Personalization Add or Remove "Choose Power Plan" context menu in Windows 11


  • Staff
Power_plan_banner.png

This tutorial will show you how to add Choose Power Plan to the desktop context menu for all users to be able to open Power Options or instantly switch between using the Power Saver, Balanced, High Performance, or Ultimate Performance plan for their account in Windows 11.

A power plan is a collection of hardware and system settings that manages how your computer uses power. Power plans can help you save energy, maximize system performance, or achieve a balance between the two.

Changes made to a power plan will affect all users that use the same power plan as their default active power scheme.

Windows 11 includes the following default power plans:
  • Balanced = Offers full performance when you need it and saves power when you don't. This is the best power plan for most people. Allows you to change your Power Mode.
  • Power saver = Saves power by reducing PC performance and screen brightness. If you're using a laptop, this plan can help you get the most from a single battery charge.
  • High performance = Maximizes screen brightness and might increase PC performance. This plan uses a lot more energy, so your laptop battery won't last as long between charges.
  • Ultimate Performance = Only available in the Windows 11 Pro for Workstations edition by default. Provides ultimate performance on higher end PCs. It builds on the current High-Performance policy, and goes a step further to eliminate micro-latencies associated with fine grained power management techniques. As the power scheme is geared towards reducing micro-latencies it may directly impact hardware; and consume more power than the default balanced plan. The Ultimate Performance power policy is currently not available on battery powered systems.
  • Custom = These are custom power plans created by a user on the PC and/or included by your PC manufacturer (OEM).

While you must be signed in as an administrator to add or remove the "Choose Power Plan" context menu, all users will be able to use the context menu.

Some Windows 11 devices (ex: Modern Standby) may only have the Balanced power plan scheme available by default.

If you would like to have a custom context menu with a power plan added or removed, then please feel free to post a request.


EXAMPLE: "Choose Power Plan" context menu

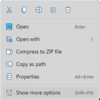
You will need to click/tap on Show more options first by default.


Show_more_options.png
Choose_Power_Plan_context_menu.png


Here's How:

1 Do step 2 (add) or step 3 (remove) below for what you would like to do.

2 To Add "Choose Power Plan" to Desktop Context Menu

A) Click/tap on the Download button below to download the file below, and go to step 4 below.​

Add_Choose_Power_Plan_to_Desktop_Context_Menu.reg


(Contents of REG file for reference)
Code:
Windows Registry Editor Version 5.00

[HKEY_CLASSES_ROOT\DesktopBackground\Shell\PowerPlan]
"Icon"="powercpl.dll"
"MUIVerb"="Choose Power Plan"
"Position"="Middle"
"SubCommands"=""


[HKEY_CLASSES_ROOT\DesktopBackground\Shell\PowerPlan\shell\01menu]
"MUIVerb"="Power Saver"
"Icon"="powercpl.dll"

[HKEY_CLASSES_ROOT\DesktopBackground\Shell\PowerPlan\shell\01menu\command]
@="powercfg.exe /setactive a1841308-3541-4fab-bc81-f71556f20b4a"


[HKEY_CLASSES_ROOT\DesktopBackground\Shell\PowerPlan\shell\02menu]
"MUIVerb"="Balanced"
"Icon"="powercpl.dll"

[HKEY_CLASSES_ROOT\DesktopBackground\Shell\PowerPlan\shell\02menu\command]
@="powercfg.exe /setactive 381b4222-f694-41f0-9685-ff5bb260df2e"


[HKEY_CLASSES_ROOT\DesktopBackground\Shell\PowerPlan\shell\03menu]
"MUIVerb"="High Performance"
"Icon"="powercpl.dll"

[HKEY_CLASSES_ROOT\DesktopBackground\Shell\PowerPlan\shell\03menu\command]
@="powercfg.exe /setactive 8c5e7fda-e8bf-4a96-9a85-a6e23a8c635c"


[HKEY_CLASSES_ROOT\DesktopBackground\Shell\PowerPlan\shell\04menu]
"MUIVerb"="Ultimate Performance"
"Icon"="powercpl.dll"

[HKEY_CLASSES_ROOT\DesktopBackground\Shell\PowerPlan\shell\04menu\command]
@="powercfg.exe /setactive e9a42b02-d5df-448d-aa00-03f14749eb61"


[HKEY_CLASSES_ROOT\DesktopBackground\Shell\PowerPlan\shell\05menu]
"MUIVerb"="Power Options"
"Icon"="powercpl.dll"
"CommandFlags"=dword:00000020

[HKEY_CLASSES_ROOT\DesktopBackground\Shell\PowerPlan\shell\05menu\command]
@="control.exe powercfg.cpl"

3 To Remove "Choose Power Plan" from Desktop Context Menu

This is the default setting.


A) Click/tap on the Download button below to download the file below, and go to step 4 below.​

Remove_Choose_Power_Plan_from_Desktop_Context_Menu.reg


(Contents of REG file for reference)
Code:
Windows Registry Editor Version 5.00

[-HKEY_CLASSES_ROOT\DesktopBackground\Shell\PowerPlan]

4 Save the .reg file to your desktop.

5 Double click/tap on the downloaded .reg file to merge it.

6 When prompted, click/tap on Run, Yes (UAC), Yes, and OK to approve the merge.

7 You can now delete the downloaded .reg file if you like.


That's it,
Shawn Brink


Attachments

  • Power_plan.png
    Power_plan.png
    17.8 KB · Views: 119
  • Add_Choose_Power_Plan_to_Desktop_Context_Menu.reg
    3.3 KB · Views: 324
  • Remove_Choose_Power_Plan_from_Desktop_Context_Menu.reg
    544 bytes · Views: 350
Last edited:
Hi,
Nice one (y)

System power page is a sad designed joke lol
 
Last edited:

My Computer

System One

  • OS
    Win-7-10-11Pro's
    Computer type
    PC/Desktop
    Manufacturer/Model
    Acer 17" Nitro 7840sn/ 2x16gb 5600c40/ 4060/ stock 1tb-os/ 4tb sn850x
    CPU
    10900k & 9940x & 5930k
    Motherboard
    z490-Apex & x299-Apex & x99-Sabertooth
    Memory
    Trident-Z Royal 4000c16 2x16gb & Trident-Z 3600c16 4x8gb & 3200c14 4x8gb
    Graphics Card(s)
    Titan Xp & 1080ti FTW3 & evga 980ti gaming
    Sound Card
    Onboard Realtek x3
    Monitor(s) Displays
    1-AOC G2460PG 24"G-Sync 144Hz/ 2nd 1-ASUS VG248QE 24"/ 3rd LG 43" series
    Screen Resolution
    1920-1080 not sure what the t.v is besides 43" class scales from 1920-1080 perfectly
    Hard Drives
    2-WD-sn850x 4tb/ 970evo+500gb/ 980 pro 2tb.
    PSU
    1000p2 & 1200p2 & 850p2
    Case
    D450 x2 & 1 Test bench in cherry Entertainment center
    Cooling
    Custom water loops x3 with 2x mora 360mm rads only 980ti gaming air cooled
    Keyboard
    G710+x3
    Mouse
    Redragon x3
    Internet Speed
    xfinity gigabyte
    Browser
    Firefox
    Antivirus
    mbam pro
How do i restore Windows 11 Original Power Schemes

Hello, :-)

The tutorial below can also be used in Windows 11. If you have Modern Standby, you will only have the "Balanced" plan available and will not be able to add other default plans. You can create custom plans though.


My Computers

System One System Two

  • OS
    Windows 11 Pro for Workstations
    Computer type
    PC/Desktop
    Manufacturer/Model
    Custom self build
    CPU
    Intel i7-8700K 5 GHz
    Motherboard
    ASUS ROG Maximus XI Formula Z390
    Memory
    64 GB (4x16GB) G.SKILL TridentZ RGB DDR4 3600 MHz (F4-3600C18D-32GTZR)
    Graphics Card(s)
    ASUS ROG-STRIX-GTX1080TI-O11G-GAMING (11GB GDDR5X)
    Sound Card
    Integrated Digital Audio (S/PDIF)
    Monitor(s) Displays
    2 x Samsung Odyssey G75 27"
    Screen Resolution
    2560x1440
    Hard Drives
    1TB Samsung 990 PRO M.2,
    4TB Samsung 990 PRO M.2,
    8TB WD MyCloudEX2Ultra NAS
    PSU
    Seasonic Prime Titanium 850W
    Case
    Thermaltake Core P3 wall mounted
    Cooling
    Corsair Hydro H115i
    Keyboard
    Logitech wireless K800
    Mouse
    Logitech MX Master 3
    Internet Speed
    1 Gbps Download and 35 Mbps Upload
    Browser
    Google Chrome
    Antivirus
    Microsoft Defender and Malwarebytes Premium
    Other Info
    Logitech Z625 speaker system,
    Logitech BRIO 4K Pro webcam,
    HP Color LaserJet Pro MFP M477fdn,
    APC SMART-UPS RT 1000 XL - SURT1000XLI,
    Galaxy S23 Plus phone
  • Operating System
    Windows 11 Pro
    Computer type
    Laptop
    Manufacturer/Model
    HP Spectre x360 2in1 14-eu0098nr (2024)
    CPU
    Intel Core Ultra 7 155H 4.8 GHz
    Memory
    16 GB LPDDR5x-7467 MHz
    Graphics card(s)
    Integrated Intel Arc
    Sound Card
    Poly Studio
    Monitor(s) Displays
    14" 2.8K OLED multitouch
    Screen Resolution
    2880 x 1800
    Hard Drives
    2 TB PCIe NVMe M.2 SSD
    Internet Speed
    Intel Wi-Fi 7 BE200 (2x2) and Bluetooth 5.4
    Browser
    Chrome and Edge
    Antivirus
    Windows Defender and Malwarebytes Premium
Is there anyway to add "AMD Ryzen Balanced" power plan to this Power Plan context menu?
Where are power plans stored in the registry?
 

My Computer

System One

  • OS
    Win11 x64
    Computer type
    PC/Desktop
    Manufacturer/Model
    Mixed
    CPU
    AMD Ryzen 3 2200g
    Motherboard
    Asrock B450m
    Memory
    32gb
Is there anyway to add "AMD Ryzen Balanced" power plan to this Power Plan context menu?
Where are power plans stored in the registry?

Hello, :alien:

You can use option three below to get a list of all power plans and their GUID.


You can then use the GUID for the AMD plan to add it to the context menu. If needed, you can post back with this plan's GUID, and I can add it to the context menu for you.
 

My Computers

System One System Two

  • OS
    Windows 11 Pro for Workstations
    Computer type
    PC/Desktop
    Manufacturer/Model
    Custom self build
    CPU
    Intel i7-8700K 5 GHz
    Motherboard
    ASUS ROG Maximus XI Formula Z390
    Memory
    64 GB (4x16GB) G.SKILL TridentZ RGB DDR4 3600 MHz (F4-3600C18D-32GTZR)
    Graphics Card(s)
    ASUS ROG-STRIX-GTX1080TI-O11G-GAMING (11GB GDDR5X)
    Sound Card
    Integrated Digital Audio (S/PDIF)
    Monitor(s) Displays
    2 x Samsung Odyssey G75 27"
    Screen Resolution
    2560x1440
    Hard Drives
    1TB Samsung 990 PRO M.2,
    4TB Samsung 990 PRO M.2,
    8TB WD MyCloudEX2Ultra NAS
    PSU
    Seasonic Prime Titanium 850W
    Case
    Thermaltake Core P3 wall mounted
    Cooling
    Corsair Hydro H115i
    Keyboard
    Logitech wireless K800
    Mouse
    Logitech MX Master 3
    Internet Speed
    1 Gbps Download and 35 Mbps Upload
    Browser
    Google Chrome
    Antivirus
    Microsoft Defender and Malwarebytes Premium
    Other Info
    Logitech Z625 speaker system,
    Logitech BRIO 4K Pro webcam,
    HP Color LaserJet Pro MFP M477fdn,
    APC SMART-UPS RT 1000 XL - SURT1000XLI,
    Galaxy S23 Plus phone
  • Operating System
    Windows 11 Pro
    Computer type
    Laptop
    Manufacturer/Model
    HP Spectre x360 2in1 14-eu0098nr (2024)
    CPU
    Intel Core Ultra 7 155H 4.8 GHz
    Memory
    16 GB LPDDR5x-7467 MHz
    Graphics card(s)
    Integrated Intel Arc
    Sound Card
    Poly Studio
    Monitor(s) Displays
    14" 2.8K OLED multitouch
    Screen Resolution
    2880 x 1800
    Hard Drives
    2 TB PCIe NVMe M.2 SSD
    Internet Speed
    Intel Wi-Fi 7 BE200 (2x2) and Bluetooth 5.4
    Browser
    Chrome and Edge
    Antivirus
    Windows Defender and Malwarebytes Premium
This PowerShell script will perform the same work, creating a context menu from your existing Power Plans. You don't need to know anything about GUID's.

After you add, remove or rename any plans, re-run the script and it will refresh the menu. The only change is my script replaces the Control Panel icon for Power Options, making it easier to find. If you're not Administrator, the script will ask for permission to run.
Code:
powershell -nop -ep bypass -f PP_ContextMenu.ps1
 

Attachments

  • PP_ContextMenu.ps1
    2 KB · Views: 58

My Computer

System One

  • OS
    Windows 7
Thank you Brink that has sorted me out perfectly.

Hello, :alien:

You can use option three below to get a list of all power plans and their GUID.


My Computer

System One

  • OS
    Win11 x64
    Computer type
    PC/Desktop
    Manufacturer/Model
    Mixed
    CPU
    AMD Ryzen 3 2200g
    Motherboard
    Asrock B450m
    Memory
    32gb

My Computers

System One System Two

  • OS
    Windows 11 Pro for Workstations
    Computer type
    PC/Desktop
    Manufacturer/Model
    Custom self build
    CPU
    Intel i7-8700K 5 GHz
    Motherboard
    ASUS ROG Maximus XI Formula Z390
    Memory
    64 GB (4x16GB) G.SKILL TridentZ RGB DDR4 3600 MHz (F4-3600C18D-32GTZR)
    Graphics Card(s)
    ASUS ROG-STRIX-GTX1080TI-O11G-GAMING (11GB GDDR5X)
    Sound Card
    Integrated Digital Audio (S/PDIF)
    Monitor(s) Displays
    2 x Samsung Odyssey G75 27"
    Screen Resolution
    2560x1440
    Hard Drives
    1TB Samsung 990 PRO M.2,
    4TB Samsung 990 PRO M.2,
    8TB WD MyCloudEX2Ultra NAS
    PSU
    Seasonic Prime Titanium 850W
    Case
    Thermaltake Core P3 wall mounted
    Cooling
    Corsair Hydro H115i
    Keyboard
    Logitech wireless K800
    Mouse
    Logitech MX Master 3
    Internet Speed
    1 Gbps Download and 35 Mbps Upload
    Browser
    Google Chrome
    Antivirus
    Microsoft Defender and Malwarebytes Premium
    Other Info
    Logitech Z625 speaker system,
    Logitech BRIO 4K Pro webcam,
    HP Color LaserJet Pro MFP M477fdn,
    APC SMART-UPS RT 1000 XL - SURT1000XLI,
    Galaxy S23 Plus phone
  • Operating System
    Windows 11 Pro
    Computer type
    Laptop
    Manufacturer/Model
    HP Spectre x360 2in1 14-eu0098nr (2024)
    CPU
    Intel Core Ultra 7 155H 4.8 GHz
    Memory
    16 GB LPDDR5x-7467 MHz
    Graphics card(s)
    Integrated Intel Arc
    Sound Card
    Poly Studio
    Monitor(s) Displays
    14" 2.8K OLED multitouch
    Screen Resolution
    2880 x 1800
    Hard Drives
    2 TB PCIe NVMe M.2 SSD
    Internet Speed
    Intel Wi-Fi 7 BE200 (2x2) and Bluetooth 5.4
    Browser
    Chrome and Edge
    Antivirus
    Windows Defender and Malwarebytes Premium
Back
Top Bottom