This tutorial will show you how to turn on or off Microsoft Defender SmartScreen Phishing protection in Windows 11.
Microsoft Defender SmartScreen protects against phishing or malware websites and applications, and the downloading of potentially malicious files.
Starting with Windows 11 build 22593, Microsoft is introducing two powerful new features that strike against the most common cyberattack techniques: phishing and targeted malware. New in Windows 11 is enhanced phishing detection and protection built into Windows with Microsoft Defender SmartScreen. This new feature will help protect users from phishing attacks by identifying and alerting users when they are entering their Microsoft credentials into a malicious application or hacked website. Smart App Control uses code signing alongside Microsoft’s powerful artificial intelligence models to ensure that only trusted applications are run, blocking one of the largest attack vectors on Windows by-default.
References:

Enhanced Phishing Protection in Microsoft Defender SmartScreen - Windows Security
Learn how Enhanced Phishing Protection for Microsoft Defender SmartScreen helps protect Microsoft school or work passwords against phishing and unsafe usage on sites and apps.
learn.microsoft.com
Protect your Microsoft password from being phished - Microsoft Support
 support.microsoft.com

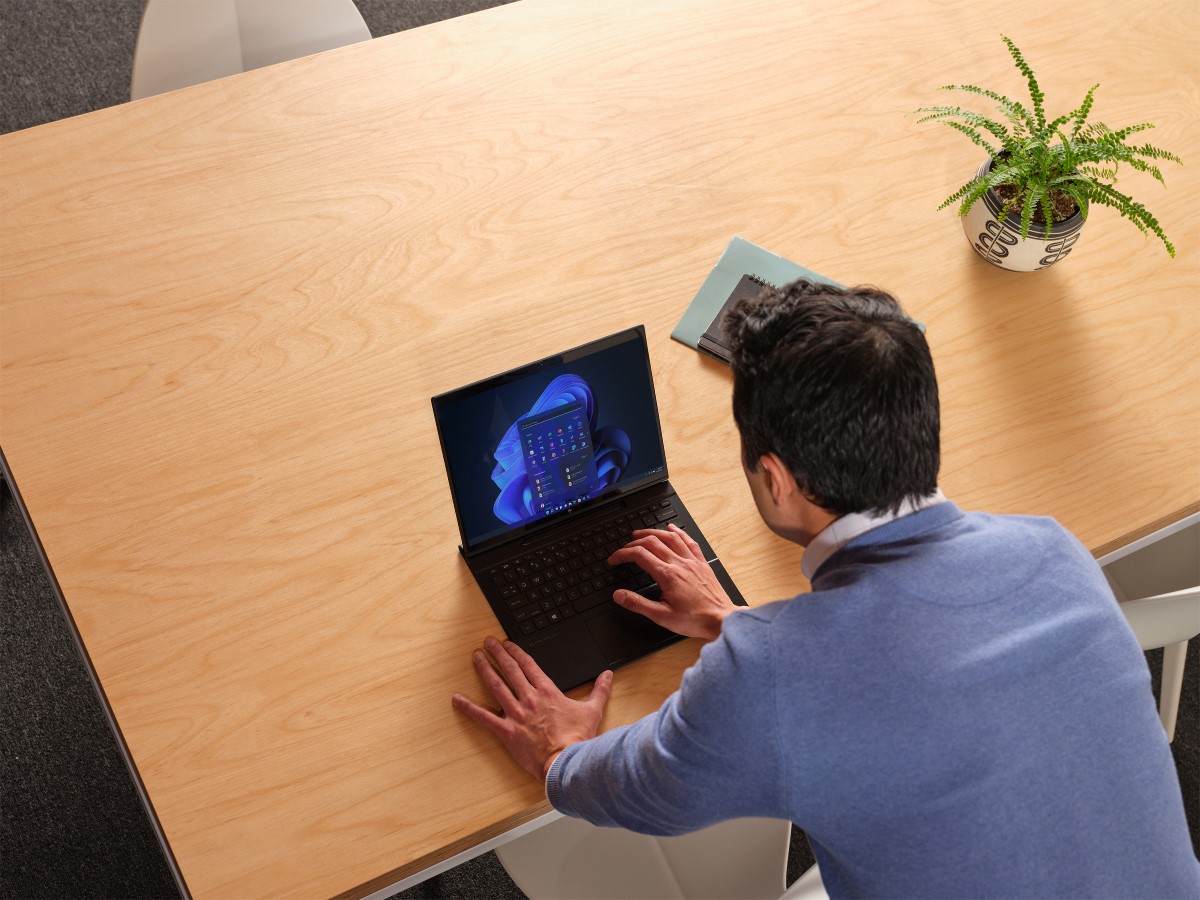
Windows powers the future of hybrid work
Over the past two years, work has changed dramatically. Most employees want flexible and remote options to stay. Cyberthreats are at an all-time high. And with the move to hybrid work, IT managers are challenged to empower their workforces with new t
New security features for Windows 11 will help protect hybrid work | Microsoft Security Blog
Attackers haven’t wasted any time capitalizing on the rapid move to hybrid work. Every day cyber criminals and nation states alike have improved their targeting, speed and accuracy as the world adapted to working outside the office.

Windows 11, version 22H2 Security baseline
Microsoft is pleased to announce the release of the security baseline package for Windows 11, version 22H2!
techcommunity.microsoft.com
Protect passwords with enhanced phishing protection
Attackers don’t break in, they log in. Learn how enhanced phishing protection in SmartScreen keeps passwords safer.
techcommunity.microsoft.com
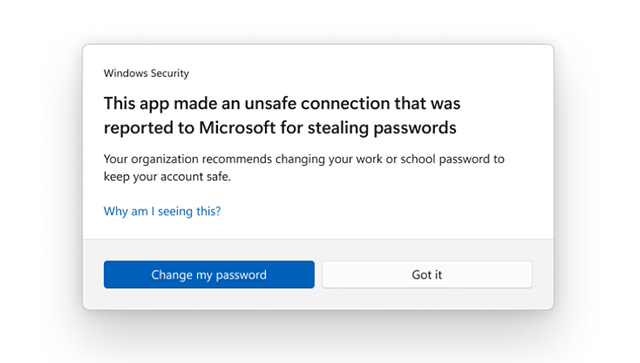
Starting with Windows 11 version 22H2 KB5030310 Build 22621.2361, Enhanced Phishing Protection in Microsoft Defender SmartScreen helps protect Microsoft school or work passwords against phishing and unsafe usage on sites and apps. Microsoft is trying out a change starting with this build where users who have enabled warning options for Windows Security under App & browser control > Reputation-based protection > Phishing protection will see a UI warning on unsafe password copy and paste, just as they currently see when they type in their password.
You must be signed in as an administrator to turn on or off Microsoft Defender SmartScreen Phishing protection.
Contents
- Option One: Turn On or Off Microsoft Defender SmartScreen Phishing Protection in Settings
- Option Two: Enable or Disable Microsoft Defender SmartScreen Phishing Protection in Local Group Policy Editor
- Option Three: Enable or Disable Microsoft Defender SmartScreen Phishing Protection using REG file
EXAMPLE: Phishing protection warning
1 Open Windows Security.
2 Click/tap on App & browser control. (see screenshot below)
3 Click/tap on the Reputation-based protection settings link. (see screenshot below)
4 Turn On or Off Phishing protection for what you want. (see screenshots below step 6)
5 Click/tap on Yes when prompted by UAC to approve.
6 If you turned on Phishing protection, you can check (on) or uncheck (off) the following for the warnings you want: (see screenshots below)
You will need to click/tap on Yes when prompted by UAC to approve each item below.
- Warn me about malicious applications and websites
- Warn me about password reuse
- Warn me about insecure password storage
7 You can now close Windows Security if you like.
Enable or Disable Microsoft Defender SmartScreen Phishing Protection in Local Group Policy Editor
The Local Group Policy Editor is only available in the Windows 11 Pro, Enterprise, and Education editions.
All editions can use Option Three to configure the same policy.
1 Open the Local Group Policy Editor (gpedit.msc).
2 Navigate to the policy location below in the left pane of the Local Group Policy Editor. (see screenshot below)
Computer Configuration > Administrative Templates > Windows Components > Windows Defender SmartScreen > Enhanced Phishing Protection
3 Do step 4 (Notify Malicious), step 5 (Notify Password Reuse), step 6 (Notify Unsafe App), and/or step 7 (Service Enabled) below for which policies you want to configure.
4 Enable or Disable "Warn me about malicious apps and sites"
A) In the right pane of Enhanced Phishing Protection in the Local Group Policy Editor, double click/tap on the Notify Malicious policy to edit it. (see screenshot below step 2)
B) Select (dot) Not Configured (default), Enabled, or Disabled for what you want, and click/tap on OK.
Enabled or Disabled will override Option One.
C) Go to step 8.
5 Enable or Disable "Warn me about password reuse"
A) In the right pane of Enhanced Phishing Protection in the Local Group Policy Editor, double click/tap on the Notify Password Reuse policy to edit it. (see screenshot below step 2)
B) Select (dot) Not Configured (default), Enabled, or Disabled for what you want, and click/tap on OK.
Enabled or Disabled will override Option One.
C) Go to step 8.
6 Enable or Disable "Warn me about unsafe password storage"
A) In the right pane of Enhanced Phishing Protection in the Local Group Policy Editor, double click/tap on the Notify Unsafe App policy to edit it. (see screenshot below step 2)
B) Select (dot) Not Configured (default), Enabled, or Disabled for what you want, and click/tap on OK.
Enabled or Disabled will override Option One.
C) Go to step 8.
7 Enable or Disable Phishing Protection
A) In the right pane of Enhanced Phishing Protection in the Local Group Policy Editor, double click/tap on the Service Enabled policy to edit it. (see screenshot below step 2)
B) Select (dot) Not Configured (default), Enabled, or Disabled for what you want, and click/tap on OK.
Enabled or Disabled will override Option One.
C) Go to step 8.
8 When finished, you can close the Local Group Policy Editor if you like.
1 Do step 2 (Notify Malicious), step 3 (Notify Password Reuse), step 4 (Notify Unsafe App), or step 5 (Service Enabled) below for which policies you want to configure.
2. Enable or Disable "Warn me about malicious apps and sites"
Enable or Disable will override Option One.
A) Click/tap on the Download button below to download the .reg file you want below, and go to step 6 below.
Default_user_choice_notify_malicious.reg
(Contents of REG file for reference)
Code:
Windows Registry Editor Version 5.00

[HKEY_LOCAL_MACHINE\SOFTWARE\Policies\Microsoft\Windows\WTDS\Components]
"NotifyMalicious"=-OR
Force_enable_notify_malicious.reg
(Contents of REG file for reference)
Code:
Windows Registry Editor Version 5.00

[HKEY_LOCAL_MACHINE\SOFTWARE\Policies\Microsoft\Windows\WTDS\Components]
"NotifyMalicious"=dword:00000001OR
Force_disable_notify_malicious.reg
(Contents of REG file for reference)
Code:
Windows Registry Editor Version 5.00

[HKEY_LOCAL_MACHINE\SOFTWARE\Policies\Microsoft\Windows\WTDS\Components]
"NotifyMalicious"=dword:00000000
3. Enable or Disable "Warn me about password reuse"
Enable or Disable will override Option One.
A) Click/tap on the Download button below to download the .reg file you want below, and go to step 6 below.
Default_user_choice_notify_password_reuse.reg
(Contents of REG file for reference)
Code:
Windows Registry Editor Version 5.00

[HKEY_LOCAL_MACHINE\SOFTWARE\Policies\Microsoft\Windows\WTDS\Components]
"NotifyPasswordReuse"=-OR
Force_enable_notify_password_reuse.reg
(Contents of REG file for reference)
Code:
Windows Registry Editor Version 5.00

[HKEY_LOCAL_MACHINE\SOFTWARE\Policies\Microsoft\Windows\WTDS\Components]
"NotifyPasswordReuse"=dword:00000001OR
Force_disable_notify_password_reuse.reg
(Contents of REG file for reference)
Code:
Windows Registry Editor Version 5.00

[HKEY_LOCAL_MACHINE\SOFTWARE\Policies\Microsoft\Windows\WTDS\Components]
"NotifyPasswordReuse"=dword:00000000
4. Enable or Disable "Warn me about unsafe password storage"
Enable or Disable will override Option One.
A) Click/tap on the Download button below to download the .reg file you want below, and go to step 6 below.
Default_user_choice_notify_unsafe.reg
(Contents of REG file for reference)
Code:
Windows Registry Editor Version 5.00

[HKEY_LOCAL_MACHINE\SOFTWARE\Policies\Microsoft\Windows\WTDS\Components]
"NotifyUnsafeApp"=-OR
Force_enable_notify_unsafe.reg
(Contents of REG file for reference)
Code:
Windows Registry Editor Version 5.00

[HKEY_LOCAL_MACHINE\SOFTWARE\Policies\Microsoft\Windows\WTDS\Components]
"NotifyUnsafeApp"=dword:00000001OR
Force_disable_notify_unsafe.reg
(Contents of REG file for reference)
Code:
Windows Registry Editor Version 5.00

[HKEY_LOCAL_MACHINE\SOFTWARE\Policies\Microsoft\Windows\WTDS\Components]
"NotifyUnsafeApp"=dword:00000000
5. Enable or Disable "Enable or Disable Phishing Protection"
Enable or Disable will override Option One.
A) Click/tap on the Download button below to download the .reg file you want below, and go to step 6 below.
Default_user_choice_enhanced_phishing_protection.reg
(Contents of REG file for reference)
Code:
Windows Registry Editor Version 5.00

[HKEY_LOCAL_MACHINE\SOFTWARE\Policies\Microsoft\Windows\WTDS\Components]
"ServiceEnabled"=-OR
Force_enable_enhanced_phishing_protection.reg
(Contents of REG file for reference)
Code:
Windows Registry Editor Version 5.00

[HKEY_LOCAL_MACHINE\SOFTWARE\Policies\Microsoft\Windows\WTDS\Components]
"ServiceEnabled"=dword:00000001OR
Force_disable_enhanced_phishing_protection.reg
(Contents of REG file for reference)
Code:
Windows Registry Editor Version 5.00

[HKEY_LOCAL_MACHINE\SOFTWARE\Policies\Microsoft\Windows\WTDS\Components]
"ServiceEnabled"=dword:00000000
6 Save the .reg file to your desktop.
7 Double click/tap on the downloaded .reg file to merge it.
8 When prompted, click/tap on Run, Yes (UAC), Yes, and OK to approve the merge.
9 You can now delete the downloaded .reg file(s) if you like.
That's it,
Shawn Brink
Attachments
-
 Windows_Security.png6 KB · Views: 97
 -
Force_disable_notify_malicious.reg688 bytes · Views: 162
-
Default_user_choice_notify_malicious.reg662 bytes · Views: 181
-
Force_enable_notify_malicious.reg688 bytes · Views: 167
-
Default_user_choice_notify_password_reuse.reg670 bytes · Views: 162
-
Force_disable_notify_password_reuse.reg696 bytes · Views: 192
-
Force_enable_notify_password_reuse.reg696 bytes · Views: 159
-
Default_user_choice_notify_unsafe.reg666 bytes · Views: 146
-
Force_enable_notify_unsafe.reg692 bytes · Views: 143
-
Force_disable_notify_unsafe.reg692 bytes · Views: 165
-
Default_user_choice_enhanced_phishing_protection.reg664 bytes · Views: 159
-
Force_disable_enhanced_phishing_protection.reg690 bytes · Views: 171
-
Force_enable_enhanced_phishing_protection.reg690 bytes · Views: 187
Last edited:
")