Hi folks
Double / triple booting etc can often be a problem especially if you have a non Windows OS and decide to wipe that OS or even one of the Windows OS'es.
I'd recommend - if you have a decent spare SSD device and a SATA->USB3/ USBC type connector. This method depends on creating a fully standard Windows system on the externel device so nothing in the main computer is touched.
What you basically need is :
1) macrium image of a fully running W10 system (latest possible version) or the W10 system itself on THE TARGET MACHINE.
2) Stand alone bootable partition manager
3) W11 running in any sort of VM -- HYPER-V, VMWare, VBOX (if you van get W11 to work -- eluded me I'm afraid) , or KVM/QEMU.
4) Usb thumb drive for booting the macrium iso.
OK here goes
1) Image the VM (FROM WITHIN the VM) and ensure the image is written to a device accessible to Windows.
2) create the Macrium Free stand alone rescue media -- FROM WITHIN THE VM. You need to choose the advance build and select the WINPE version -- choose the one that says best for Win 8.1 / Win 10 not the WINRE version and ensure all device drivers are loaded . You need that when we come to fix the boot on the Real machine !!
3) ensure that the bootable rescue media is available to a bootable USB device - what usually works best here is to (again from WITHIN the VM) to create an iso image in macrium and then use RUFUS to create a bootable USB stick. I've found creating the USB directly via macrium doesn't always work so I'd recommend using the ISO.
4) Take a macrium image and save to storage device.
5) on the target machine ensure macrium thumb device and macrium image are available as well as the external target device for Windows.
6) boot into Macrium and restore the image. You don't need the W10 system or image at this stage yet.
7) do not yet reboot the machine - but still within Macrium choose fix Windows boot problems - I've found by using an image from a VM this invariably works. Attempting similar from a Physical image doesn't work for me - often get BSOD or "OOPS something went wrong at boot time so i'd recommend using the VM image !!).
8) boot the external USB device -- should work - you'll probably get a few messages like getting device ready -- but there's still a bit of work to do.
9) Now boot your stand alone partition manager -- you'll probably want to do this as your VM might only use 40GB of "Virtual disk space" whereas on an external USB device you might want to use the whole device say 128 / 250 GB --these are the best to use for this as they only cost a few dollars each these days. !!!
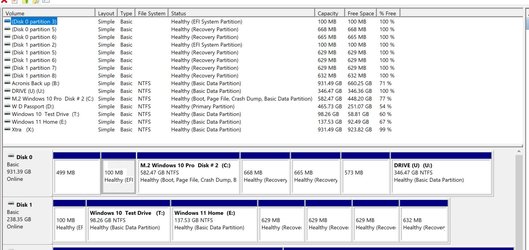
10) move the recovery partition to the end and expand the C partition.
11) now re-boot the external SSD drive
12) you'll need to update a whole slew of drivers -- so either from the W10 macrium image (yes the W10 one) or an actual Windows internal W10 "C" drive point to directory windows->system32->driverstore
11) via device manager go through each device which needs a driver update or "unknown" device and choose update driver, scan this computer and use the directory in step 12). Ensure the "include subdirectories / folders " box is checked
12) should fix things like video drivers / sound etc etc.
13) activate as normal - in some cases this will activate via Digital License if you created the W11 system via an update from W10.
Have fun and enjoy your "Portable Windows 11 system". For me it actually works better than my Disk based W11 system -- that's because the old laptop still has laptop "spinners" and even via a USB 3 connection any SSD is way faster than those older 2.5 inch spinners - even if they are sata ones.
Cheers
jimbo
Double / triple booting etc can often be a problem especially if you have a non Windows OS and decide to wipe that OS or even one of the Windows OS'es.
I'd recommend - if you have a decent spare SSD device and a SATA->USB3/ USBC type connector. This method depends on creating a fully standard Windows system on the externel device so nothing in the main computer is touched.
What you basically need is :
1) macrium image of a fully running W10 system (latest possible version) or the W10 system itself on THE TARGET MACHINE.
2) Stand alone bootable partition manager
3) W11 running in any sort of VM -- HYPER-V, VMWare, VBOX (if you van get W11 to work -- eluded me I'm afraid) , or KVM/QEMU.
4) Usb thumb drive for booting the macrium iso.
OK here goes
1) Image the VM (FROM WITHIN the VM) and ensure the image is written to a device accessible to Windows.
2) create the Macrium Free stand alone rescue media -- FROM WITHIN THE VM. You need to choose the advance build and select the WINPE version -- choose the one that says best for Win 8.1 / Win 10 not the WINRE version and ensure all device drivers are loaded . You need that when we come to fix the boot on the Real machine !!
3) ensure that the bootable rescue media is available to a bootable USB device - what usually works best here is to (again from WITHIN the VM) to create an iso image in macrium and then use RUFUS to create a bootable USB stick. I've found creating the USB directly via macrium doesn't always work so I'd recommend using the ISO.
4) Take a macrium image and save to storage device.
5) on the target machine ensure macrium thumb device and macrium image are available as well as the external target device for Windows.
6) boot into Macrium and restore the image. You don't need the W10 system or image at this stage yet.
7) do not yet reboot the machine - but still within Macrium choose fix Windows boot problems - I've found by using an image from a VM this invariably works. Attempting similar from a Physical image doesn't work for me - often get BSOD or "OOPS something went wrong at boot time so i'd recommend using the VM image !!).
8) boot the external USB device -- should work - you'll probably get a few messages like getting device ready -- but there's still a bit of work to do.
9) Now boot your stand alone partition manager -- you'll probably want to do this as your VM might only use 40GB of "Virtual disk space" whereas on an external USB device you might want to use the whole device say 128 / 250 GB --these are the best to use for this as they only cost a few dollars each these days. !!!
10) move the recovery partition to the end and expand the C partition.
11) now re-boot the external SSD drive
12) you'll need to update a whole slew of drivers -- so either from the W10 macrium image (yes the W10 one) or an actual Windows internal W10 "C" drive point to directory windows->system32->driverstore
11) via device manager go through each device which needs a driver update or "unknown" device and choose update driver, scan this computer and use the directory in step 12). Ensure the "include subdirectories / folders " box is checked
12) should fix things like video drivers / sound etc etc.
13) activate as normal - in some cases this will activate via Digital License if you created the W11 system via an update from W10.
Have fun and enjoy your "Portable Windows 11 system". For me it actually works better than my Disk based W11 system -- that's because the old laptop still has laptop "spinners" and even via a USB 3 connection any SSD is way faster than those older 2.5 inch spinners - even if they are sata ones.
Cheers
jimbo
My Computer
System One
-
- OS
- Windows XP,7,10,11 Linux Arch Linux
- Computer type
- PC/Desktop
- CPU
- 2 X Intel i7
")