Microsoft 365 Insider Blog:
Hi, Microsoft 365 Insiders! We’re excited to announce that now you can bring more creativity and expression to your Teams messaging with custom emojis and reactions.
Custom emojis and reactions in Microsoft Teams
Let your personality shine in Teams! Now you have the ability to upload your own custom emojis to personalize your messaging and reflect your team’s unique culture.Custom emojis and reactions in Teams are a great way to efficiently communicate your status or share a lighthearted message or feeling. There is a maximum of 5,000 custom emojis allowed per tenant.
How it works
Access custom emojis
1. Open a Teams chat or channel and in the chat box, select the Emoji icon (2. At the top of the window, select the Emoji menu option.

3. In the bottom right area of the window, select the Emoji icon with the dotted line circle around it (

4. To see who created the emoji, or to delete it (if you have permissions to do so), right-click on it.

Upload new emojis
1. If you have permissions to add emojis for your organization, in the Custom section of the Emojis library (shown above), select the + icon. A File Explorer window will open to allow you to select a new image or GIF file to use as a custom emoji. (You can upload a JPEG, PNG, or GIF file; smaller images with square dimensions work best.)
2. To assign a name to your new custom emoji, type it in the Name box and select Add emoji.

3. When your upload has succeeded, a confirmation message will appear on the screen.

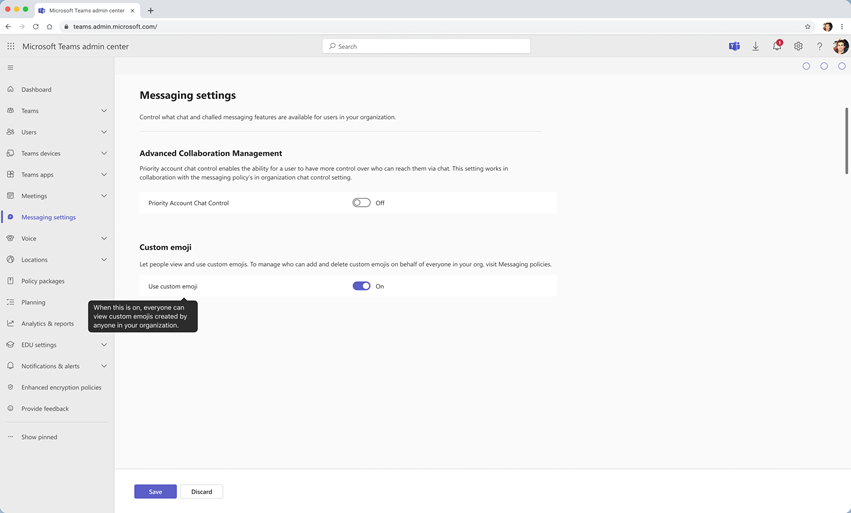
Manage custom emoji features (for admins)
1. Go to the Teams Admin Center. NOTE: To access the Teams Admin Center, sign in at admin.teams.microsoft.com.2. Under Messaging settings, you can turn the custom emoji feature on or off for your entire tenant. (It’s set to on by default.)
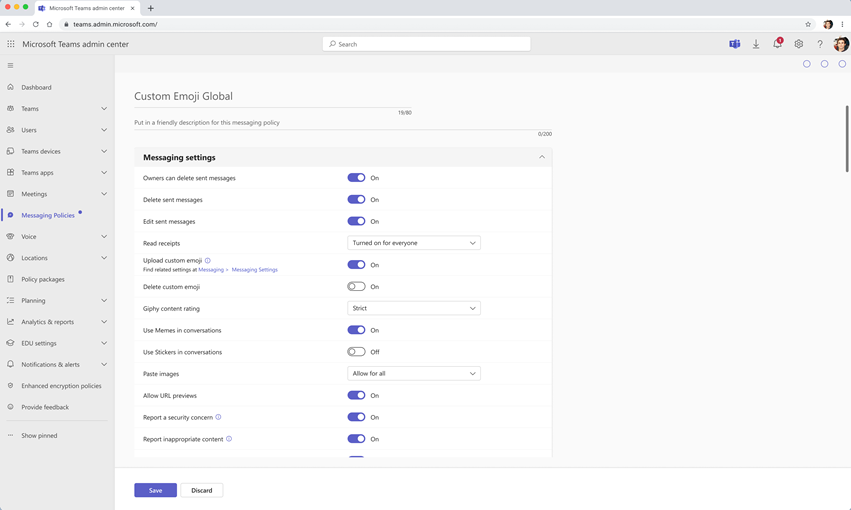
3. To grant permission to users to create and delete emojis, adjust the settings in the messaging policy groups. (Everyone can create custom emojis by default; only admins can delete by default.)
Requirements
If your admin has added you as part of the tenant, you can view and use all the new custom emojis and reactions by default. Admins can use the Teams Admin Center controls to turn off custom emojis or select which users can create or delete them.Availability
To use this feature, you must be a member of the Teams Public Preview or Microsoft 365 Targeted release and use the new Teams client for Windows, Mac, iOS, or the web. (Custom emojis and reactions are currently not available on Android.)To enable your Teams client for the Public Preview, IT administrators must enable Show preview features in their update policy. Learn more
For Targeted release, global admins can go to the Microsoft 365 admin center and give access to a select set of individuals or the entire organization. Learn more
Feedback
We want to hear from you! Select Settings and more > Help in the top right corner of the Teams app, and then select either Give feedback or Suggest a feature to share your thoughts. Source:

Custom emojis and reactions in Microsoft Teams
Now you can bring much more creativity and fun to your Microsoft Teams chats with custom emojis and reactions.
 insider.microsoft365.com