This tutorial will show you how to change the password for a fixed or removable data drive encrypted by BitLocker in Windows 10 and Windows 11.
BitLocker Drive Encryption is a data protection feature that integrates with the operating system and addresses the threats of data theft or exposure from lost, stolen, or inappropriately decommissioned drives and computers. You can turn on BitLocker protection for operating system drives, fixed data drives, and removable data drives.
When you turn on BitLocker for fixed data drives or removable data drives, you can choose to use a password to unlock the drive.
When the BitLocker protected drive is unlocked, users can change the BitLocker password for the drive on demand.
A BitLocker password can be 8 to 256 characters long including uppercase and lowercase letters, symbols, numbers, and spaces.
Contents
- Option One: Change BitLocker Password for Drive in File Explorer
- Option Two: Change BitLocker Password for Drive in Control Panel
- Option Three: Change BitLocker Password for Drive using Command
This option requires adding Turn off BitLocker to the context menu first.
1 Open This PC in File Explorer (Win+E).
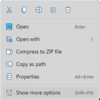
2 Right click or press and hold on the BitLocker protected drive you want to change the password for, and click/tap on Show more options.
You can skip step 2 in Windows 10 since Show more options is not available.
3 Click/tap on Change BitLocker password. (see screenshot below)
3 Type the Old password, type a New password, type the new password again to Confirm new password, and click/tap on Change password. (see screenshot below)
4 Click/tap on Close then the password has been successfully changed. (see screenshot below)
1 Open the Control Panel (icons view), and click/tap on the BitLocker Drive Encryption icon.
2 Expand the BitLocker protected drive (ex: "E:") you want to change the password for, and click/tap on Change password. (see screenshot below)
3 Type the Old password, type a New password, type the new password again to Confirm new password, and click/tap on Change password. (see screenshot below)
4 Click/tap on Close then the password has been successfully changed. (see screenshot below)
You must be signed in as an administrator to use this option.
1 Open Windows Terminal (Admin), and select either Windows PowerShell or Command Prompt.
2 Type the command below into Windows Terminal (Admin), and press Enter. (see screenshot below)
manage-bde -changepassword <drive letter>:Substitute <drive letter> in the command above with the actual drive letter (ex: "E") of the BitLocker protected drive you want to change the password for.
For example: manage-bde -changepassword E:
3 When prompted, Type the new password, and press Enter.
4 When prompted, Confirm the new password by typing it again, and press Enter.
5 If your password has been successfully updated, you can close Windows Terminal (Admin).
That's it,
Shawn Brink
Related Tutorials
- Add or Remove Change BitLocker password Context Menu in Windows 11
- Turn On BitLocker for Fixed Data Drive in Windows 11
- Turn On BitLocker for Removable Data Drive in Windows 11
- Turn Off BitLocker for Drive in Windows 11
- Lock BitLocker Drive in Windows 11
- Suspend or Resume BitLocker Protection for Drive in Windows 11
- Turn On or Off Auto-unlock for BitLocker Drive in Windows 11
Last edited:


