This tutorial will show you how to install the Windows Subsystem for Linux (WSL) feature in Windows 10 and Windows 11.
The Windows Subsystem for Linux lets developers run a GNU/Linux environment -- including most command-line tools, utilities, and applications -- directly on Windows, unmodified, without the overhead of a traditional virtual machine or dualboot setup.
WSL 2 is a new version of the Windows Subsystem for Linux architecture that powers the Windows Subsystem for Linux to run ELF64 Linux binaries on Windows. Its primary goals are to increase file system performance, as well as adding full system call compatibility. This new architecture changes how these Linux binaries interact with Windows and your computer's hardware, but still provides the same user experience as in WSL 1 (the current widely available version).
Individual Linux distributions can be run with either the WSL 1 or WSL 2 architecture. Each distribution can be upgraded or downgraded at any time and you can run WSL 1 and WSL 2 distributions side by side. WSL 2 uses an entirely new architecture that benefits from running a real Linux kernel.
When you install WSL, it performs the following actions:
- Enables the Windows Subsystem for Linux and Virtual Machine Platform optional features
- Downloads and installs the latest Linux kernel
- Sets WSL 2 as the default
- Downloads and installs Ubuntu distribution (reboot may be required) by default.
- Windows Subsystem for Linux Documentation
- What is Windows Subsystem for Linux
- Comparing WSL 1 and WSL 2
- FAQ's about Windows Subsystem for Linux 2
- How to install Linux on Windows with WSL
- Enable virtualization on Windows 11 PCs
Starting with Windows 11 build 22518, Microsoft made it easier for new users to get started with the WSL in the Microsoft Store by changing the
wsl.exe –install command to install WSL from the Microsoft Store by default. Additionally, Microsoft added some additional arguments to wsl.exe –install to make it easier to configure your install, such as wsl –install –no-launch which will install a new WSL distro without immediately launching it. To see a full list of available commands please run wsl –help. If you want to get started with the Store version right away and already have WSL installed just run wsl –update to update immediately to the Store version!Starting with Windows 11 Build 25267, the inbox version of Windows Subsystem for Linux has been removed. When you install a build with this change if you’re a WSL user you will need to update to the latest WSL version outlined here in this GitHub post to ensure WSL continues working on your PC. Once you have done that, WSL will continue working on subsequent build updates. In future builds we’re looking to have this done automatically.
Starting with Windows 11 Build 25300, Microsoft improved the upgrade experience to the new Windows Subsystem for Linux Store app (mentioned in Build 25272), so it now prompts for installation if wsl.exe is invoked.
You must be signed in as an administrator to install WSL.
- Option One: Install Windows Subsystem for Linux (WSL) using Command
- Option Two: Install Windows Subsystem for Linux (WSL) from Microsoft Store
EXAMPLE: WSL (Linux) in Windows 11 File Explorer
1 Open Windows Terminal (Admin), and select Command Prompt.
2 Copy and paste the
wsl --install command into the elevated terminal, and press Enter. (see screenshot below step 3)WSL will install the Ubuntu distribution by default using the wsl --install command. If you would prefer to have WSL install a different Linux distribution by default, then use one of the following commands below instead for the distribution you want:
wsl --install -d Debian
wsl --install -d kali-linux
wsl --install -d openSUSE-42
wsl --install -d SLES-12
To see a list of available Linux distributions, enter the wsl --list --online command.
If you already installed WSL, this command will fail to run.
You will have to manually install any Linux distributions you want as usual.
3 When installing WSL has finished, restart the computer to apply.
4 When the computer has finished restarting and you sign back in to Windows 11, WSL will automatically resume after a moment to install the Linux distribution (ex: Ubuntu). (see screenshot below)
5 When the Ubuntu distribution has finished installing, you will then need to create a user account and password for your new Linux distribution (ex: Ubuntu).
This option requires Windows 11 build 22000 or higher to be installed.

The Windows Subsystem for Linux in the Microsoft Store is now generally available on Windows 10 and 11
1 Enable the Virtual Machine Platform optional feature.
You can do this by running: dism.exe /online /enable-feature /featurename:VirtualMachinePlatform /all in an elevated PowerShell.
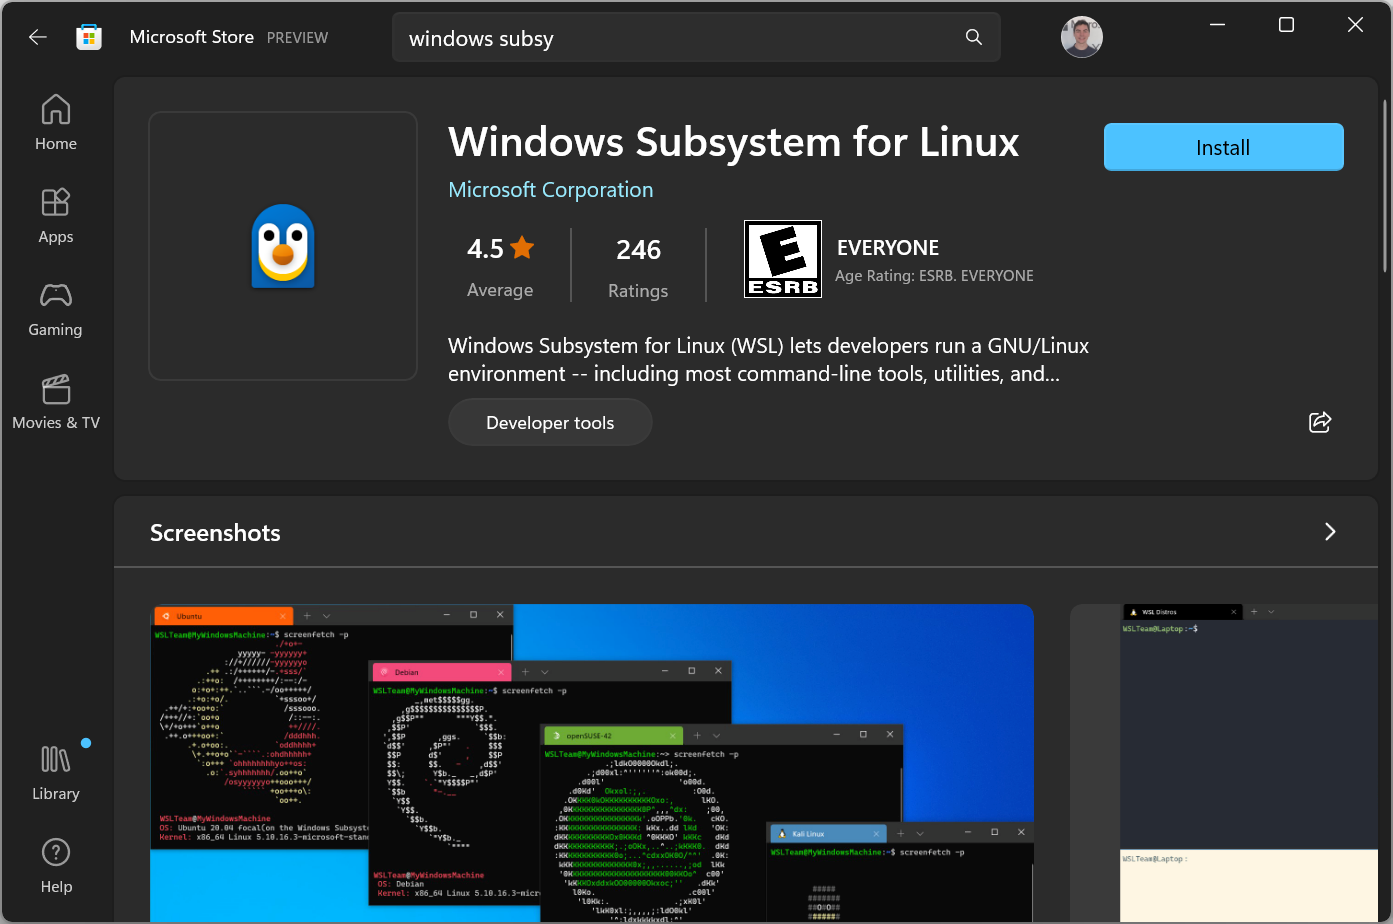
2 Install the Windows Subsystem for Linux app from the Microsoft Store. (see screenshot below)
3 Install a Linux distro (ex: Ubuntu) of your choice to start using WSL. (see screenshot below)
4 Open the installed distro to finish installing and setting up the distro for WSL. (see screenshots below
That's it,
Shawn Brink
- Add "Show Linux" on Navigation Pane to Folder Options in Windows 11
- Add or Remove Linux in Navigation Pane of File Explorer in Windows 11
- Install Windows Subsystem for Linux (WSL) Distros in Windows 11
- Find Windows Subsystem for Linux (WSL) Installed App Version in Windows 11
- Change Default Windows Subsystem for Linux (WSL) Distro in Windows 11
- Uninstall Windows Subsystem for Linux (WSL) in Windows 11
- List Installed Windows Subsystem for Linux (WSL) Distros in Windows 11
- List Running Windows Subsystem for Linux (WSL) Distros in Windows 11
- Uninstall Windows Subsystem for Linux (WSL) Distro in Windows 11
- Add or Remove "Open Linux shell here" Context Menu in Windows 11


