This tutorial will show you how to completely uninstall the Windows Subsystem for Linux (WSL) feature in Windows 10 and Windows 11.
Windows Subsystem for Linux lets developers run a GNU/Linux environment -- including most command-line tools, utilities, and applications -- directly on Windows, unmodified, without the overhead of a traditional virtual machine or dualboot setup.
You must be signed in as an administrator to uninstall WSL.
Here's How:
1 Open the Start menu
 .
.2 Click/tap on the All apps button. (see screenshot below)
3 Perform the following steps to uninstall all installed Linux distros: (see screenshots below)
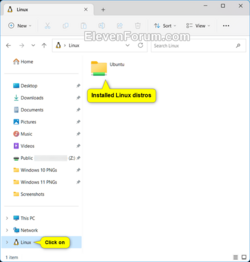
You can open File Explorer (Win+E), and click/tap on Linux in the navigation pane to see all your installed Linux distros to uninstall.

- Right click on the Linux distro (ex: "Ubuntu on Windows").
- Click/tap on Uninstall.
- Click/tap on Uninstall to confirm.
4 Perform the following steps to uninstall the Windows Subsystem for Linux app: (see screenshots below)
- Right click on the Windows Subsystem for Linux app.
- Click/tap on Uninstall.
- Click/tap on Uninstall to confirm.
5 Open Windows Features (OptionalFeatures.exe).
6 Uncheck Windows Subsystem for Linux, and click/tap on OK. (see screenshot below)
7 Click/tap on Restart now when ready to restart the computer to finish uninstalling WSL. (see screenshot below)
That's it,
Shawn Brink
Related Tutorials
- Install Windows Subsystem for Linux (WSL) in Windows 11
- Find Windows Subsystem for Linux (WSL) Installed App Version in Windows 11
- Add "Show Linux" on Navigation Pane to Folder Options in Windows 11
- Add or Remove Linux in Navigation Pane of File Explorer in Windows 11
- Uninstall Windows Subsystem for Linux (WSL) Distro in Windows 11
Last edited:


