This tutorial will show you how to suspend (pause) or resume BitLocker protection for a drive encrypted by BitLocker or Device Encryption in Windows 10 and Windows 11.
Device Encryption is a Windows feature that provides a simple way for some devices to enable BitLocker encryption automatically. Device encryption is available on all Windows versions, and it requires a device to meet either Modern Standby or HSTI security requirements. Device Encryption is only available for the operating system drive.
BitLocker Drive Encryption is a data protection feature that integrates with the operating system and addresses the threats of data theft or exposure from lost, stolen, or inappropriately decommissioned drives and computers. You can turn on BitLocker protection for operating system drives, fixed drives, and removable drives.
You can suspend BitLocker protection for an unlocked drive encrypted by BitLocker or Device Encryption, and resume BitLocker protection for the drive at any time.
Sometimes you may need to suspend BitLocker protection on an operating system drive to prevent certain problems and allow successful firmware and hardware updates.
Suspend keeps the data encrypted but encrypts the BitLocker volume master key with a clear key. The clear key is a cryptographic key stored unencrypted and unprotected on the disk drive. By storing this key unencrypted, the Suspend option allows for changes or upgrades to the computer without the time and cost of decrypting and re-encrypting the entire drive. After the changes are made and BitLocker is again enabled, BitLocker will reseal the encryption key to the new values of the measured components that changed as a part of the upgrade, the volume master key is changed, the protectors are updated to match and the clear key is erased.
When you suspend BitLocker protection for an OS drive, it will remain unlocked and unprotected until you either manually resume BitLocker protection for the drive, have it automatically resume BitLocker protection after a specified number of times (RebootCount) you restart the computer, or have it automatically resume BitLocker protection the next time you restart the computer.
When you suspend BitLocker protection for a fixed data drive, it will remain unlocked and unprotected until you manually resume BitLocker protection for the drive. This is even after you restart the computer.
When you suspend BitLocker protection for a removable data drive, it will remain unlocked and unprotected until you manually resume BitLocker protection for the drive. This is even after you restart the computer, or disconnect and reconnect the drive.
Reference:

Suspend BitLocker protection for non-Microsoft software updates - Windows Client
You must be signed in as an administrator to suspend and resume BitLocker protection for drives.
- Option One: Suspend BitLocker Protection for OS Drive in Control Panel
- Option Two: Resume BitLocker Protection for Drive in Control Panel
- Option Three: Resume BitLocker Protection for Drive in File Explorer
- Option Four: Suspend BitLocker Protection for Drive using manage-bde Command
- Option Five: Resume BitLocker Protection for Drive using manage-bde Command
- Option Six: Suspend BitLocker Protection for Drive using Suspend-BitLocker Command
- Option Seven: Suspend BitLocker Protection for OS Drive with RebootCount using Suspend-BitLocker Command
- Option Eight: Suspend BitLocker Protection for All Drives using Suspend-BitLocker Command
- Option Nine: Resume BitLocker Protection for Drive using Resume-BitLocker Command
- Option Ten: Resume BitLocker Protection for All Drives using Resume-BitLocker Command
This option can only be used to suspend BitLocker protection for an operating system drive.
1 Open the Control Panel (icons view), and click/tap on the BitLocker Drive Encryption icon.
2 Under Operating system drive, click/tap on the Suspend protection link for the OS drive (ex: "C:" you want. (see screenshot below)
3 Click/tap on Yes to confirm. (see screenshot below)
4 BitLocker protection for this OS drive will remain suspended until you either manually resume or restart the computer.
1 Open the Control Panel (icons view), and click/tap on the BitLocker Drive Encryption icon.
2 Under Operating system drive, expand open the suspended drive you want, and click/tap on the Resume protection link. (see screenshot below)
1 Open This PC in File Explorer (Win+E). (see screenshot below)
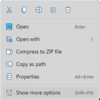
2 Right click on the suspended drive, and click/tap on Show more options.
Step 2 is only available in Windows 11, and not for Windows 10.
3 Click/tap on Resume BitLocker protection.
1 Open Windows Terminal (Admin), and select either Windows PowerShell or Command Prompt.
2 Type the command below into Windows Terminal (Admin), press Enter. (see screenshot below)
manage-bde -protectors -disable <drive letter>:Substitute <drive letter> in the command above with the actual drive letter of the drive you want to suspend BitLocker protection.
For example: manage-bde -protectors -disable D:
1 Open Windows Terminal (Admin), and select either Windows PowerShell or Command Prompt.
2 Type the command below into Windows Terminal (Admin), press Enter. (see screenshot below)
manage-bde -protectors -enable <drive letter>:Substitute <drive letter> in the command above with the actual suspended drive letter of the drive you want to resume BitLocker protection.
For example: manage-bde -protectors -enable D:
1 Open Windows Terminal (Admin), and select Windows PowerShell.
2 Type the command below into Windows Terminal (Admin), press Enter. (see screenshot below)
Suspend-BitLocker -MountPoint "<drive letter>:"Substitute <drive letter> in the command above with the actual drive letter of the drive you want to suspend BitLocker protection.
For example: Suspend-BitLocker -MountPoint "D:"
Suspend BitLocker Protection for OS Drive with RebootCount using Suspend-BitLocker Command
This option only gets applied to the specific "C:" operating system drive, and allows you to specify the number of computer restarts before automatically restoring BitLocker protection for this OS drive. You will still be able to manually resume BitLocker protection for this OS drive at anytime.
1 Open Windows Terminal (Admin), and select Windows PowerShell.
2 Type the command below into Windows Terminal (Admin), press Enter. (see screenshot below)
Suspend-BitLocker -MountPoint "C:" -RebootCount <restarts #>Substitute <restarts #> in the command above with a number between 0 to 15 for how many times to restart the computer before automatically restoring BitLocker protection for this OS drive.
Setting 0 for the RebootCount will suspend BitLocker protection for this OS drive until you manually resume BitLocker protection for this OS drive.
For example: Suspend-BitLocker -MountPoint "C:" -RebootCount 0
1 Open Windows Terminal (Admin), and select Windows PowerShell.
2 Copy and paste the command below into Windows Terminal (Admin), press Enter. (see screenshot below)
Get-BitLockerVolume | Suspend-BitLocker1 Open Windows Terminal (Admin), and select Windows PowerShell.
2 Type the command below into Windows Terminal (Admin), press Enter. (see screenshot below)
Resume-BitLocker -MountPoint "<drive letter>:"Substitute <drive letter> in the command above with the actual drive letter of the suspended drive you want to resume BitLocker protection.
For example: Resume-BitLocker -MountPoint "D:"
1 Open Windows Terminal (Admin), and select Windows PowerShell.
2 Copy and paste the command below into Windows Terminal (Admin), press Enter. (see screenshot below)
Get-BitLockerVolume | Resume-BitLockerThat's it,
Shawn Brink
- Turn On or Off Device Encryption in Windows 11
- Turn On BitLocker for Operating System Drive in Windows 11
- Turn On BitLocker for Fixed Data Drive in Windows 11
- Turn On BitLocker for Removable Data Drive in Windows 11
- Turn Off BitLocker for Drive in Windows 11
- Check BitLocker Drive Encryption Status of Drive in Windows 11
- Add Suspend BitLocker protection to Context Menu in Windows 11
- Lock BitLocker Drive in Windows 11
- Change BitLocker Password for Drive in Windows 11


