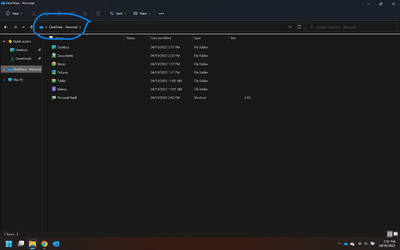
This tutorial will show you how to add or remove OneDrive in the navigation pane of File Explorer for your account or all users in Windows 11.
OneDrive is built-in to Windows 11 by default.
With OneDrive, you can sync files between your computer and the cloud, so you can get to your files from anywhere - your computer, your mobile device, and even through the OneDrive website at OneDrive.com. If you add, change, or delete a file or folder in your OneDrive folder, the file or folder is added, changed, or deleted on the OneDrive website and vice versa. You can work with your synced files directly in File Explorer and access your files even when you’re offline. Whenever you’re online, any changes that you or others make will sync automatically.
Removing OneDrive from the navigation pane of File Explorer does not delete or remove your C:\Users\<username>\OneDrive folder.
Contents
- Option One: Add or Remove OneDrive in File Explorer Navigation Pane for Current User
- Option Two: Add or Remove OneDrive in File Explorer Navigation Pane for All Users
EXAMPLE: OneDrive in navigation pane of new File Explorer
If you turn on Show all folders in the navigation pane when using this option, OneDrive will always show in the navigation pane.
1 Do step 2 (add) or step 3 (remove) below for what you want.
2 Add OneDrive to Navigation Pane in File Explorer
This is the default setting.
A) Click/tap on the Download button below to download the file below, and go to step 4 below.
Add_OneDrive_to_navigation_pane_in_File_Explorer.reg
Download
(Contents of REG file for reference)
Code:
Windows Registry Editor Version 5.00

[HKEY_CURRENT_USER\Software\Classes\CLSID\{018D5C66-4533-4307-9B53-224DE2ED1FE6}]
"System.IsPinnedToNameSpaceTree"=dword:00000001
4 Remove OneDrive from Navigation Pane of File Explorer
A) Click/tap on the Download button below to download the file below, and go to step 5 below.
Remove_OneDrive_from_navigation_pane_in_File_Explorer.reg
Download
(Contents of REG file for reference)
Code:
Windows Registry Editor Version 5.00

[HKEY_CURRENT_USER\Software\Classes\CLSID\{018D5C66-4533-4307-9B53-224DE2ED1FE6}]
"System.IsPinnedToNameSpaceTree"=dword:00000000
4 Save the .reg file to your desktop.
5 Double click/tap on the downloaded .reg file to merge it.
6 When prompted, click/tap on Run, Yes (UAC), Yes, and OK to approve the merge.
7 If File Explorer is open, close and reopen it to apply.
8 You can now delete the downloaded .reg file if you like.
You must be signed in as an administrator to use this option.
This option will completely remove OneDrive from the File Explorer navigation pane even if Show all folders is turned on.
1 Do step 2 (add) or step 3 (remove) below for what you want.
2. Allow Add OneDrive to Navigation Pane in File Explorer for All Users
This is the default setting.
A) Click/tap on the Download button below to download the file below, and go to step 4 below.
Add_OneDrive_to_navigation_pane_in_File_Explorer_for_all_users.reg
Download
(Contents of REG file for reference)
Code:
Windows Registry Editor Version 5.00

[HKEY_CLASSES_ROOT\CLSID\{018D5C66-4533-4307-9B53-224DE2ED1FE6}]
@="OneDrive - Personal"
"System.IsPinnedToNameSpaceTree"=dword:00000001

[HKEY_LOCAL_MACHINE\SOFTWARE\Microsoft\Windows\CurrentVersion\Explorer\Desktop\NameSpace\{018D5C66-4533-4307-9B53-224DE2ED1FE6}]
@="OneDrive - Personal"
"HiddenByDefault"=-

[HKEY_LOCAL_MACHINE\SOFTWARE\Microsoft\Windows\CurrentVersion\Policies\NonEnum]
"{018D5C66-4533-4307-9B53-224DE2ED1FE6}"=-
3. Remove OneDrive from Navigation Pane in File Explorer for All Users
A) Click/tap on the Download button below to download the file below, and go to step 4 below.
Remove_OneDrive_from_navigation_pane_in_File_Explorer_for_all_users.reg
Download
(Contents of REG file for reference)
Code:
Windows Registry Editor Version 5.00

[HKEY_CLASSES_ROOT\CLSID\{018D5C66-4533-4307-9B53-224DE2ED1FE6}]
@="OneDrive - Personal"
"System.IsPinnedToNameSpaceTree"=dword:00000000

[HKEY_LOCAL_MACHINE\SOFTWARE\Microsoft\Windows\CurrentVersion\Explorer\Desktop\NameSpace\{018D5C66-4533-4307-9B53-224DE2ED1FE6}]
@="OneDrive - Personal"
"HiddenByDefault"=dword:00000001

[HKEY_LOCAL_MACHINE\SOFTWARE\Microsoft\Windows\CurrentVersion\Policies\NonEnum]
"{018D5C66-4533-4307-9B53-224DE2ED1FE6}"=dword:00000001
4 Save the .reg file to your desktop.
5 Double click/tap on the downloaded .reg file to merge it.
6 When prompted, click/tap on Run, Yes (UAC), Yes, and OK to approve the merge.
7 You can now delete the downloaded .reg file if you like.
That's it,
Shawn Brink
Related Tutorials
- Enable or Disable OneDrive in Windows 11
- Uninstall and Reinstall OneDrive in Windows 11
- Set up OneDrive in Windows 11
- Turn On or Off OneDrive Run at Startup in Windows 11
- Turn On or Off Show all folders in Navigation Pane of File Explorer in Windows 11
- Enable or Disable Show OneDrive Status on Navigation Pane in Windows 11
- Add OneDrive to Send to Context Menu in Windows 11
Attachments
-
Remove_OneDrive_from_navigation_pane_in_File_Explorer.reg780 bytes · Views: 8,314
-
Add_OneDrive_to_navigation_pane_in_File_Explorer.reg780 bytes · Views: 2,602
-
Add_OneDrive_to_navigation_pane_in_File_Explorer_for_all_users.reg1.3 KB · Views: 1,590
-
Remove_OneDrive_from_navigation_pane_in_File_Explorer_for_all_users.reg1.4 KB · Views: 4,939
Last edited:


