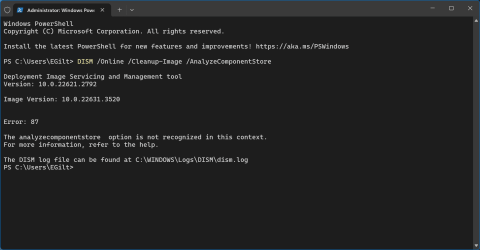
This tutorial will show you how to analyze and clean up the component store (WinSxS folder) to reduce its size in Windows 10 and Windows 11.
The WinSxS folder is located in the Windows folder, for example C:\Windows\WinSxS. It’s the location for Windows Component Store files. The Windows Component Store is used to support the functions needed for the customization and updating of Windows. Here are some examples of how the Windows Component Store files are used:
- Using Windows Update to install new component versions. This keeps systems secure and up-to-date.
- Enabling or disabling Windows features.
- Adding roles or features using Server Manager.
- Moving systems between different Windows Editions.
- System recovery from corruption or boot failures
- Uninstalling problematic updates
- Running programs using side-by-side assemblies
Files in this folder might appear to be stored in more than one place in the operating system, but there's usually only one copy of the file and the rest of the copies are actually hard links. Some tools, such as the File Explorer, determine the size of directories without taking into account that the contained files might be hard linked, which might lead you to think that the WinSxS folder takes up more disk space than it really does.
The operating system automatically reduces the size of the WinSxS folder by using methods similar to the ones described in this topic. Windows also uses internal processes to reduce the size of the WinSxS folder, such as uninstalling and deleting packages with components that have been replaced by other components with newer versions. Previous versions of some components are kept on the system for a period of time, allowing you to rollback if necessary. After a period of time, these older components are automatically removed from the installation.
See also:


Determine the Actual Size of the WinSxS Folder

You have a number of ways to start the cleanup of the component store, which use a combination of package deletion and component compression to clean up the WinSxS folder.
You must be signed in as an administrator to analyze and clean up the component store (WinSxS folder).
Some important system files are located only in the WinSxS folder. Deleting files from the WinSxS folder or deleting the entire WinSxS folder might severely damage your system, so that your PC might not boot, and make it impossible to update.
You can instead reduce the size of the WinSxS folder using tools built into Windows.
- Option One: Analyze the Component Store (WinSxS folder)
- Option Two: Clean Up Component Store (WinSxS folder) using StartComponentCleanup task in Task Scheduler
- Option Three: Clean Up Component Store (WinSxS folder) using /StartComponentCleanup Command
- Option Four: Clean Up Component Store (WinSxS folder) using /StartComponentCleanup /ResetBase Command
This option is used to determine the actual size of the WinSxS folder, and if clean up is recommended.
1 Open Windows Terminal (Admin), and select either Windows PowerShell or Command Prompt.
2 Copy and paste the command below into Windows Terminal (Admin), and press Enter. (see screenshot below)
DISM /Online /Cleanup-Image /AnalyzeComponentStore3 Based on the output, you can determine the overhead of the WinSxS folder by taking the sum of the backups and disabled features size with the cache and temporary data size.
In this example, the WinSxS folder appears to be 7.15 GB, but the actual overhead (the sum of the size of Backups and Disabled Features and the size of Cache and Temporary Data) is 1.16 GB.
4 Component Store Cleanup Recommended will report Yes or No if cleanup is needed.
Here's the information that's available in the output:
Title | Description |
|---|---|
| Windows Explorer Reported Size of Component Store | This value the size of the WinSxS folder if computed by Windows Explorer. This value doesn’t factor in the use of hard links within the WinSxS folder. |
| Actual Size of Component Store | This value factors in hard links within the WinSxS folder. It doesn’t exclude files that are shared with Windows by using hard links. |
| Shared with Windows | This value provides the size of files that are hard linked so that they appear both in the component store and in other locations (for the normal operation of Windows). This is included in the actual size, but shouldn’t be considered part of the component store overhead. |
| Backups and Disabled Features | This is the size of the components that are being kept to respond to failures in newer components or to provide the option of enabling more functionality. It also includes the size of component store metadata and side-by-side components. This is included in the actual size and is part of the component store overhead. |
| Cache and Temporary Data | This is the size of files that are used internally by the component store to make component servicing operations faster. This is included in the actual size and is part of the component store overhead. |
| Date of Last Cleanup | This is the date of the most recently completed component store cleanup. |
| Number of Reclaimable Packages | This is the number of superseded packages on the system that component cleanup can remove. |
| Component Store Cleanup Recommended | This is a component store cleanup recommendation. Cleanup is recommended when performing a cleanup process may reduce the size of the component store overhead. |
Clean Up Component Store (WinSxS folder) using StartComponentCleanup task in Task Scheduler
The StartComponentCleanup task automatically cleans up components when the system isn't in use. When run automatically, the task will wait at least 30 days after an updated component has been installed before uninstalling the previous versions of the component.
If you choose to run this task, the task will have a 1 hour timeout and may not completely clean up all files.
You can also run StartComponentCleanup task using the command below in Windows Terminal (Admin).
schtasks.exe /Run /TN "\Microsoft\Windows\Servicing\StartComponentCleanup"
1 Open Task Scheduler (taskschd.msc).
2 Navigate to and open the folder below in the left pane of Task Scheduler. (see screenshot below step 3)
3 Select the StartComponentCleanup task in the middle pane of Servicing, and click/tap on Run under Selected Item in the right Actions pane. (see screenshot below)
4 The StartComponentCleanup task will now run until finished or the 1 hour timeout has been reached. This can take a while to finish running. (see screenshot below)
Using the /StartComponentCleanup parameter of Dism.exe gives you similar results to running the StartComponentCleanup task in Task Scheduler, except previous versions of updated components will be immediately deleted (without a 30 day grace period) and you will not have a 1-hour timeout limitation.
1 Open Windows Terminal (Admin), and select either Windows PowerShell or Command Prompt.
2 Copy and paste the command below into Windows Terminal (Admin), and press Enter. (see screenshot below)
DISM /Online /Cleanup-Image /StartComponentCleanup3 When you see The operation completed successfully, you can close Windows Terminal (Admin) if you like. It may take a while to finish running.
Clean Up Component Store (WinSxS folder) using /StartComponentCleanup /ResetBase Command
Using the /ResetBase parameter together with the /StartComponentCleanup parameter of DISM.exe removes all superseded versions of every component in the component store.
All existing update packages can't be uninstalled after this command is completed, but this won't block the uninstallation of future update packages.
1 Open Windows Terminal (Admin), and select either Windows PowerShell or Command Prompt.
2 Copy and paste the command below into Windows Terminal (Admin), and press Enter. (see screenshot below)
DISM /Online /Cleanup-Image /StartComponentCleanup /ResetBase3 When you see The operation completed successfully, you can close Windows Terminal (Admin) if you like. It may take a while to finish running.
That's it,
Shawn Brink


