Installation and Upgrade Clean Install Windows 11


  • Staff
Windows.png

This tutorial will show you step by step on how to clean install Windows 11 at boot on your PC with or without an Internet connection and setup with a local account or Microsoft account.

Windows 11 has all the power and security of Windows 10 with a redesigned and refreshed look. It also comes with new tools, sounds, and apps. Every detail has been considered. All of it comes together to bring you a refreshing experience on your PC.

A clean install of Windows 11 will wipe out everything on the drive you select to install Windows 11 on giving you a completely new default installation of Windows 11.

References:

If you’d like to see if your current PC meets the minimum requirements, download and run the PC Health Check app.


It is required to be connected to the Internet if you want to set up a Microsoft account during Windows Setup.

It is not required to be connected to the Internet if you want to set up a local account during Windows Setup.


If you set up a Microsoft account during Windows Setup, it will get linked to OneDrive to backup and sync your files by default. You can either set up a local account instead to avoid this, or stop the backup and sync your files to OneDrive when the installation is complete.

If you set up a Microsoft account during Windows Setup, your user profile folder in the "C:\Users" folder will be named with the first 5 characters of the email address used for your Microsoft account. If you want to specify the name of your user profile folder in the "C:\Users" folder, then you will need to set up a local account during Windows Setup instead of a Microsoft account so your user profile folder will have the same name you enter as the local account name. When Windows 11 has finished installing, you can switch to a Microsoft account from the local account (if wanted) without the user profile folder name getting changed.


Here's How:

1 If you have not already, you will need to create a bootable Windows 11 installation USB that supports UEFI mode.

2 It is recommended to temporarily disconnect all non OS hard drives until Windows installation has finished for the following reasons:
  • To avoid you mistakenly deleting or formatting the wrong disk or drive.
  • To prevent Windows Setup from installing the boot configuration files (bootloader) to a different connected hard drive instead of on the disk Windows will be installed on.
3 Boot to the UEFI firmware settings for your motherboard, and enable UEFI or disable Legacy BIOS (CSM) mode.

Usually it will be set to UEFI mode by default if supported. You may need to read your PC's or motherboard's manual for its specific instructions on how to change this setting.


4 Boot from the Windows 11 installation USB flash drive on your computer.

5 Select your language, time and currency format, and keyboard or input method preferences, and click/tap on Next. (see screenshot below)

Clean_install_Windows_11-1.jpg

6 Perform an available action below: (see screenshots below)
  • Click/tap on the Install Now button to start Windows Setup for the installation.
  • Select (dot) Install Windows 11, check I agree everything will be deleted including files, apps, an settings, and click/tap on Next.

Starting with Windows 11 build 26040 (Canary), Microsoft is refreshing Windows OS Media Setup with a much cleaner and more modern design. All of the same features will continue to be supported in the bare-metal (clean) OS installation experience, including unattended support, but will now be consistent with the current upgrade and installation experience available for the devices already running the Windows OS.

winsetup-before-after-1024x493.png


Clean_install_Windows_11-2.jpg

7 Enter your Windows 11 product key, and click/tap on Next. (see screenshot below)

The product key you enter will determine which edition of Windows 11 gets installed, and is required to activate Windows 11 unless you activate with a digital license instead. If you don't enter a product key and click/tap on I don't have a product key, you will be able to select the Windows 11 edition you want to install at step 8 below, but Windows 11 will not be activated.

You can enter an official Windows 7, Windows 8.1, or Windows 10 retail product key (OEM keys will not work) not currently used to activate Windows on another PC, and click/tap on Next to activate Windows 11.

⚠️ Free Activation from Windows 7/8 key or upgrade to Windows 10/11 Ends

If you do not have a product key available right now, click/tap on the I don't have a product key link, select the Windows 11 edition you want to install at step 8. You will be able to manually activate Windows 11 with your product key when you want later after the Windows 11 installation has finished.

If you want to activate with a digital license linked to your Microsoft account, click/tap on the I don't have a product key link, select the Windows 11 edition you want to install at step 8, and add your linked Microsoft account at step 20 .

You will not be asked to enter a product key if installing Windows 11 Enterprise. You will need to manually activate later after installation has finished.

If this is an OEM PC that has a valid product key embedded in its UEFI firmware chip, then you will not be prompted to enter a product key. Windows 11 will automatically use the embedded product key if its valid for the edition being installed. If needed, you can change the product key after installation has finished.


Clean_install_Windows_11-3.jpg

8 If you clicked on I don't have a product key in step 7 above, then select the Windows 11 edition you want to install, and click/tap on Next. (see screenshots below)

Clean_install_Windows_11-4.jpg
Clean_install_Windows_11-5.jpg

9 Check the I accept the Microsoft Software License Terms box, and click/tap on Next. (see screenshot below)

If you only have the keyboard available, you can press the Space + + keys to check the box.


Clean_install_Windows_11-6.jpg

10 Click/tap on the Custom: Install Windows only (advanced) option. (see screenshot below)

Clean_install_Windows_11-7.jpg

11 Perform one of the following actions to select a drive or disk to install Windows 11 on: (see screenshots below)

If RAID is enabled in UEFI/BIOS, Windows Setup may not see any drive(s) available to select to install on.

In this situation, you could either disable RAID in BIOS/UEFI or select to "Add driver" to install the RAID driver from your OEM/motherboard manufacturer's chipset.

AMD Quick Start Guide- Chapter 5: Install AMD-RAID Drivers (PDF)

Intel Support - Installing the Operating System onto a RAID Volume—F6 Install Method

If no drives can be found during Windows 11 or Windows 10 installation (Intel 11th Generation processors)


  • Delete all partitions on the Drive # (ex: Drive 0) you want to install Windows 11 until that Drive # shows only as one Unallocated Space, select the unallocated space, and click/tap on Next.
  • Select a Primary or unallocated partition on a drive you want to install Windows 11, Delete the partition/volume if not already unallocated, click/tap on OK to confirm, and click/tap on Next.
Clean_install_Windows_11-8.jpg
Clean_install_Windows_11-8B.jpg

12 The installation of Windows 11 will now begin. (see screenshots below)

During the installation process, your screen may flash and the computer will restart a few times.


Clean_install_Windows_11-9.jpg
Clean_install_Windows_11-10.jpg

13 Select your country or region (ex: "United States"), and click/tap on Yes. (see screenshot below)

If you would like to set up this PC to have an OOBE (Out-of-box Experience) so another user/owner can pick up at this step to finish setting up Windows on the PC with their own account and preferences the next time the PC it turned on, then:

1. Press the Shift + F10 keys when you see the screenshot below to open a command prompt.
2. Type C:\Windows\System32\shutdown -s -t 0 -f into the command prompt, and press Enter to shut down Windows.


Clean_install_Windows_11-11.jpg

14 Select the keyboard layout (ex: "US") you want, and click/tap on Yes. (see screenshot below)

Clean_install_Windows_11-12.jpg

15 Select Add layout or Skip depending on if you want to add a second keyboard layout or not. (see screenshot below)

Clean_install_Windows_11-13.jpg

16 Windows Setup will now check for an Internet connection. If an Internet connection is not detected, it will prompt you to connect and select an Ethernet network and/or setup and connect to a Wi-Fi network (if available), and click/tap on Next. (see screenshots below)

Starting with a Windows 11 build 25987 (Canary) ISO, when you need to connect to a network and there is no Wi-Fi drivers, you will be given an option to press an Install Drivers button to install drivers you have previously downloaded.


It is required to have an Internet connection if you want to set up a Microsoft account, or work or school account.

Whether you have an Internet connection or not, you will still be able to set up a local account (if wanted) when you get to step 21.

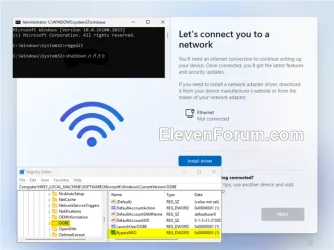
If installing a Windows 11 Pro or Education edition and you currently do not have an Internet connection available, click/tap on I don't have Internet, and go to step 21D to set up a local account. I don't have Internet is not available by default for the Home edition unless you use either command below first. (see bottom screenshot)

If you don't have an Internet connection and none of the above worked for you, then press the Shift + F10 keys to open a command prompt. Copy and paste the OOBE\BYPASSNRO command into the command prompt, and press Enter. This will restart the computer, and take you back to step 13. You should then be able to click/tap on I don't have internet when you get back to this step, and go to step 21D to set up a local account. (see bottom screenshot)

If the OOBE\BYPASSNRO command doesn't work for you, then copy and paste the MSOOBE\BYPASSNRO command into the command prompt, and press Enter. This will restart the computer, and take you back to step 13. You should then be able to click/tap on I don't have internet when you get back to this step, and go to step 21D to set up a local account. (see bottom screenshot)


Clean_install_Windows_11-13b.jpg
Internet_required.png
W11_PRO_no_Internet-1.jpg

17 Type a name you want for the PC, and click/tap on Next. (see screenshot below)

You can always rename the PC at anytime if needed.

Your PC name cannot have more then 15 characters.

Your PC name cannot have spaces or any of the following special characters: " /\ [] : | <> + + ; , ?


ComputerName.jpg

18 Perform an action below for which type of account you want to set up: (see screenshot below)

You will not see this step if installing a Windows 11 Home edition. You will see step 19 instead.


  • Click/tap on Set up for personal use, click/tap on Next, and go to step 19 to set up a Microsoft account or local account on your personal PC.
  • Click/tap on Set up for work or school, click/tap on Next, and go to step 22 to set up a work or school account on your PC to join a domain.
Clean_install_Windows_11-14.jpg

19 Click/tap on Sign in, and go to the step below depending on if your want to set up a local account or Microsoft account to sign in to Windows 11 with. (see screenshot below)

This account will be an administrator account on the PC.


MSA_required.jpg

20 Set Up Windows 11 with a Microsoft Account

For more details about a Microsoft account, see: Microsoft account | Microsoft Docs


A) Type in the email address for your Microsoft account, and click/tap on Next. (see screenshot below)​

If you do not have a Microsoft account and would like to use one, click/tap on the Create one link to create a new Microsoft account.


Clean_install_Windows_11_Microsoft_account-1.jpg

B) Type in the password for your Microsoft account, and click/tap on Sign in. (see screenshot below)​

Clean_install_Windows_11_Microsoft_account-3.jpg

C) If you have two-step verification turned on for your Microsoft account, select how (ex: email or text) you would like to get a code sent to you. (see screenshots below)​

Clean_install_Windows_11_Microsoft_account-4.jpg
Clean_install_Windows_11_Microsoft_account-5.jpg

D) Provide any other required information based on how you selected to get a code, and click/tap on Send code. (see screenshot below)​

Clean_install_Windows_11_Microsoft_account-6.jpg

E) Enter the code you received from Microsoft, and click/tap on Verify. (see screenshot below)​

Clean_install_Windows_11_Microsoft_account-7.jpg

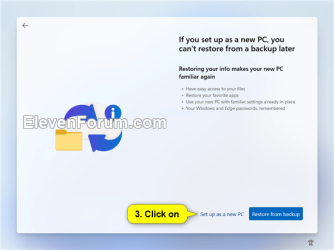
F) Select Set up as new device, and click/tap on Next. (see screenshots below)​

You may need to click/tap on a View more options link first to see the Set up as new device option.

You can select to restore your settings, preferences, Microsoft Store apps, and synced OneDrive files from another device instead of setting up as a new device.


Clean_install_Windows_11_Microsoft_account-10A.png
Clean_install_Windows_11_Microsoft_account-10.jpg


G) Click/tap on Create PIN. (see screenshot below)​

Clean_install_Windows_11_Microsoft_account-8.jpg

H) Enter a PIN you want to use to sign in with, and click/tap on OK. (see screenshot below)​

Clean_install_Windows_11_Microsoft_account-9.jpg

I) Turn On (default) or Off the privacy settings you want, and click/tap on Accept when finished. (see screenshots below)​

You will be able to change these privacy settings at anytime in Windows 11.


Clean_install_Windows_11-_privacy_settings-1.jpg
Clean_install_Windows_11-_privacy_settings-4.jpg
Clean_install_Windows_11-_privacy_settings-2.jpg
Clean_install_Windows_11-_privacy_settings-5.jpg
Clean_install_Windows_11-_privacy_settings-3.jpg
Clean_install_Windows_11-_privacy_settings-6.jpg

J) Check all the ways you plan to use this device, and click/tap on Accept. (see screenshot below)​

Click/tap on Skip instead if you do not want to select (check) any device usages.

You can change your device usage options at any time in Windows 11.


Clean_install_Windows_11_Microsoft_account-11.jpg
Clean_install_Windows_11_Microsoft_account-12.jpg

K) Scan the QR code with your Android phone to link it if wanted, and click/tap on Continue. (see screenshot below)​


Click/tap on Skip instead if you do not want to link an Android phone.

This option is only available starting with Windows 11 build 22567.


Clean_install_Windows_11_Microsoft_account-14.jpg

L) If prompted (no longer asked), click/tap on the Only save files to this PC (recommended) link or Next depending on if you want to use OneDrive or not. (see screenshot below)​

This is for backing up and syncing your account's personal Desktop, Documents, Pictures, Music, and/or Videos folders to your online (cloud) OneDrive.

When you back up a folder its contents get moved to your account's OneDrive folder on the PC to then be synced with your online OneDrive.

⚠️ If you set up a Microsoft account during Windows Setup, it will get linked to OneDrive to backup and sync your files by default. You can either set up a local account instead to avoid this, or stop the backup and sync your files to OneDrive when the installation is complete.


Clean_install_Windows_11_Microsoft_account-13.jpg

M) If prompted to "Try premium Office apps for free with Microsoft 365", click/tap on Decline or Continue for what you want. (see screenshot below)​

Microsoft_365.png

N) If prompted to "Get 100 GB more cloud storage" for OneDrive, click/tap on Decline or Continue for what you want. (see screenshot below)​

Cloud_storage.png

O) Go to step 23.​


21 Set Up Windows 11 with a Local Account

For more details about a local account, see: Local account | Microsoft Docs:


A) Enter this specific fake email address ("fake@fake.com"), and click/tap on Next. (see screenshot below)​

Fake_email_for_local_account-1.jpg

B) Enter a fake password, and click/tap on Sign in. (see screenshot below)​

Fake_email_for_local_account-2.jpg

C) Click/tap on Next when you see Oops, something went wrong. (see screenshot below)​

Local_account-Internet-1.jpg


D) Enter a user name you want for this local account, and click/tap on Next. (see screenshot below)​

Clean_install_Windows_11-_local_account-4.jpg

E) Enter a password you want for this local account, and click/tap on Next. (see screenshot below)​

If you do not want this local account to have a password, leave the password field empty, click/tap on Next, and go to step J below.


Clean_install_Windows_11-_local_account-5.jpg

F) Enter the password again to confirm, and click/tap on Next. (see screenshot below)​

Clean_install_Windows_11-_local_account-6.jpg

G) Select a security question (1 of 3) you want from the drop menu, type your answer, and click/tap on Next. (see screenshot below)​

Clean_install_Windows_11-_local_account-7.jpg

H) Select a security question (2 of 3) you want from the drop menu, type your answer, and click/tap on Next. (see screenshot below)​

Clean_install_Windows_11-_local_account-8.jpg

I) Select a security question (3 of 3) you want from the drop menu, type your answer, and click/tap on Next. (see screenshot below)​

Clean_install_Windows_11-_local_account-9.jpg

J) Turn On (default) or Off the privacy settings you want, and click/tap on Accept when finished. (see screenshots below)​

You will be able to change these privacy settings at anytime in Windows 11.


Clean_install_Windows_11-_privacy_settings-1.jpg
Clean_install_Windows_11-_privacy_settings-4.jpg
Clean_install_Windows_11-_privacy_settings-2.jpg
Clean_install_Windows_11-_privacy_settings-5.jpg
Clean_install_Windows_11-_privacy_settings-3.jpg
Clean_install_Windows_11-_privacy_settings-6.jpg

O) Go to step 23.​


22 Set Up Windows 11 with a Work or School Account

A) Type in the email address for your work or school account, and click/tap on Next. (see screenshot below)​

W11_clean_install_work_or_school_account-1.png

B) Type in the password for your work or school account, and click/tap on Sign in. (see screenshot below)​

W11_clean_install_work_or_school_account-2.png

C) Turn On (default) or Off the privacy settings you want, and click/tap on Accept when finished. (see screenshots below)​

You will be able to change these privacy settings at anytime in Windows 11.


Clean_install_Windows_11-_privacy_settings-1.jpg
Clean_install_Windows_11-_privacy_settings-4.jpg
Clean_install_Windows_11-_privacy_settings-2.jpg
Clean_install_Windows_11-_privacy_settings-5.jpg
Clean_install_Windows_11-_privacy_settings-3.jpg
Clean_install_Windows_11-_privacy_settings-6.jpg

D) Windows Setup will check for updates. (see screenshot below)​

W11_clean_install_work_or_school_account-4.png

E) If prompted to use Windows Hello with your account, click/tap on OK. (see screenshot below)​

W11_clean_install_work_or_school_account-5.png

F) If your organization requires additional security information, click/tap on Next, and follow any other given instructions to verify. (see screenshot below)​

W11_clean_install_work_or_school_account-6.png

G) When finished, go to step 23.​


23 When the clean install has finished, you will be on your desktop in Windows 11 with the Start menu open. (see screenshot below)

Desktop.png

24 Make sure the correct time zone, date, and time is set.

25 Check for and install any available Windows Updates.

26 Install any needed drivers for your devices.


That's it,
Shawn Brink


Attachments

  • Windows_11_banner.png
    Windows_11_banner.png
    5.6 KB · Views: 10,167
  • Windows_11_flag.png
    Windows_11_flag.png
    2.6 KB · Views: 399
Last edited:

My Computers

System One System Two

  • OS
    Windows 11 Pro for Workstations
    Computer type
    PC/Desktop
    Manufacturer/Model
    Custom self build
    CPU
    Intel i7-8700K 5 GHz
    Motherboard
    ASUS ROG Maximus XI Formula Z390
    Memory
    64 GB (4x16GB) G.SKILL TridentZ RGB DDR4 3600 MHz (F4-3600C18D-32GTZR)
    Graphics Card(s)
    ASUS ROG-STRIX-GTX1080TI-O11G-GAMING (11GB GDDR5X)
    Sound Card
    Integrated Digital Audio (S/PDIF)
    Monitor(s) Displays
    2 x Samsung Odyssey G75 27"
    Screen Resolution
    2560x1440
    Hard Drives
    1TB Samsung 990 PRO M.2,
    4TB Samsung 990 PRO M.2,
    8TB WD MyCloudEX2Ultra NAS
    PSU
    Seasonic Prime Titanium 850W
    Case
    Thermaltake Core P3 wall mounted
    Cooling
    Corsair Hydro H115i
    Keyboard
    Logitech wireless K800
    Mouse
    Logitech MX Master 3
    Internet Speed
    1 Gbps Download and 35 Mbps Upload
    Browser
    Google Chrome
    Antivirus
    Microsoft Defender and Malwarebytes Premium
    Other Info
    Logitech Z625 speaker system,
    Logitech BRIO 4K Pro webcam,
    HP Color LaserJet Pro MFP M477fdn,
    APC SMART-UPS RT 1000 XL - SURT1000XLI,
    Galaxy S23 Plus phone
  • Operating System
    Windows 11 Pro
    Computer type
    Laptop
    Manufacturer/Model
    HP Spectre x360 2in1 14-eu0098nr (2024)
    CPU
    Intel Core Ultra 7 155H 4.8 GHz
    Memory
    16 GB LPDDR5x-7467 MHz
    Graphics card(s)
    Integrated Intel Arc
    Sound Card
    Poly Studio
    Monitor(s) Displays
    14" 2.8K OLED multitouch
    Screen Resolution
    2880 x 1800
    Hard Drives
    2 TB PCIe NVMe M.2 SSD
    Internet Speed
    Intel Wi-Fi 7 BE200 (2x2) and Bluetooth 5.4
    Browser
    Chrome and Edge
    Antivirus
    Windows Defender and Malwarebytes Premium
The oobe\bypassnro method to install as a local account is very simple and works with Home as well.

I suggest this is added to this tutorial. It works even with latest Dev versions that are forcing an internet connection.
 

My Computer

System One

  • OS
    Windows 10 Pro + others in VHDs
    Computer type
    Laptop
    Manufacturer/Model
    ASUS Vivobook 14
    CPU
    I7
    Motherboard
    Yep, Laptop has one.
    Memory
    16 GB
    Graphics Card(s)
    Integrated Intel Iris XE
    Sound Card
    Realtek built in
    Monitor(s) Displays
    N/A
    Screen Resolution
    1920x1080
    Hard Drives
    1 TB Optane NVME SSD, 1 TB NVME SSD
    PSU
    Yep, got one
    Case
    Yep, got one
    Cooling
    Stella Artois
    Keyboard
    Built in
    Mouse
    Bluetooth , wired
    Internet Speed
    72 Mb/s :-(
    Browser
    Edge mostly
    Antivirus
    Defender
    Other Info
    TPM 2.0
The oobe\bypassnro method to install as a local account is very simple and works with Home as well.

I suggest this is added to this tutorial. It works even with latest Dev versions that are forcing an internet connection.

It's included in the note box under step 16 to help. :-)


My Computers

System One System Two

  • OS
    Windows 11 Pro for Workstations
    Computer type
    PC/Desktop
    Manufacturer/Model
    Custom self build
    CPU
    Intel i7-8700K 5 GHz
    Motherboard
    ASUS ROG Maximus XI Formula Z390
    Memory
    64 GB (4x16GB) G.SKILL TridentZ RGB DDR4 3600 MHz (F4-3600C18D-32GTZR)
    Graphics Card(s)
    ASUS ROG-STRIX-GTX1080TI-O11G-GAMING (11GB GDDR5X)
    Sound Card
    Integrated Digital Audio (S/PDIF)
    Monitor(s) Displays
    2 x Samsung Odyssey G75 27"
    Screen Resolution
    2560x1440
    Hard Drives
    1TB Samsung 990 PRO M.2,
    4TB Samsung 990 PRO M.2,
    8TB WD MyCloudEX2Ultra NAS
    PSU
    Seasonic Prime Titanium 850W
    Case
    Thermaltake Core P3 wall mounted
    Cooling
    Corsair Hydro H115i
    Keyboard
    Logitech wireless K800
    Mouse
    Logitech MX Master 3
    Internet Speed
    1 Gbps Download and 35 Mbps Upload
    Browser
    Google Chrome
    Antivirus
    Microsoft Defender and Malwarebytes Premium
    Other Info
    Logitech Z625 speaker system,
    Logitech BRIO 4K Pro webcam,
    HP Color LaserJet Pro MFP M477fdn,
    APC SMART-UPS RT 1000 XL - SURT1000XLI,
    Galaxy S23 Plus phone
  • Operating System
    Windows 11 Pro
    Computer type
    Laptop
    Manufacturer/Model
    HP Spectre x360 2in1 14-eu0098nr (2024)
    CPU
    Intel Core Ultra 7 155H 4.8 GHz
    Memory
    16 GB LPDDR5x-7467 MHz
    Graphics card(s)
    Integrated Intel Arc
    Sound Card
    Poly Studio
    Monitor(s) Displays
    14" 2.8K OLED multitouch
    Screen Resolution
    2880 x 1800
    Hard Drives
    2 TB PCIe NVMe M.2 SSD
    Internet Speed
    Intel Wi-Fi 7 BE200 (2x2) and Bluetooth 5.4
    Browser
    Chrome and Edge
    Antivirus
    Windows Defender and Malwarebytes Premium
It's included in the note box under step 16 to help. :)

ah missed that
 

My Computer

System One

  • OS
    Windows 10 Pro + others in VHDs
    Computer type
    Laptop
    Manufacturer/Model
    ASUS Vivobook 14
    CPU
    I7
    Motherboard
    Yep, Laptop has one.
    Memory
    16 GB
    Graphics Card(s)
    Integrated Intel Iris XE
    Sound Card
    Realtek built in
    Monitor(s) Displays
    N/A
    Screen Resolution
    1920x1080
    Hard Drives
    1 TB Optane NVME SSD, 1 TB NVME SSD
    PSU
    Yep, got one
    Case
    Yep, got one
    Cooling
    Stella Artois
    Keyboard
    Built in
    Mouse
    Bluetooth , wired
    Internet Speed
    72 Mb/s :-(
    Browser
    Edge mostly
    Antivirus
    Defender
    Other Info
    TPM 2.0
Hello Shawn, it has been a while hope all is well with you.

I'm preparing my Alienware PC to list it for sale. I will be performing a cleans install from a bootable USB drive. When I received the PC, Windows 10 Pro was installed and when I took the upgrade for Win 11, the version remained the same, Pro.

I have the original Win 10 Pro product key, and when I checked the product key on the current 11 Pro version, the key is the same (as I would expect). So, my question, when I'm going through the steps for the Clean Install, should I enter the product key or leave it blank during the installation process. And if I leave it blank, when the new owner takes possession and login with their MS account will the version still be Pro, or will it default to Home? (I've forgotten how Microsoft knows what version of Windows you have, e.g. MS Account, physical PC, etc.)

Hope my explanation is clear.

Thanks,
Greg
 

My Computer

System One

  • OS
    Windows 11
    Computer type
    PC/Desktop
    Manufacturer/Model
    Alienware R13
    CPU
    12th Gen Intel(R) Core(TM) i9 12900KF
    Motherboard
    Alienware
    Memory
    NVIDIA(R) GeForce RTX(TM) 3080 10GB GDDR6X
    Graphics Card(s)
    64GB Dual Channel DDR5 at 4400MHz
    Sound Card
    Dell Sound Bar
    Monitor(s) Displays
    Dell UP2716
    Screen Resolution
    2560 x 1440
    Hard Drives
    1TB NVMe M.2 PCIe SSD (Boot) + 1TB 7200RPM SATA 6Gb/s
    PSU
    Alienware(TM) 750 Watt
    Case
    Alienware Clear Side Panel
    Cooling
    Alienware Cryo-tech(TM) Edition CPU Liquid Cooling
    Keyboard
    Dell
    Mouse
    Wired
    Internet Speed
    Spectrum Gig/40
    Browser
    MS Edge
    Antivirus
    Norton Security
Hello Shawn, it has been a while hope all is well with you.

I'm preparing my Alienware PC to list it for sale. I will be performing a cleans install from a bootable USB drive. When I received the PC, Windows 10 Pro was installed and when I took the upgrade for Win 11, the version remained the same, Pro.

I have the original Win 10 Pro product key, and when I checked the product key on the current 11 Pro version, the key is the same (as I would expect). So, my question, when I'm going through the steps for the Clean Install, should I enter the product key or leave it blank during the installation process. And if I leave it blank, when the new owner takes possession and login with their MS account will the version still be Pro, or will it default to Home? (I've forgotten how Microsoft knows what version of Windows you have, e.g. MS Account, physical PC, etc.)

Hope my explanation is clear.

Thanks,
Greg
The computer most likely has a product key for Windows 10/11 stored in firmware. During the clean install you likely will not even be asked for a product key nor which edition to install. Windows setup will read the product key stored in firmware and install Windows Pro automatically. When the new user logs in, the edition of Windows installed will not change. Besides, to legitimately downgrade from Pro to Home without modifying registry keys requires a clean install. If it does ask for a product key, I recommend skipping it, then picking Windows Pro as the desired edition.
 

My Computers

System One System Two

  • OS
    Windows 11
    Computer type
    PC/Desktop
    Manufacturer/Model
    Homebuilt
    CPU
    AMD Ryzen 7 3800XT
    Motherboard
    ASUS ROG Crosshair VII Hero (WiFi)
    Memory
    32GB
    Graphics Card(s)
    EVGA GeForce GTX 1080 Ti
  • Operating System
    Windows 11 Education
    Computer type
    Laptop
    Manufacturer/Model
    Dell Inspiron 7773
    CPU
    Intel i7-8550U
    Memory
    32GB
    Graphics card(s)
    Nvidia Geforce MX150
    Sound Card
    Realtek
    Monitor(s) Displays
    17"
    Screen Resolution
    1920 x 1080
    Hard Drives
    Toshiba 512GB NVMe SSD
    SK Hynix 512GB SATA SSD
    Internet Speed
    Fast!
1. Assuming your key is retail, just re-enter it on new device.

2. If old pc does not have a bios embedded key, new owner can choose which version to install.


According to EULA, you are supposed to wipe OS from old pc when using licence on new pc, but most people like to install Windows for new owner to demonstrate it can run ok, so best to get to the first screen asking for a keyboard, then let pc shutdown.

Now here is where it gets somewhat crazy - as pc has had a digital licence, it will activate automatically (whether new owner chooses Home or Pro) even without entering a key.

If you wipe pc, and new owner installs windows 10/11 (and you did not tell them it would activate automatically) you have complied with EULA. and new owner gets a lucky surprise.

So really you should not put it in writing anywhere, that pc comes with an activated licence.

Just simply say user has to install which version they want and provide a licence as appropriate i.e. you are selling it without a key. They will be surprised when it activates automatically.
 

My Computer

System One

  • OS
    Windows 10 Pro + others in VHDs
    Computer type
    Laptop
    Manufacturer/Model
    ASUS Vivobook 14
    CPU
    I7
    Motherboard
    Yep, Laptop has one.
    Memory
    16 GB
    Graphics Card(s)
    Integrated Intel Iris XE
    Sound Card
    Realtek built in
    Monitor(s) Displays
    N/A
    Screen Resolution
    1920x1080
    Hard Drives
    1 TB Optane NVME SSD, 1 TB NVME SSD
    PSU
    Yep, got one
    Case
    Yep, got one
    Cooling
    Stella Artois
    Keyboard
    Built in
    Mouse
    Bluetooth , wired
    Internet Speed
    72 Mb/s :-(
    Browser
    Edge mostly
    Antivirus
    Defender
    Other Info
    TPM 2.0
Hi Shawn, I really like your article here! I just recently had to build a new system due to an electrical storm/power outage frying my old system. I decided to go with Windows 11 vs Windows 10 so that I would possibly not have to update to a new OS again for a while. I was previously running Windows 7 Home Premium, which I liked ok (for a MS product anyway - I would really rather get away from ALL MS products, but I won't get into that here). First I must say that I am really not liking Win 11 (I have had the opportunity to use a laptop in the past that was using Win 10 and I hated it, as well!) My very first gripe with this new OS is the reason I stumbled upon your article here - I hated that I thought that I "had" to use a Microsoft acct to be able to even load Win 11 onto my system (which I already begrudgingly had an acct - but again I won't get into that here).
So, I would love to try to do this clean install of Win 11 onto my system, but I have a few questions I wanted to see if you would clarify for me before I decide if I want to attempt this:
1st - I have a 2TB WD Black hd that is divided as such: 100 MB Healthy (EFI System Partition), which I know/understand was created by the system when installing the OS, 487.59 GB NTFS Healthy (Boot, Page File, Crash Dump, Basic Data Partition) labeled C:, which I know/understand is the main Boot drive, 593 MB Healthy (Recovery Partition), which, again, I know/understand was created by the system when installing the OS, and the remainder is 1374.73 GB NTFS Healthy (Basic Data Partition) labeled E:. So my first question is: Do I absolutely have delete all the partitions on this drive to do this clean install?
I would really rather not, as there is almost 500 GBs of data on the E: drive that I really don't want to back up then re-load back to the hd - that would take a hell of a lot of time to do!!!
2nd - you mention needing "to create a bootable Windows 11 installation USB that supports UEFI mode." Is this necessary if I have an actual Windows 11 Home installation disk with a product key?
and 3rd another user, TheMystic, said in a post that they “create a new user (as Admin) with a name I like, switch to it and then delete the user created with Microsoft Account.” Would this actually work? In other words, will this get rid of my Win11 OS being tied to a Microsoft account completely? Or do I need to do the clean install to actually make that happen?
I apologize for the long post and I thank you, or anybody here, for your help/answers/suggestions!
 

My Computer

System One

  • OS
    win11home
    Computer type
    PC/Desktop
    Manufacturer/Model
    DIY
    CPU
    AMD Ryzen 5 5600X
    Motherboard
    MSI MAG B550 Tomahawk
    Memory
    Corsair Vengeance LPX DDR4 2x16GB (32GB total) 3600MHz
    Graphics Card(s)
    Zotac Gaming GeForce GTX 1660 Super (Mem size: 6GB GDDR6/Mem bus:192-bit)
    Sound Card
    on board
    Monitor(s) Displays
    LG Ultragear Gaming Monitor (Model: 24GL600F)
    Screen Resolution
    1920 x 1080
    Hard Drives
    I have 4 hard drives currently connect to my system:
    running my current Win11 OS is a 2TB Western Digital Black (7200 RPM SATA 6Gb/s 64MB Cache)
    Western Digital Green 2TB (IntelliPower SATA 6.0Gb/s 64MB Cache)
    Western Digital Caviar Green 500GB
    WD 1TB (can't access specifics on this drive right now)
    (the last 3 came from my old system w/the last one containing my old OS Win7)
    PSU
    SeaSonic X Series X650 Gold (SS-650KM Active PFC F3) 650W ATX12V V2.3/EPS 12V V2.91 SLI Ready CrossFire Ready 80 PLUS GOLD Certified Full Modular Active PFC Power Supply New 4th Gen CPU Certified Hasw
    Case
    Cooler Master Elite 431 Plus
    Cooling
    for my CPU I am currently using the stock cooling fan/system that came with it, and in my case I have 1x COUGAR 14CM CFD Green LED Hydraulic (Liquid) Bearing Ultra Silent Fan, 2x COUGAR CF-V12H Vortex Hydro-Dynamic-Bearing (Fluid) 12CM Silent Cooling Fan, and 1 other 120mm fan that I don't remember the specifics for
    Keyboard
    Logitech Cordless Desktop Pro
    Mouse
    generic Wal Mart ONN optical mouse
    Browser
    Brave
Hello @NunyaBeeswax, and welcome to Eleven Forum. :-)

Q1) Since all the partitions are system partitions on the Windows disk and not data, it would be best (not required though) to wipe the Windows drive clean to "unallocated" to select to install Windows 11 on. No need to wipe the "E" drive. If "E" is a separate disk, then it would be recommended to temporarily disconnect it until after the clean install has finished.

Q2) If it's an official Windows 11 installation disk, then you can certainly use it instead to install Windows 10 Home.

Q3) If you link a Microsoft account to a digital license for a computer, it will always be linked to that specific computer for that specific digital license. It just makes it easier to automatically activate when you set up with the same Microsoft account. You can of course set up with only a local account instead, but would just need to manually activate instead.
 
Last edited:

My Computers

System One System Two

  • OS
    Windows 11 Pro for Workstations
    Computer type
    PC/Desktop
    Manufacturer/Model
    Custom self build
    CPU
    Intel i7-8700K 5 GHz
    Motherboard
    ASUS ROG Maximus XI Formula Z390
    Memory
    64 GB (4x16GB) G.SKILL TridentZ RGB DDR4 3600 MHz (F4-3600C18D-32GTZR)
    Graphics Card(s)
    ASUS ROG-STRIX-GTX1080TI-O11G-GAMING (11GB GDDR5X)
    Sound Card
    Integrated Digital Audio (S/PDIF)
    Monitor(s) Displays
    2 x Samsung Odyssey G75 27"
    Screen Resolution
    2560x1440
    Hard Drives
    1TB Samsung 990 PRO M.2,
    4TB Samsung 990 PRO M.2,
    8TB WD MyCloudEX2Ultra NAS
    PSU
    Seasonic Prime Titanium 850W
    Case
    Thermaltake Core P3 wall mounted
    Cooling
    Corsair Hydro H115i
    Keyboard
    Logitech wireless K800
    Mouse
    Logitech MX Master 3
    Internet Speed
    1 Gbps Download and 35 Mbps Upload
    Browser
    Google Chrome
    Antivirus
    Microsoft Defender and Malwarebytes Premium
    Other Info
    Logitech Z625 speaker system,
    Logitech BRIO 4K Pro webcam,
    HP Color LaserJet Pro MFP M477fdn,
    APC SMART-UPS RT 1000 XL - SURT1000XLI,
    Galaxy S23 Plus phone
  • Operating System
    Windows 11 Pro
    Computer type
    Laptop
    Manufacturer/Model
    HP Spectre x360 2in1 14-eu0098nr (2024)
    CPU
    Intel Core Ultra 7 155H 4.8 GHz
    Memory
    16 GB LPDDR5x-7467 MHz
    Graphics card(s)
    Integrated Intel Arc
    Sound Card
    Poly Studio
    Monitor(s) Displays
    14" 2.8K OLED multitouch
    Screen Resolution
    2880 x 1800
    Hard Drives
    2 TB PCIe NVMe M.2 SSD
    Internet Speed
    Intel Wi-Fi 7 BE200 (2x2) and Bluetooth 5.4
    Browser
    Chrome and Edge
    Antivirus
    Windows Defender and Malwarebytes Premium
Just a clarification on Question 1, @NunyaBeeswax, you do NOT need to delete your 1374.73 GB NTFS Healthy (Basic Data Partition) labeled E:. You can leave that on the disk. Delete the other partitions (and there will really be 4 because you are not seeing one): EFI System, Microsoft System Reserved, the old OS partition, and the Recovery Partition. You will be left with a large unallocated space, followed by your data partition. Highlight the unallocated space on the disk, then click next.
 

My Computers

System One System Two

  • OS
    Windows 11
    Computer type
    PC/Desktop
    Manufacturer/Model
    Homebuilt
    CPU
    AMD Ryzen 7 3800XT
    Motherboard
    ASUS ROG Crosshair VII Hero (WiFi)
    Memory
    32GB
    Graphics Card(s)
    EVGA GeForce GTX 1080 Ti
  • Operating System
    Windows 11 Education
    Computer type
    Laptop
    Manufacturer/Model
    Dell Inspiron 7773
    CPU
    Intel i7-8550U
    Memory
    32GB
    Graphics card(s)
    Nvidia Geforce MX150
    Sound Card
    Realtek
    Monitor(s) Displays
    17"
    Screen Resolution
    1920 x 1080
    Hard Drives
    Toshiba 512GB NVMe SSD
    SK Hynix 512GB SATA SSD
    Internet Speed
    Fast!
When I clean install Windows I always delete all partitions on the drive and let the installer recreate everything just to be certain that its all new and no remnants remain.
 

My Computers

System One System Two

  • OS
    Windows 11 Pro
    Computer type
    PC/Desktop
    Manufacturer/Model
    Self Built
    CPU
    Intel Core i9 13900k, Intel UHD 770 integrated
    Motherboard
    MSI MEG Z790 ACE
    Memory
    32gb G.Skill Trident Z5 6600
    Graphics Card(s)
    Gigabyte RTX 4090 Gaming OC
    Sound Card
    EVGA Nu Audio, Razer Kraken V3 Pro, Realtek Onboard
    Monitor(s) Displays
    LG 38GN950-B, Benq EX3415R nano IPS monitors
    Screen Resolution
    3840x1600, 3440X1440
    Hard Drives
    Samsung 970 Pro, Samsung 850 Pro, Crucial MX500, WD Black SN700, WD Black 8tb HD
    PSU
    EVGA Supernova G2 1300w
    Case
    Thermaltake Level 20 XT
    Cooling
    ARCTIC Liquid Freezer III 420 ARGB in push/pull, Antec Prism X 120mm ARGB Fans x 15
    Keyboard
    Razer Huntsman Elite V1
    Mouse
    Corsair Dark Core Pro SE on an Asus ROG Balteus Qi pad
    Internet Speed
    450Mbps cable primary, 6Mbps secondary vdsl
    Browser
    Chrome primary, FF-Edge-IE secondary
    Antivirus
    Norton 360 Premium
    Other Info
    I sit on a Secret Lab Titan XL 2020 chair.😍
  • Operating System
    Windows 11 Pro
    Computer type
    Laptop
    Manufacturer/Model
    2021 HP Omen
    CPU
    AMD Ryzen 7 5800H
    Motherboard
    factory
    Memory
    16gb ddr 3200
    Graphics card(s)
    Nvidia RTX 3060 Mobile
    Sound Card
    onboard B&O
    Monitor(s) Displays
    15.6" 144hz IPS
    Screen Resolution
    1920x1080
    Hard Drives
    Hynix 512gb nvme ssd, WD Black SN850 2TB nvme ssd
    PSU
    factory
    Case
    factory
    Cooling
    factory with ARCTIC MX-6
    Mouse
    touchpad and Logitech wireless mouse
    Keyboard
    4 zone rgb
    Internet Speed
    WiFi 6, 1gb ethernet
    Browser
    Chrome primary, FF-IE and Edge secondary
    Antivirus
    Norton 360 Premium
When I clean install Windows I always delete all partitions on the drive and let the installer recreate everything just to be certain that its all new and no remnants remain.
It is not required to delete a data partition containing almost 500 GB of data and then have to restore it.
 

My Computers

System One System Two

  • OS
    Windows 11
    Computer type
    PC/Desktop
    Manufacturer/Model
    Homebuilt
    CPU
    AMD Ryzen 7 3800XT
    Motherboard
    ASUS ROG Crosshair VII Hero (WiFi)
    Memory
    32GB
    Graphics Card(s)
    EVGA GeForce GTX 1080 Ti
  • Operating System
    Windows 11 Education
    Computer type
    Laptop
    Manufacturer/Model
    Dell Inspiron 7773
    CPU
    Intel i7-8550U
    Memory
    32GB
    Graphics card(s)
    Nvidia Geforce MX150
    Sound Card
    Realtek
    Monitor(s) Displays
    17"
    Screen Resolution
    1920 x 1080
    Hard Drives
    Toshiba 512GB NVMe SSD
    SK Hynix 512GB SATA SSD
    Internet Speed
    Fast!
thank you for your quick response and your answers! the E: partition is on the same physical hd as the OS partition C:, so as NavyLCDR said, if I can just wipe the rest of the drive and leave the E: partition intact, that would be awesome! I do have other physical drives connected (3 to be exact), but I will definitely disconnect those drives before preceding!
Again, thank yall so much!
 

My Computer

System One

  • OS
    win11home
    Computer type
    PC/Desktop
    Manufacturer/Model
    DIY
    CPU
    AMD Ryzen 5 5600X
    Motherboard
    MSI MAG B550 Tomahawk
    Memory
    Corsair Vengeance LPX DDR4 2x16GB (32GB total) 3600MHz
    Graphics Card(s)
    Zotac Gaming GeForce GTX 1660 Super (Mem size: 6GB GDDR6/Mem bus:192-bit)
    Sound Card
    on board
    Monitor(s) Displays
    LG Ultragear Gaming Monitor (Model: 24GL600F)
    Screen Resolution
    1920 x 1080
    Hard Drives
    I have 4 hard drives currently connect to my system:
    running my current Win11 OS is a 2TB Western Digital Black (7200 RPM SATA 6Gb/s 64MB Cache)
    Western Digital Green 2TB (IntelliPower SATA 6.0Gb/s 64MB Cache)
    Western Digital Caviar Green 500GB
    WD 1TB (can't access specifics on this drive right now)
    (the last 3 came from my old system w/the last one containing my old OS Win7)
    PSU
    SeaSonic X Series X650 Gold (SS-650KM Active PFC F3) 650W ATX12V V2.3/EPS 12V V2.91 SLI Ready CrossFire Ready 80 PLUS GOLD Certified Full Modular Active PFC Power Supply New 4th Gen CPU Certified Hasw
    Case
    Cooler Master Elite 431 Plus
    Cooling
    for my CPU I am currently using the stock cooling fan/system that came with it, and in my case I have 1x COUGAR 14CM CFD Green LED Hydraulic (Liquid) Bearing Ultra Silent Fan, 2x COUGAR CF-V12H Vortex Hydro-Dynamic-Bearing (Fluid) 12CM Silent Cooling Fan, and 1 other 120mm fan that I don't remember the specifics for
    Keyboard
    Logitech Cordless Desktop Pro
    Mouse
    generic Wal Mart ONN optical mouse
    Browser
    Brave
Shawn, your answer to Q3 makes it seem as though even if I re-install Win 11 using your clean install instructions and not installing it using my Microsoft acct, that my Win 11 digital license will still be linked to my MS acct no matter what. Is that correct?

That's correct. It's by design so you will be able to automatically activate with a linked digital license via your Microsoft account.

This doesn't mean you will not be able to manually activate without using the Microsoft account.
 

My Computers

System One System Two

  • OS
    Windows 11 Pro for Workstations
    Computer type
    PC/Desktop
    Manufacturer/Model
    Custom self build
    CPU
    Intel i7-8700K 5 GHz
    Motherboard
    ASUS ROG Maximus XI Formula Z390
    Memory
    64 GB (4x16GB) G.SKILL TridentZ RGB DDR4 3600 MHz (F4-3600C18D-32GTZR)
    Graphics Card(s)
    ASUS ROG-STRIX-GTX1080TI-O11G-GAMING (11GB GDDR5X)
    Sound Card
    Integrated Digital Audio (S/PDIF)
    Monitor(s) Displays
    2 x Samsung Odyssey G75 27"
    Screen Resolution
    2560x1440
    Hard Drives
    1TB Samsung 990 PRO M.2,
    4TB Samsung 990 PRO M.2,
    8TB WD MyCloudEX2Ultra NAS
    PSU
    Seasonic Prime Titanium 850W
    Case
    Thermaltake Core P3 wall mounted
    Cooling
    Corsair Hydro H115i
    Keyboard
    Logitech wireless K800
    Mouse
    Logitech MX Master 3
    Internet Speed
    1 Gbps Download and 35 Mbps Upload
    Browser
    Google Chrome
    Antivirus
    Microsoft Defender and Malwarebytes Premium
    Other Info
    Logitech Z625 speaker system,
    Logitech BRIO 4K Pro webcam,
    HP Color LaserJet Pro MFP M477fdn,
    APC SMART-UPS RT 1000 XL - SURT1000XLI,
    Galaxy S23 Plus phone
  • Operating System
    Windows 11 Pro
    Computer type
    Laptop
    Manufacturer/Model
    HP Spectre x360 2in1 14-eu0098nr (2024)
    CPU
    Intel Core Ultra 7 155H 4.8 GHz
    Memory
    16 GB LPDDR5x-7467 MHz
    Graphics card(s)
    Integrated Intel Arc
    Sound Card
    Poly Studio
    Monitor(s) Displays
    14" 2.8K OLED multitouch
    Screen Resolution
    2880 x 1800
    Hard Drives
    2 TB PCIe NVMe M.2 SSD
    Internet Speed
    Intel Wi-Fi 7 BE200 (2x2) and Bluetooth 5.4
    Browser
    Chrome and Edge
    Antivirus
    Windows Defender and Malwarebytes Premium
so then let me ask you this, if you don't mind answering: since my Win11 license will be tied to my MS acct no matter what at this point, would it not be easier for me to go the route that TheMystic used, and just create another user account with admin privileges, then log in with that new account and delete the account that is tied to my MS acct?
 

My Computer

System One

  • OS
    win11home
    Computer type
    PC/Desktop
    Manufacturer/Model
    DIY
    CPU
    AMD Ryzen 5 5600X
    Motherboard
    MSI MAG B550 Tomahawk
    Memory
    Corsair Vengeance LPX DDR4 2x16GB (32GB total) 3600MHz
    Graphics Card(s)
    Zotac Gaming GeForce GTX 1660 Super (Mem size: 6GB GDDR6/Mem bus:192-bit)
    Sound Card
    on board
    Monitor(s) Displays
    LG Ultragear Gaming Monitor (Model: 24GL600F)
    Screen Resolution
    1920 x 1080
    Hard Drives
    I have 4 hard drives currently connect to my system:
    running my current Win11 OS is a 2TB Western Digital Black (7200 RPM SATA 6Gb/s 64MB Cache)
    Western Digital Green 2TB (IntelliPower SATA 6.0Gb/s 64MB Cache)
    Western Digital Caviar Green 500GB
    WD 1TB (can't access specifics on this drive right now)
    (the last 3 came from my old system w/the last one containing my old OS Win7)
    PSU
    SeaSonic X Series X650 Gold (SS-650KM Active PFC F3) 650W ATX12V V2.3/EPS 12V V2.91 SLI Ready CrossFire Ready 80 PLUS GOLD Certified Full Modular Active PFC Power Supply New 4th Gen CPU Certified Hasw
    Case
    Cooler Master Elite 431 Plus
    Cooling
    for my CPU I am currently using the stock cooling fan/system that came with it, and in my case I have 1x COUGAR 14CM CFD Green LED Hydraulic (Liquid) Bearing Ultra Silent Fan, 2x COUGAR CF-V12H Vortex Hydro-Dynamic-Bearing (Fluid) 12CM Silent Cooling Fan, and 1 other 120mm fan that I don't remember the specifics for
    Keyboard
    Logitech Cordless Desktop Pro
    Mouse
    generic Wal Mart ONN optical mouse
    Browser
    Brave
so then let me ask you this, if you don't mind answering: since my Win11 license will be tied to my MS acct no matter what at this point, would it not be easier for me to go the route that TheMystic used, and just create another user account with admin privileges, then log in with that new account and delete the account that is tied to my MS acct?

You can certainly do that to avoid a clean install.
 

My Computers

System One System Two

  • OS
    Windows 11 Pro for Workstations
    Computer type
    PC/Desktop
    Manufacturer/Model
    Custom self build
    CPU
    Intel i7-8700K 5 GHz
    Motherboard
    ASUS ROG Maximus XI Formula Z390
    Memory
    64 GB (4x16GB) G.SKILL TridentZ RGB DDR4 3600 MHz (F4-3600C18D-32GTZR)
    Graphics Card(s)
    ASUS ROG-STRIX-GTX1080TI-O11G-GAMING (11GB GDDR5X)
    Sound Card
    Integrated Digital Audio (S/PDIF)
    Monitor(s) Displays
    2 x Samsung Odyssey G75 27"
    Screen Resolution
    2560x1440
    Hard Drives
    1TB Samsung 990 PRO M.2,
    4TB Samsung 990 PRO M.2,
    8TB WD MyCloudEX2Ultra NAS
    PSU
    Seasonic Prime Titanium 850W
    Case
    Thermaltake Core P3 wall mounted
    Cooling
    Corsair Hydro H115i
    Keyboard
    Logitech wireless K800
    Mouse
    Logitech MX Master 3
    Internet Speed
    1 Gbps Download and 35 Mbps Upload
    Browser
    Google Chrome
    Antivirus
    Microsoft Defender and Malwarebytes Premium
    Other Info
    Logitech Z625 speaker system,
    Logitech BRIO 4K Pro webcam,
    HP Color LaserJet Pro MFP M477fdn,
    APC SMART-UPS RT 1000 XL - SURT1000XLI,
    Galaxy S23 Plus phone
  • Operating System
    Windows 11 Pro
    Computer type
    Laptop
    Manufacturer/Model
    HP Spectre x360 2in1 14-eu0098nr (2024)
    CPU
    Intel Core Ultra 7 155H 4.8 GHz
    Memory
    16 GB LPDDR5x-7467 MHz
    Graphics card(s)
    Integrated Intel Arc
    Sound Card
    Poly Studio
    Monitor(s) Displays
    14" 2.8K OLED multitouch
    Screen Resolution
    2880 x 1800
    Hard Drives
    2 TB PCIe NVMe M.2 SSD
    Internet Speed
    Intel Wi-Fi 7 BE200 (2x2) and Bluetooth 5.4
    Browser
    Chrome and Edge
    Antivirus
    Windows Defender and Malwarebytes Premium
I have a question:

Background: finally nearly finished with building the latest DA.VW should be W11pro compatible and will be installing from a fresh retail version.
My limited foray into W10p on the previous attempt to build a similar system was a disaster and it was only after abandoning the attempt that I discovered the probable reason for the failures. Water under the bridge. New LGA1700 based system with DDR5 etc. about to go online.

In those days of working with W10p, @Kari had a tutorial for putting all Windows user stuff on a different drive -- something I've been a fan of for decades. I have glanced through this new Clean Install tutorial and don't find a reference to it. So my question is: can it be done in W11pro and is it the same process as Kari defined for W10 -- OR -- is it now better to MOVE the folders after the install completes?
 

My Computer

System One

  • OS
    Windows 11
    Computer type
    PC/Desktop
    Manufacturer/Model
    self-made
    CPU
    Intel i9-12900KF
    Motherboard
    Asus ProArt Z690 Creator WiFi
    Memory
    Trident Z5 DDR5-5600 16GBx4
    Graphics Card(s)
    Asus RTX 3080
    Monitor(s) Displays
    2 LG
    Hard Drives
    Sabrent NVMe M.2 Rocket 4.0 2TB drive (os)
    Corsair NVMe M.2 Gen3x4 8TB drive (user)
    PSU
    Be quiet Dark Power Pro 12 (1200w)
    Case
    Fractal Designs (pos)
    Cooling
    Asus Ryujin II AIO cooler
    Antivirus
    Malwarebytes Premium 4.5.26
    Other Info
    note: os and os-user files were orginally installed on two different drives for reasons related to the content creation purpose for this computer. There are multiple additional hdd drives on this computer but it seems unnecessary to mention them as they are likely to be germane to the current problem.
Is it possible to fresh install Windows 11 by adding the data partition with the recovery partition position after it, not after the Windows partition? If possible, how to do it? What are the pros and cons with this kind of partition configuration?
 

My Computer

System One

  • OS
    Windows 10
Is it possible to fresh install Windows 11 by adding the data partition with the recovery partition position after it, not after the Windows partition? If possible, how to do it? What are the pros and cons with this kind of partition configuration?
No - it will always reduce size of Windows partition to make space to install Winre.

There is no advantage in putting recover partition after a data partition. Attempting to do so can lead to winre being disabled if you do not do it correctly.

So order should be

1 EFI
2 MSR (hidden)
3 OS system (C drive)
4 Recovery partition
5 Data partition
 

My Computer

System One

  • OS
    Windows 10 Pro + others in VHDs
    Computer type
    Laptop
    Manufacturer/Model
    ASUS Vivobook 14
    CPU
    I7
    Motherboard
    Yep, Laptop has one.
    Memory
    16 GB
    Graphics Card(s)
    Integrated Intel Iris XE
    Sound Card
    Realtek built in
    Monitor(s) Displays
    N/A
    Screen Resolution
    1920x1080
    Hard Drives
    1 TB Optane NVME SSD, 1 TB NVME SSD
    PSU
    Yep, got one
    Case
    Yep, got one
    Cooling
    Stella Artois
    Keyboard
    Built in
    Mouse
    Bluetooth , wired
    Internet Speed
    72 Mb/s :-(
    Browser
    Edge mostly
    Antivirus
    Defender
    Other Info
    TPM 2.0

Latest Support Threads

Back
Top Bottom