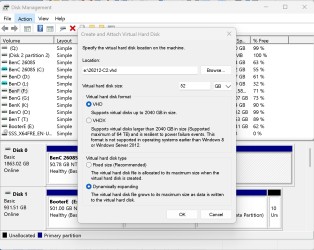
This tutorial will show you how to create and set up a VHD or VHDX virtual hard disk file in Windows 11.
Virtual hard disks (VHDs) are disk image file formats that have similar functionalities to a physical hard drive and are designed primarily for use with Hyper-V virtual machines.
When you attach a .vhd or .vhdx file, it will be mounted as a drive in File Explorer > This PC to open and access.
Reference:

Manage Virtual Hard Disks (VHD)
Learn about Virtual Hard Disks (VHD) and how to manage them with Disk Management, where you can view, create, attach, and detach them in a computer.
learn.microsoft.com
You must be signed in as an administrator to create a VHD or VHDX file.
Here's How:
1 Open Settings (Win+I).
2 Click/tap on System on the left side, and click/tap on Storage on the right side. (see screenshot below)
3 Click/tap on Advanced storage settings on the right side to expand it, and click/tap on Disks & volumes. (see screenshot below)
4 Click/tap on the Create VHD button at the top. (see screenshot below)
5 Enter the Virtual hard disk name you want for this VHD or VHDX file. (see screenshot below)
6 Perform the following steps: (see screenshots below)
- Click/tap on Browse.
- Navigate to and select the drive or folder you want to save the this VHD or VHDX file to.
- Click/tap on Select Folder.
7 Select MB, GB, or TB in the Virtual hard disk size drop menu, and enter a size you want for this VHD or VHDX file. (see screenshot below)
8 Select VHD or VHDX for the Virtual hard disk format you want to use. (see screenshot below)
VHD = Supports virtual disks up to 2040GB in size.
VHDX = Supports virtual disks up to 64TB in size and offers more resilient protection against unexpected IO failure caused by issues like power outage).
9 Select Fixed size or Dynamically expanding for the Virtual hard disk type you want to use. (see screenshot below)
Fixed size = This virtual hard disk file is allocated to the maximum size specified at step 7 when created (Recommended for efficiency).
Dynamically expanding = Grows to maximum size specified at step 7 as data is written.
10 Click/tap on Create. (see screenshot below)
11 Select (dot) GPT or MBR for which Partition Style you want to use for this VHD or VHDX disk, and click/tap on Initialize. (see screenshot below)

GUID Partition Table - Wikipedia
Master boot record - Wikipedia
12 Enter the Label (drive name) you want for this VHD or VHDX disk. (see screenshot below)
13 Select an available Drive Letter you want assigned to this VHD or VHDX disk. (see screenshot below)
14 Select NTFS, FAT, FAT32, or REFS File System you want to use for this VHD or VHDX disk. (see screenshot below)

NTFS overview
Learn how NTFS provides a full set of features including security descriptors, encryption, disk quotas, and rich metadata in Windows.
learn.microsoft.com

Overview of FAT, HPFS, and NTFS File Systems - Windows Client
Describes the differences between File Allocation Table (FAT), High Performance File System (HPFS), and NT File System (NTFS) under Windows NT, and their advantages and disadvantages.
learn.microsoft.com

Resilient File System (ReFS) overview
Learn more about: Resilient File System (ReFS) overview
learn.microsoft.com
15 Enter the Size in MB of unallocated space you want to use for this VHD or VHDX disk. (see screenshot below)
Max is the size you entered at step 7.
16 You can click/tap on Advanced to expand it open to change any available settings below you want: (see screenshot below)
- Browse to and select a Folder Path to Mount in.
- Select Allocation Unit Size.
- Check or uncheck Perform a quick format.
- Check or uncheck Enable file and folder compression.
17 Click/tap on Format. (see screenshot below)
18 The VHD or VHDX file will now be created at the location specified at step 6, and the VHD or VHDX will now get attached and mounted as a drive with the drive letter specified at step 13. (see screenshots below)
19 You can now close Settings if you like.
That's it,
Shawn Brink
Last edited:


