This tutorial will show you how to enable or disable audio enhancements for sound device(s) in Windows 11.
Audio enhancement packages are designed to enhance your specific audio hardware performance and quality.
Available audio enhancements will vary depending on the manufacturer.
Sometimes these audio enhancements can cause problems with audio and sound. If you encounter an audio or sound problem, you can try disabling audio enhancements to see if it may solve the problem.
Reference:
Disable Audio Enhancements - Microsoft Support
Contents
- Option One: Enable or Disable Audio Enhancements in Settings
- Option Two: Enable or Disable Audio Enhancements in Control Panel
1 Open Settings (Win+I).
2 Click/tap on System on the left side, and click/tap on Sound on the right side. (see screenshot below)
3 Click/tap on All sound devices. (see screenshot below)
4 Click/tap on an output or input sound device you want to enable or disable audio enhancements for. (see screenshot below)
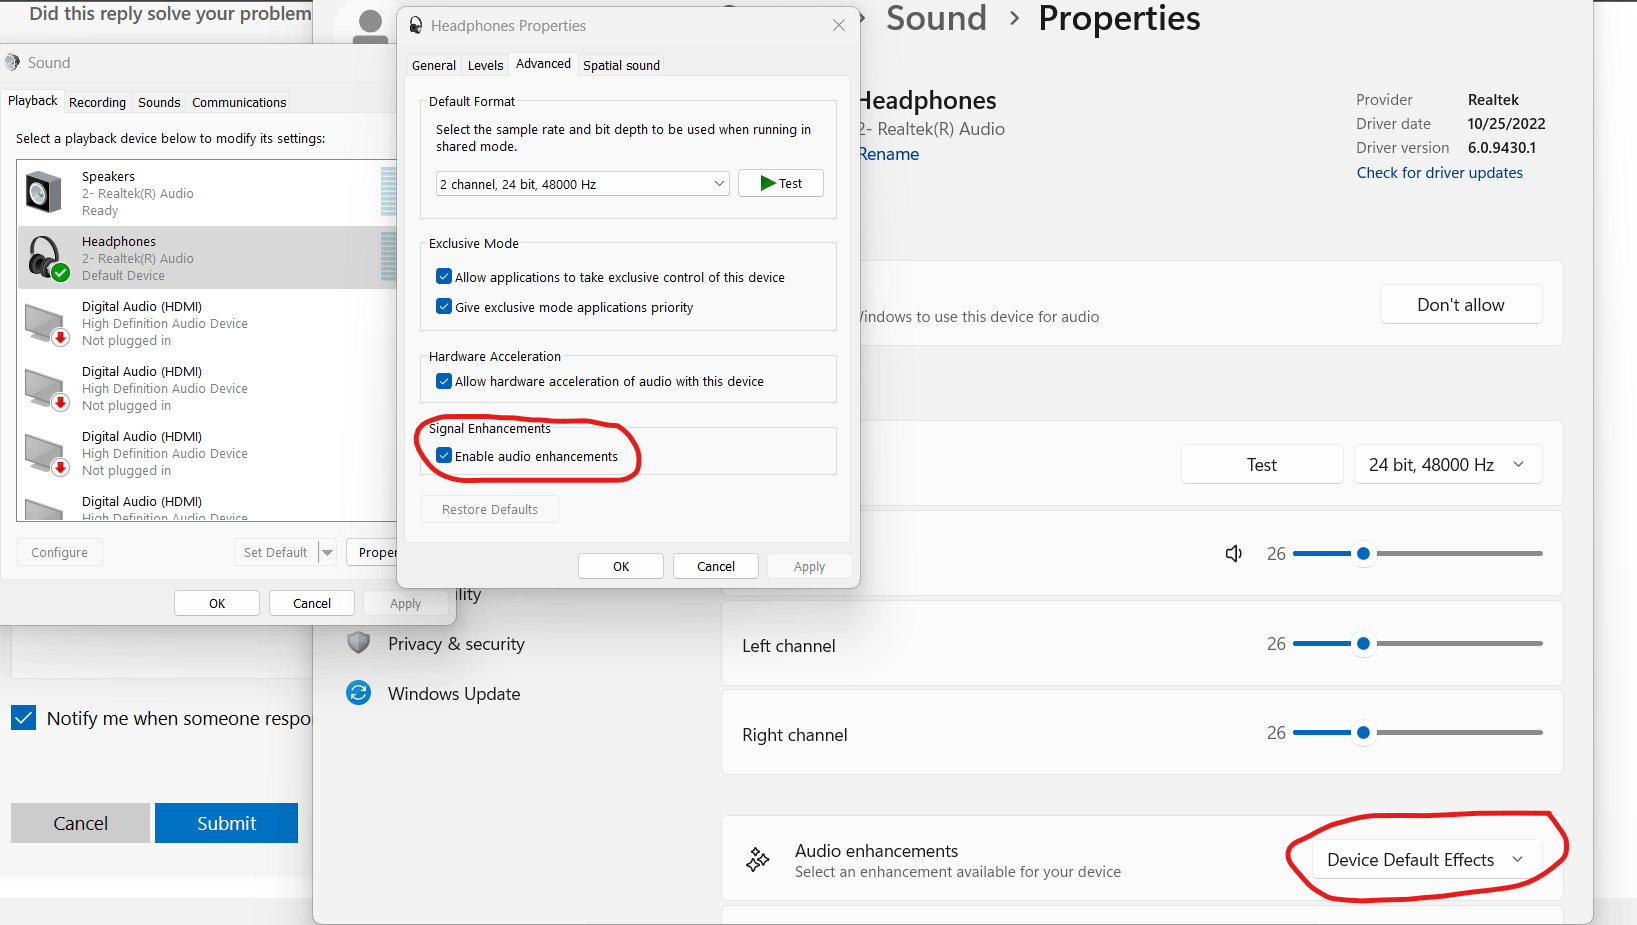
5 Select Device Default Effects (enable - default) or Off (disable) for what you want in the Audio enhancements drop menu. (see screenshots below)
6 You can now close Settings if you like.
1 Open the Control Panel (icons view), and click/tap on the Sound icon.
2 Perform the following actions: (see screenshots below)
- Click/tap on the Playback or Recording tab for the type of device you want to enable or disable audio enhancements for.
- Select the sound device you want to enable or disable audio enhancements for.
- Click/tap on the Properties button.
3 Perform the following actions: (see screenshots below)
- Click/tap on the Enhancements or Advanced tab.
Depending on the manufacturer, the setting to disable audio enhancements will either be on the Enhancements tab, or the Advanced tab.
- Check or uncheck the available audio enhancements you want to enable or disable.
- Click/tap on OK.
4 Click/tap on OK. (see screenshots below)
That's it,
Shawn Brink
Last edited:


