This tutorial will show you how to enable or disable Quick Machine Recovery in Windows 11.
Quick machine recovery (QMR) is a feature that enables the recovery of Windows devices when they encounter critical errors that prevent them from booting. QMR automatically detects, diagnoses, and remediates boot critical issues from WinRE, helping restore productivity without requiring hands on, in-person intervention. This feature can automatically search for remediations in the cloud and recover from widespread boot failures, significantly reducing the burden on IT administrators when multiple devices are affected.
Building on the foundation of Startup Repair, quick machine recovery uses a secure and connected Windows Recovery Environment to scan Windows Update for remediation options. This allows devices to be recovered without requiring manual intervention.
QMR is enabled by default on Windows Home and will be soon enabled on Pro devices that are not managed by IT. It requires Windows 11 24H2 or 25H2. On managed Windows Pro and Enterprise devices, QMR needs to be enabled by IT policy, and soon can be enabled just-in-time by Autopatch management. Microsoft is introducing the preview of QMR management in Windows Autopatch. Autopatch empowers IT administrators with comprehensive control over the deployment of QMR updates, including approvals, scheduling, alerting, and reporting. To discover more details, visit the Ignite Autopatch blog post and attend the Ignite breakout session BRK345: Resilient by design: How Windows has evolved with new recovery tools for a demo.
There are two main settings of quick machine recovery: cloud remediation and auto remediation.
- When enabled, devices connect to the network and utilize Windows Update during recovery scenarios
- When disabled, Windows uses Startup Repair as a local recovery option
- When enabled, the device connects automatically to Windows Update and tries to find a remediation. If a solution isn't found on the first attempt, the device retries without requiring manual intervention
- When disabled or not configured, the device requires manual intervention to continue the recovery process
- Device crash: When the device fails to boot repeatedly, the system automatically detects the issue and initiates the recovery process
- Boot to recovery: The device boots into the recovery environment to initiate the quick machine recovery process
- Network connection: After a network connection is established, the device scans Windows Update for remediations
- Remediation
- If no solution is found, the system retries the process based on the configured retry scanning intervals and time-outs
- If a solution is found, the system downloads and applies it
- Reboot: After a remediation is applied, the device reboots:
- If the solution is successful, the device boots into Windows
- If the solution fails, the device reboots into the recovery environment again and the process repeats from step 2

Starting with Windows 11 build 26100.4770 (24H2), Quick machine recovery is now available and enabled by default on Windows Home and will be soon enabled on Pro devices that are not managed by IT. When enabled, it automatically detects and fixes widespread issues on Windows 11 devices using the Windows Recovery Environment (WinRE). This reduces downtime and avoids the need for manual fixes. If a device experiences a widespread boot issue, it enters WinRE, connects to the internet, and Microsoft can deliver a targeted fix through Windows Update. IT admins can enable or customize this experience for their organization through the Intune Settings Catalog UI using the RemoteRemediationCSP. There is also a dedicated quick machine recovery settings page available under System > Recovery > Quick machine recovery. Today it’s enabled by default for home users.
A more streamlined interface appears during an unexpected restart This updated design aligns with Windows 11’s visual style and helps you return to work faster. The screen displays a more readable layout while keeping the technical details visible. This screen appears with a black background.
Starting with Windows 11 build 26200.5518 (Dev 24H2) and build 26120.3653 (Beta 24H2), as a follow up to the last announcement of quick machine recovery, the test remediation package is now available for Windows Insiders to experience the full capabilities of QMR in action. Microsoft encourages Windows Insiders to test it today. The remediation package “Quick machine recovery update for Windows 11” will be automatically installed by QMR when “test mode” is activated. To verify the quick machine recovery remediation is installed, go to Settings > Windows Update > Update history. The remediation should be listed under Quality updates. Please note that the ability to see the remediation package in your Windows Update history is gradually rolling out so not everyone will see this listed there right away. To provide feedback, simply open the Feedback Hub app on your Windows device, navigate to Recovery and Uninstall > Quick Machine Recovery, and share your insights. Stay tuned for further updates and enhancements as Microsoft continues to improve the resilience and reliability of Windows.
Starting with Windows 11 build 26100.7309 (24H2), build 26200.7309 (25H2), and build 2800.1764 (26H1), Microsoft is updating Quick Machine Recovery in Windows – Microsoft Support make getting back to a working PC clearer and faster. The experience in both Windows Settings and the Windows Recovery Environment (WinRE) has been streamlined so options are easier to find and use. On PCs with the settings “quick machine recovery” and “automatically check for solutions” both enabled, QMR now runs a one‑time scan by default instead of repeating scans in a loop. If a fix isn’t available right away, you won’t be left waiting; QMR will quickly point you to the most appropriate recovery options to get you back up and running.
Starting with Windows 11 build 26100.7922 (24H2) and 26200.9822 (25H2), Quick machine recovery (QMR) will now be turned on automatically for Windows Professional devices that are not domain joined. These devices will get the same recovery features as Windows Home users. For enterprise computers that are domain joined, nothing changes—QMR will stay off unless your organization turns it on.
References:

Ignite 2025: Windows 11 Resiliency with new "Quick machine recovery" and "Point-in-time restore" recovery tools
 www.elevenforum.com
Get started with quick machine recovery in Windows - Windows IT Pro Blog
 techcommunity.microsoft.com

Resilience in action for Windows devices - Windows IT Pro Blog
techcommunity.microsoft.com
You must be signed in as an administrator to enable or disable Quick Machine Recovery.
Quick Machine Recovery (QMR) will not work at boot if it cannot connect to the internet.
This is not an issue with an Ethernet (LAN) connection. If you use a Wi-Fi (WLAN) connection, then you should use Option Two to configure a custom settings.xml file with your Wi-Fi SSID and password.

- Option One: Enable or Disable Quick Machine Recovery in Settings
- Option Two: Configure Quick Machine Recovery using Custom settings.xml
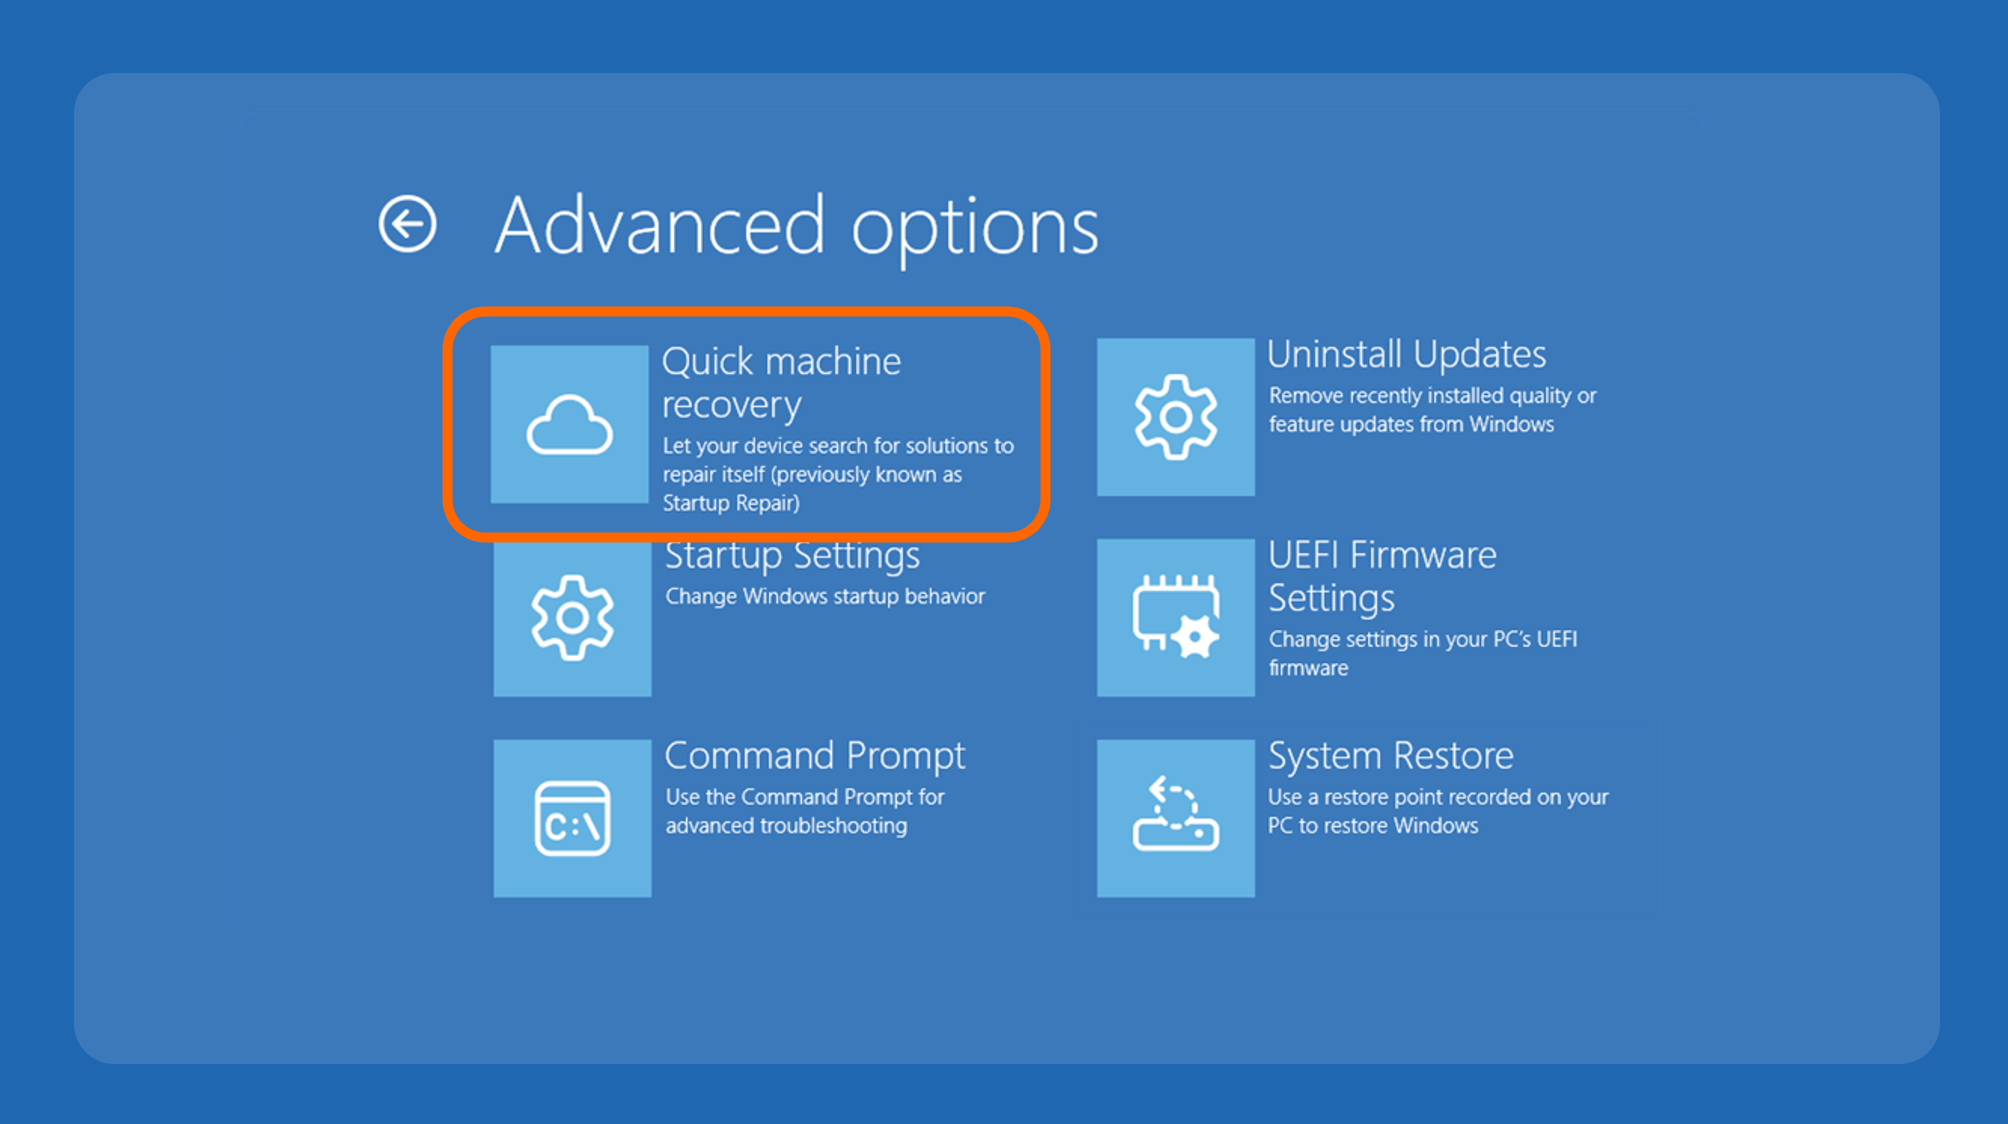
EXAMPLE: Quick Machine Recovery in WinRE Advanced Options
1 Open Settings (WIn+I).
2 Click/tap on System on the left side, and click/tap on Recovery on the right side. (see screenshot below)
3 Under "Recovery options", click/tap on Quick machine recovery. (see screenshot below)
4 Do step 5 (on) or step 6 (off) below for what you want.
This is the default setting.
- Turn on or off Continue searching if a solution isn't found (auto remediation) for what you want.
- Turn on or off Automatically check for solutions for what you want.
- If you turned on Continue searching if a solution isn't found (auto remediation), select a Look for solutions every time you want in the drop menu.
- If you turned on Automatically check for solutions, select a Look for solutions time you want in the drop menu.
7 You can now close Settings if you like.
This option is useful when you use a Wi-Fi connection, and need to configure a QMR settings.xml file to specify your Wi-Fi SSID and password for connection.

Quick Machine Recovery
1 Open the Notepad app.
2 Copy and paste the code below into Notepad. (see screenshot below step 3)
<?xml version='1.0' encoding='utf-8'?>

<WindowsRE>
    <WifiCredential>
        <Wifi ssid="WiFi-SSID" password="WiFi-Password" />
    </WifiCredential>
    <CloudRemediation state="1" />
    <AutoRemediation state="1" totalwaittime="180" waitinterval="0"/>
    <Headless state="0"/>
</WindowsRE>
3 Change the code below in Notepad for what you want configured: (see screenshot below)
- Replace WiFi-SSID in the code with the actual SSID for your Wi-Fi connection.
- Replace WiFi-Password in the code with the actual password for your Wi-Fi connection.
- CloudRemediation state 1 = QMR enabled, and 0 = QMR disabled
- AutoRemediation state 1 = "Automatically check for solutions" enabled, and 0 = "Automatically check for solutions" disabled
- totalwaittime is "Restart every" time in minutes (ex: "180")
- waitinterval is "Look for solutions" time in minutes (ex: "0")
4 When finished, click/tap on File on the toolbar, and click/tap on Save as. (see screenshot below)
5 Perform the steps below to save the settings.xml file where you want to keep it on your PC: (see screenshot below)
- Navigate to and select the folder (ex: "C:\QMR") you want to save the settings.xml file at.
- Select All files (*.*) in the Save as type drop menu.
- Type settings.xml as the File name.
- Click/tap on Save.
6 Open Windows Terminal (Admin), and select Command Prompt.
7 Type the command below into into Terminal (Admin), and press Enter to apply the custom settings.xml file. (see screenshot below)
reagentc.exe /setrecoverysettings /path "<Full path of settings.xml file>"Substitute <Full path of settings.xml file> in the command above with the actual full path of your custom QMR settings.xml file location from step 5.
For example: reagentc.exe /setrecoverysettings /path "C:\QMR\settings.xml"
8 Copy and paste the command below into Terminal (Admin), and press Enter to verify your QMR settings. (see screenshot below)
reagentc.exe /getrecoverysettings9 You can now close the Terminal window if you like.
That's it,
Shawn Brink