This tutorial will show you how to enable or disable Snap Assist for your account in Windows 11.
The Snap windows feature in Windows allows you to automatically resize and arrange windows on your screen.
When you snap a window, Snap Assist will show what you can snap next to it. Snap Assist significantly speeds up the process of snapping windows side-by-side by offering you a choice of windows to snap by just clicking on a window to snap it.
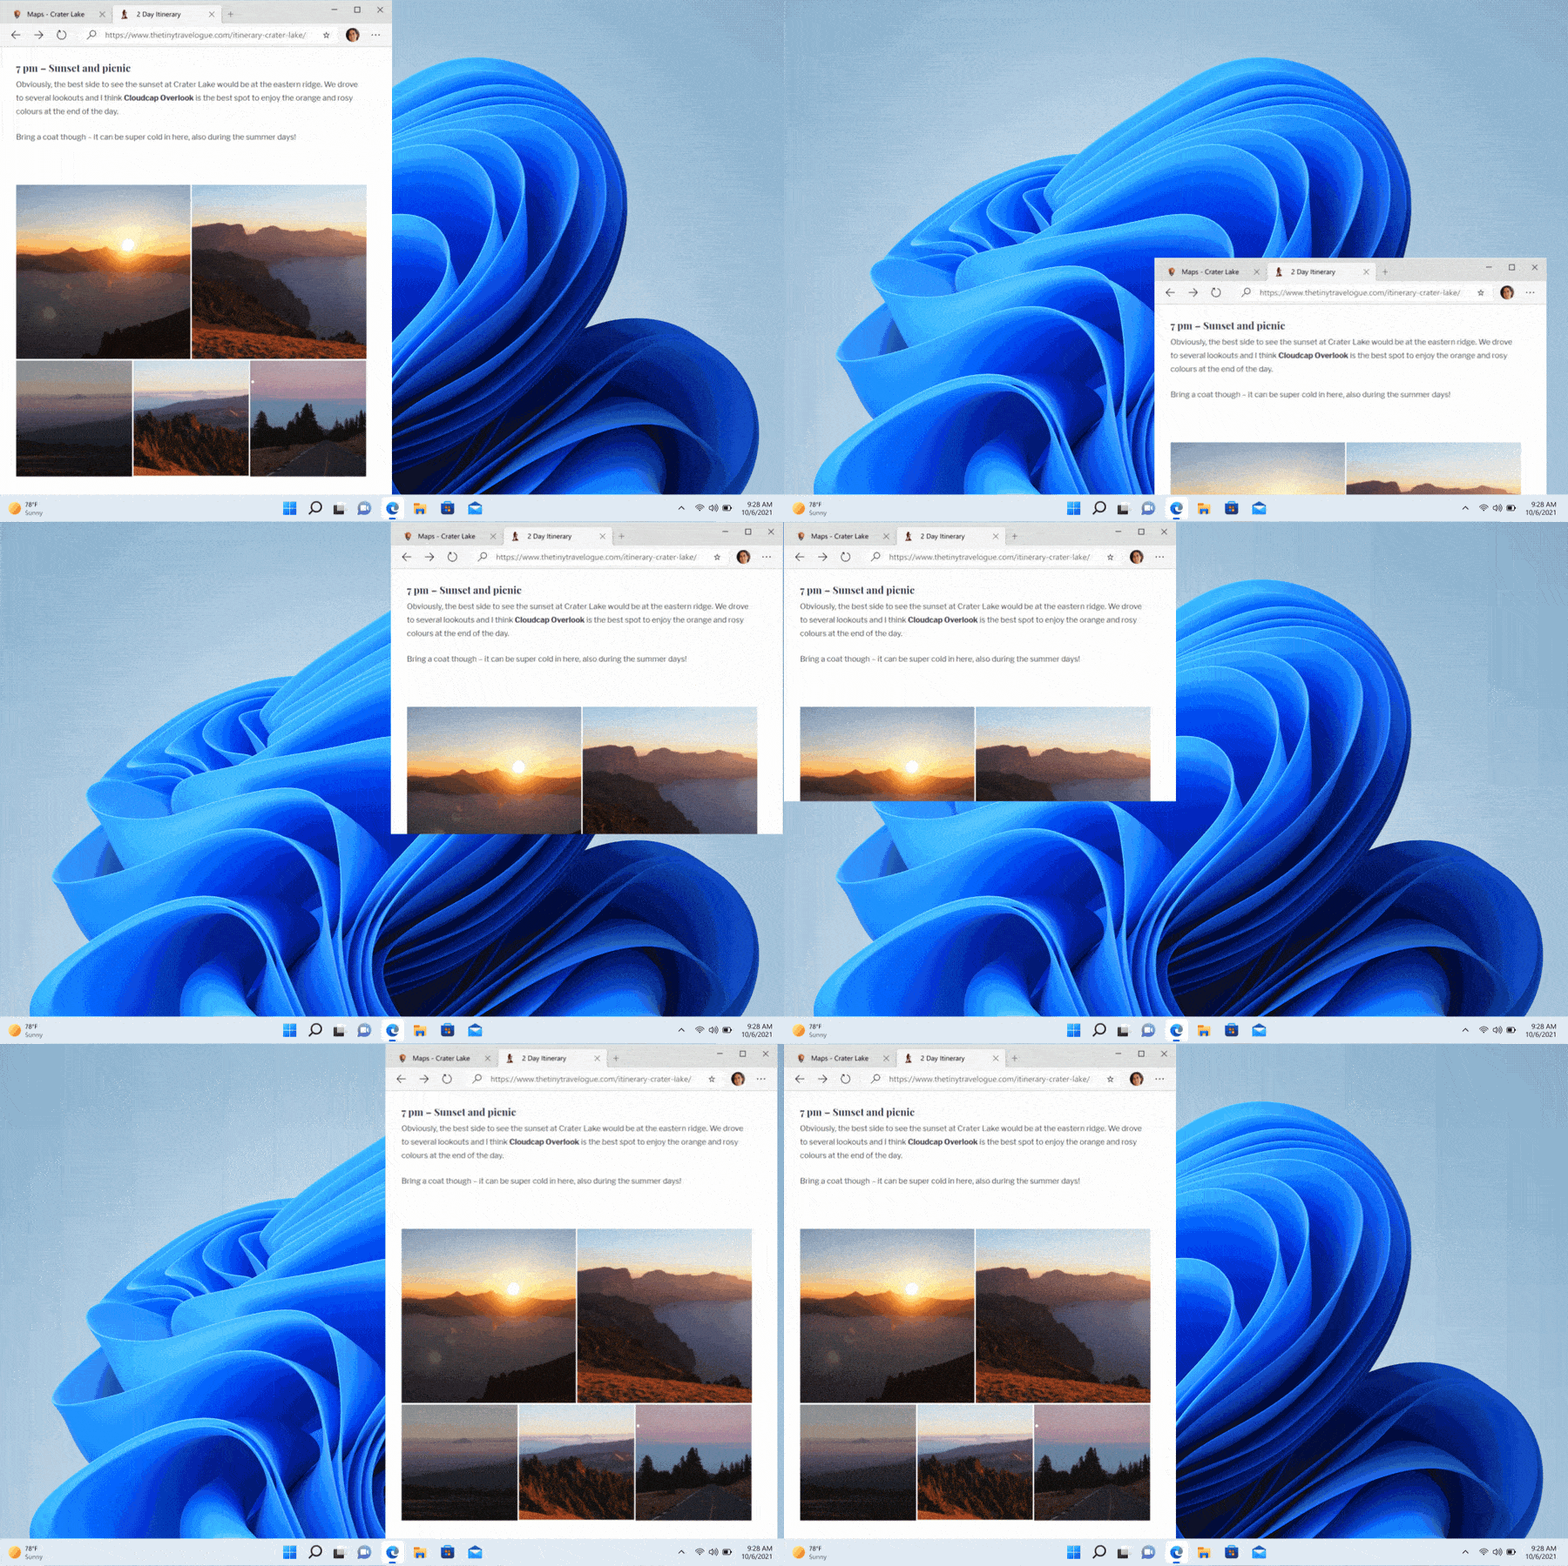
Starting with Windows 11 build 22557, Microsoft improved snap assist to seamlessly animate between zones in a layout for a delightful end-to-end snapping experience. Microsoft has updated the transition animation that shows going from one snapped window state to another. Snap some windows using the snap assist, move windows from one configuration to another and observe the fluidity of the transition with our new animations.
Starting with Windows 11 build 22563, Microsoft has made it even easier to snap the most relevant windows next to each other side by side by introducing Microsoft Edge tabs as suggested windows in snap assist. When a window is snapped, you will now see 3 of your most recent Edge tabs shown (by default) as suggestions.
Contents
- Option One: Enable or Disable Snap Assist in Settings
- Option Two: Enable or Disable Snap Assist using REG file
- Option Three: Enable or Disable Snap Assist in Registry Editor
EXAMPLE: Snap Assist "When I snap a window, show what I can snap next to it"

1 Open Settings (Win+I).
2 Click/tap on System on the left side, and click/tap on Multitasking on the right side. (see screenshot below)
Open Multitasking settings
3 Click/tap on Snap windows on the right side to expand it open. (see screenshot below step 4)
4 Check (enable - default) or Uncheck (disable) When I snap a window, suggest what I can snap next to it for what you want on the right side under Work with multiple windows.
The When I snap a window, suggest what I can snap next to it setting will be disabled and grayed out if Snap windows is not turned on.
5 You can now close Settings if you like.
This option will not work when Administrator protection is turned on.
1 Do step 2 (enable) or step 3 (disable) below for what you would like to do.
2 To Enable Snap Assist
This is the default setting.
A) Click/tap on the Download button below to download the file below, and go to step 4 below.
Turn_on_Snap_Assist_for_current_user.reg
Download
(Contents of REG file for reference)
Code:
Windows Registry Editor Version 5.00

[HKEY_CURRENT_USER\Control Panel\Desktop]
"WindowArrangementActive"="1"

[HKEY_CURRENT_USER\Software\Microsoft\Windows\CurrentVersion\Explorer\Advanced]
"SnapAssist"=dword:00000001
3 To Disable Snap Assist
A) Click/tap on the Download button below to download the file below, and go to step 4 below.
Turn_off_Snap_Assist_for_current_user.reg
Download
(Contents of REG file for reference)
Code:
Windows Registry Editor Version 5.00

[HKEY_CURRENT_USER\Software\Microsoft\Windows\CurrentVersion\Explorer\Advanced]
"SnapAssist"=dword:00000000
4 Save the .reg file to your desktop.
5 Double click/tap on the downloaded .reg file to merge it.
6 When prompted, click/tap on Run, Yes (UAC), Yes, and OK to approve the merge.
7 Sign out and sign in or restart the computer to apply.
8 You can now delete the downloaded .reg file if you like.
1 Open Registry Editor (regedit.exe).
2 Navigate to the key location below in the left pane of Registry Editor. (see screenshot below step 3)
HKEY_USERS\<SID>\Software\Microsoft\Windows\CurrentVersion\Explorer\Advanced
Substitute <SID> in the key path above with the actual SID for the account you want to apply this to.
For example:
HKEY_USERS\S-1-5-21-2498639629-3946114050-4100787084-1001\Software\Microsoft\Windows\CurrentVersion\Explorer\Advanced
3 In the right pane of the Advanced key, double click/tap on the SnapAssist DWORD to modify it. (see screenshot below)
4 Enter 0 (disable) or 1 (enable - default) for what you want, and click/tap on OK. (see screenshot below)
5 Close Registry Editor.
6 Sign out and sign in or restart the computer to apply.
That's it,
Shawn Brink
Related Tutorials
- Snap windows into Layouts in Windows 11
- Turn On or Off Snap windows in Windows 11
- Enable or Disable Snap Layouts for Maximize Button in Windows 11
- Enable or Disable Snap Layouts on Top of Screen in Windows 11
- Enable or Disable Drag to Snap windows in Windows 11
- Enable or Disable Snap Window without Dragging All the Way to Screen Edge in Windows 11
- Enable or Disable Simultaneously Resize any Adjacent Snapped window in Windows 11
- Enable or Disable Show Snap Groups on Alt+Tab, Task View, and Taskbar in Windows 11
Attachments
Last edited:


