NOTE: The following scenario is not mine. A friend encountered this situation...
Let's call the two people involved here Bill and John.
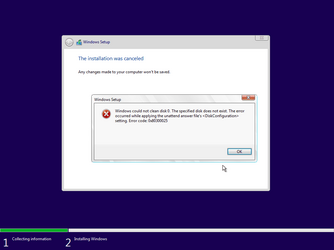
Bill has a computer at home where his Windows drive failed. His important data is backed up, but he his backup is NOT an image backup of the C: drive, just a data backup. Bill has no choice but to replace the drive and install Windows from scratch. John offers to help and brings with him a Windows installation UFD from which Windows can be installed. When John arrives at Bill's home, he realizes that his UFD has an answer file that will automatically wipe disk zero and start installing Windows to it with no user intervention as soon as he boots from that drive. However, he is not sure that the Windows drive in Bill's system is in fact disk zero. In addition, his answer file is configured to create user accounts and passwords appropriate for his systems, not for Bill's system. Since Bill has no other system and John didn't bring his laptop with him, John has to go home, remove the answer file, then go back to Bill's house to install Windows.
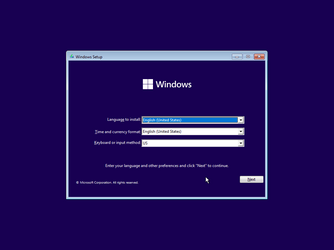
So, John brings this question to me: Is there any hot key that you can press during the boot from a thumb drive that will tell Windows setup to ignore the autounattend.xml answer file? I have not been able to find any way to do this, but one would think that logically there should be some way to do this.
Is anyone aware of any way to accomplish this?
Let's call the two people involved here Bill and John.
Bill has a computer at home where his Windows drive failed. His important data is backed up, but he his backup is NOT an image backup of the C: drive, just a data backup. Bill has no choice but to replace the drive and install Windows from scratch. John offers to help and brings with him a Windows installation UFD from which Windows can be installed. When John arrives at Bill's home, he realizes that his UFD has an answer file that will automatically wipe disk zero and start installing Windows to it with no user intervention as soon as he boots from that drive. However, he is not sure that the Windows drive in Bill's system is in fact disk zero. In addition, his answer file is configured to create user accounts and passwords appropriate for his systems, not for Bill's system. Since Bill has no other system and John didn't bring his laptop with him, John has to go home, remove the answer file, then go back to Bill's house to install Windows.
So, John brings this question to me: Is there any hot key that you can press during the boot from a thumb drive that will tell Windows setup to ignore the autounattend.xml answer file? I have not been able to find any way to do this, but one would think that logically there should be some way to do this.
Is anyone aware of any way to accomplish this?
My Computers
-
At a glance
Win11 Pro 25H2 (RTM+)Intel i7-14650HX32 GBNo GPU - Built-in Intel Graphics- OS
- Win11 Pro 25H2 (RTM+)
- Computer type
- PC/Desktop
- Manufacturer/Model
- Acemagic
- CPU
- Intel i7-14650HX
- Memory
- 32 GB
- Graphics Card(s)
- No GPU - Built-in Intel Graphics
- Sound Card
- Integrated
- Monitor(s) Displays
- Varies as machine will often be moved to locations with different monitors
- Screen Resolution
- Varies
- Hard Drives
- 1 x 1TB Gen 4 NVMe SSD
- PSU
- 120W Power Brick
- Keyboard
- Corsair K70 Max RGB Magnetic Keyboard
- Mouse
- Logitech MX Master 3
- Internet Speed
- 1Gb Up / 1 Gb Down
- Browser
- Edge
- Antivirus
- Windows Defender
-
At a glance
Win11 Pro 25H2 (RTM+)Intel i7-1255U16 GBIntel Iris Xe Graphics- Operating System
- Win11 Pro 25H2 (RTM+)
- Computer type
- Laptop
- Manufacturer/Model
- Lenovo ThinkBook 13x Gen 2
- CPU
- Intel i7-1255U
- Memory
- 16 GB
- Graphics card(s)
- Intel Iris Xe Graphics
- Sound Card
- Realtek® ALC3306-CG codec
- Monitor(s) Displays
- 13.3-inch IPS Display
- Screen Resolution
- WQXGA (2560 x 1600)
- Hard Drives
- 2 TB 4 x 4 NVMe SSD
- PSU
- USB-C / Thunderbolt 4 Power / Charging
- Keyboard
- Backlit, spill resistant keyboard
- Mouse
- Buttonless Glass Precision Touchpad
- Internet Speed
- 1Gb Up / 1Gb Down
- Browser
- Edge
- Antivirus
- Windows Defender
- Other Info
- WiFi 6e / Bluetooth 5.1 / Facial Recognition / Fingerprint Sensor / ToF (Time of Flight) Human Presence Sensor