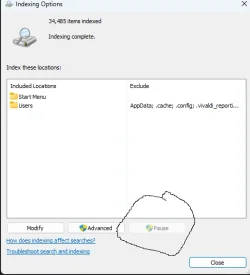
This tutorial will show you how to temporarily pause search indexing in Windows 10 and Windows 11.
Search Indexing in Windows improves the speed and efficiency of searches by creating an index of files and their properties on your device. This index allows Windows to quickly locate and retrieve the information you need.
Indexing is the process of looking at files, email messages, and other content on your PC and cataloging their information, such as the words and metadata in them. When you search your PC after indexing, it looks at an index of terms to find results faster.
When you first run indexing, it can take up to a couple hours to complete. After that, indexing will run in the background on your PC as you use it, only re-indexing updated data.
By default, the indexer backoff feature will use logic to reduce indexing speed when user or system activity is high, and will automatically continue at full speed when activity is not high.
If needed, you can manually pause indexing temporarily. Indexing will resume automatically after 15 minutes.
Reference:
Search indexing in Windows | Microsoft Support
Learn more about how indexing affects searches in Windows.
 support.microsoft.com
You must be signed in as an administrator to pause search indexing.
Here's How:
1 Open Settings (Win+I).
2 Click/tap on Privacy & security on the left side, and click/tap on Search on the right side. (see screenshot below)
3 Under Related settings, click/tap on Advanced indexing options. (see screenshot below)
4 If indexing is in progress, you can click/tap on the Pause button. (see screenshot below)
5 Indexing will now be temporarily paused for 15 minutes, then will resume automatically. (see screenshots below)
If you want to manually resume indexing before the 15 minutes is over, then you can perform either action below:
1) Restart the Windows Search service to continue indexing where it left off when paused.
OR
2) Rebuild the index to start indexing fresh from scratch.
That's it,
Shawn Brink
Last edited: