I updated to this BIOS and was wondering what to do next. I have 2 links.
Updating Microsoft Secure Boot keys | Windows IT Pro blog
A new Microsoft Windows UEFI CA 2023 will replace the existing Windows Production 2011 CA.techcommunity.microsoft.com
then this link
I haven't run the instructions in link 1 or link 2. I did check to see if I had the 2023 certificates and it said false. I am a bit confused on what to do.
Do I run Sheikh's script? or do I follow instructions in link 1?
I am incredibly confused I only just started reading up on this a week ago.
Thanks,
James.

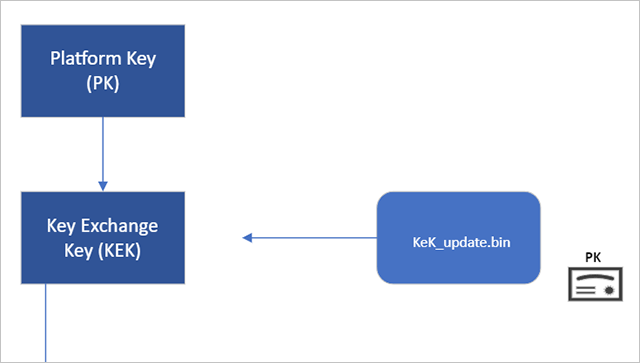
There are many steps to fully locking down Secure Boot, and some of the steps may make your computer unbootable if done wrong. Here is a summary of the steps:
0. Update to the latest build of Windows 11.
1. Update DB.
2. Install updated bootloader in the EFI partition.
3. Update DBX.
4. Update KEK.
5. Install SVN in firmware.
6. Update all external boot drives with new bootloaders.
7. Revoke 2011 PCA Production certificate in DBX. (This is optional at this point and is the most dangerous step.)
8. Install the latest SKUSiPolicy.P7b file into the EFI partition. (Also, optional. Also, somewhat risky.)
Microsoft has recently released a registry setting that will do Steps 1-4 at one go. But quite often the KEK update fails. The KEK update will only work if your computer is still supported; the manufacturer has to supply an updated file to Microsoft. If your computer is no longer supported, then you have to use a tool called Mosby to create a bootable drive. It wipes out all the Secure Boot keys, including the PK, and replaces them.
Finally, several people on ElevenForum have published Powershell scripts that will check the Secure Boot status of your machine to see if the updates took. It is wise to check after each step.
Word of warning, based on experience: If you reset any Secure Boot keys in the UEFI, then cancel out of any changes, the changes to the Secure Boot keys will still take place. I rendered one computer unbootable this way. Fortunately, Mosby came to the rescue!
My Computer
At a glance
Windows 11 ProIntel i9-13900KF32 GB Corsair Vengeance DDR5-6000 MHzASUS Dual GeForce RTX 4070
- OS
- Windows 11 Pro
- Computer type
- PC/Desktop
- Manufacturer/Model
- iBUYPOWER
- CPU
- Intel i9-13900KF
- Motherboard
- ASUS ROG Maximus Z790 Hero
- Memory
- 32 GB Corsair Vengeance DDR5-6000 MHz
- Graphics Card(s)
- ASUS Dual GeForce RTX 4070
- Sound Card
- none
- Monitor(s) Displays
- Dell U2412M
- Screen Resolution
- 1920 x 1200
- Hard Drives
- WD Black SN850X NVMe SSD - 1 TB
- PSU
- Thermaltake Toughpower GF3 1000W
- Case
- Fractal Design Meshify 2 RGB
- Cooling
- Corsair H150i RGB Elite
- Keyboard
- Deck Hassium Pro
- Mouse
- Logitech MX Master 4
- Internet Speed
- 1500 Mbps download, 40 Mbps upload
- Browser
- Firefox
- Antivirus
- Bitdefender Internet Security


