- Local time
- 11:10 AM
- Posts
- 280
- OS
- Window 11 v24H2 Build 26100.2033
Hello Everyone, Welcome.
Special Thanks to @Kari and ChatGPT.
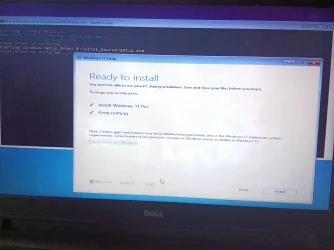
This project should run setup.exe from WinPE boot disk to install windows 11 on an unsupported pc hardware avoiding error message "This PC can't run Windows 11".
With reference to topic in link from this website WinPE - Create a Custom Windows Install USB dated Feb 22 2022.
Follow the code in this stated link to enable PowerShell in WinPE, copy and paste the commands to elevated PowerShell:. Notice that you can copy all commands at once, and paste them all to elevated PowerShell, which will then run them one by one. Please refer to WorkFlow in Live/Current OS given below.
1.First extract Windows 11 v25H2 iso to folder Win11_Source on any internal drive/partition.
2.Download and install both Windows 11 ADK (Assessment and Deployment Kit), and Windows PE add-on for the ADK, installing ADK first from links below:-
3. When both ADK and WinPE add-on have been installed, open an elevated ADK Deployment and Imaging Tools Environment, a special mode of Command Prompt.
You will find it in Start > All Apps > W > Windows Kits: {Replace D: with correct usb letter in your pc}
copype amd64 C:\WinPE_amd64
MakeWinPEMedia /UFD C:\WinPE_amd64 D:
4.C:\Program Files (x86)\Windows Kits\10\Assessment and Deployment Kit\Deployment Tools>MakeWinPEMedia.cmd /UFD C:\WinPE_amd64 D:
WARNING, ALL DATA ON DISK DRIVE D: WILL BE LOST!
Proceed with Format [Y,N]?Y
Formatting D:...
Setting the boot code on D:...
Copying files to D:...
Success
5.C:\Windows\system32>mkdir C:\Mount\Scripts
6.C:\Windows\system32> Mount-WindowsImage -ImagePath "C:\WinPE_amd64\media\sources\boot.wim" -Index 1 -Path "C:\Mount"
7. WinSetup.cmd,SetupW11.ps1 are to be saved in C:\Mount\Scripts
C:\Mount\
├── Windows\
├── Program Files\
├── Scripts ← MUST BE HERE
└── startnet.cmd is under Windows\System32
WinSetup.cmd runs in startnet.cmd to execute SetupW11.ps1
Contents of WinSetup.cmd(Copy following lines and paste in notepad to save as>All files>Winsetup.cmd)
@echo off
rem
rem Run PowerShell script to start Windows Setup
rem
cls
echo.
echo Starting windows Setup...
powershell -ExecutionPolicy bypass -file "X:\Scripts\SetupW11.ps1"
Contents of SetupW11.ps1 (Prepared with the help of ChatGPT)
Write-Host "Searching NTFS drives for Win11_Source..." -ForegroundColor Cyan
Start-Sleep -Seconds 1
# Search only NTFS partitions (avoid FAT32 WinPE)
$path = Get-Volume |
Where-Object {$_.FileSystem -eq "NTFS"} |
ForEach-Object {
$candidate = "$($_.DriveLetter):\Win11_Source"
if (Test-Path $candidate) { $candidate }
} | Select-Object -First 1
if (-not $path) {
Write-Host "Win11_Source folder NOT found on any NTFS drive!" -ForegroundColor Red
pause
exit
}
Write-Host "Found folder: $path" -ForegroundColor Green
pause
$SetupFile = Join-Path $path "setup.exe"
if (-not (Test-Path $SetupFile)) {
Write-Host "setup.exe NOT found inside Win11_Source!" -ForegroundColor Red
pause
exit
}
Write-Host "Starting Windows Setup from: $SetupFile" -ForegroundColor Yellow
pause
cmd /c "`"$SetupFile`""
# Final pause so WinPE window stays open after running Setup
Write-Host "If Windows Setup did not start, review above messages." -ForegroundColor Magenta
pause
Contents of Bypass.cmd
reg add "HKLM\SYSTEM\Setup\LabConfig" /v "BypassTPMCheck" /t REG_DWORD /d 1
reg add "HKLM\SYSTEM\Setup\LabConfig" /v "BypassRAMCheck" /t REG_DWORD /d 1
reg add "HKLM\SYSTEM\Setup\LabConfig" /v "BypassSecureBootCheck" /t REG_DWORD /d 1
reg add "HKCU\SOFTWARE\Microsoft\PCHC" /v "UpgradeEligibility" /t REG_DWORD /d 1
reg add "HKLM\SYSTEM\Setup\MoSetup" /v "AllowUpgradesWithUnsupportedTPMOrCPU" /t REG_DWORD /d 1
reg add "HKLM\SYSTEM\CurrentControlSet\Control\BitLocker" /v "PreventDeviceEncryption" /t REG_DWORD /d 1
reg add HKLM\SOFTWARE\Microsoft\Windows\CurrentVersion\OOBE /v "BypassNRO" /t REG_DWORD /d 1 /f
We are editing startnet.cmd in boot.wim by following cmd command run as administrator.
7 C:\Windows\System32>notepad C:\mount\Windows\System32\startnet.cmd
startnet.cmd(Delete the original contents and paste these line and Click file>save.
wpeinit
powercfg /s 8c5e7fda-e8bf-4a96-9a85-a6e23a8c635c
echo Running Bypass script...
call X:\Scripts\Bypass.cmd
echo Running Windows Setup launcher...
call X:\Scripts\WinSetup.cmd
echo All operations complete.
WorkFlow in Live/Current OS (First mount boot.wim and then run powershell as administrator to add following packages to boot.wim)
POWERSHELL COMMAND TO MOUNT Boot.wim
PS C:\Windows\system32> Mount-WindowsImage -ImagePath "C:\WinPE_amd64\media\sources\boot.wim" -Index 1 -Path "C:\Mount"
To enable PowerShell in WinPE, copy and paste the following commands to elevated PowerShell:. Notice that you can copy all commands at once, and paste them all to elevated PowerShell, which will then run them one by one:
PS C:\Windows\system32> Dism /Add-Package /Image:"C:\Mount" /PackagePath:"C:\Program Files (x86)\Windows Kits\10\Assessment and Deployment Kit\Windows Preinstallation Environment\amd64\WinPE_OCs\WinPE-WMI.cab"
Deployment Image Servicing and Management tool
Version: 10.0.26100.5074
Image Version: 10.0.26100.1
Processing 1 of 1 - Adding package WinPE-WMI-Package~31bf3856ad364e35~amd64~~10.0.26100.1
[==========================100.0%==========================]
The operation completed successfully.
PS C:\Windows\system32> Dism /Add-Package /Image:"C:\Mount" /PackagePath:"C:\Program Files (x86)\Windows Kits\10\Assessment and Deployment Kit\Windows Preinstallation Environment\amd64\WinPE_OCs\en-us\WinPE-WMI_en-us.cab"
Deployment Image Servicing and Management tool
Version: 10.0.26100.5074
Image Version: 10.0.26100.1
Processing 1 of 1 - Adding package WinPE-WMI-Package~31bf3856ad364e35~amd64~en-US~10.0.26100.1
[==========================100.0%==========================]
The operation completed successfully.
PS C:\Windows\system32> Dism /Add-Package /Image:"C:\Mount" /PackagePath:"C:\Program Files (x86)\Windows Kits\10\Assessment and Deployment Kit\Windows Preinstallation Environment\amd64\WinPE_OCs\WinPE-NetFX.cab"
Deployment Image Servicing and Management tool
Version: 10.0.26100.5074
Image Version: 10.0.26100.1
Processing 1 of 1 - Adding package WinPE-NetFx-Package~31bf3856ad364e35~amd64~~10.0.26100.1
[==========================100.0%==========================]
The operation completed successfully.
PS C:\Windows\system32> Dism /Add-Package /Image:"C:\Mount" /PackagePath:"C:\Program Files (x86)\Windows Kits\10\Assessment and Deployment Kit\Windows Preinstallation Environment\amd64\WinPE_OCs\en-us\WinPE-NetFX_en-us.cab"
Deployment Image Servicing and Management tool
Version: 10.0.26100.5074
Image Version: 10.0.26100.1
Processing 1 of 1 - Adding package WinPE-NetFx-Package~31bf3856ad364e35~amd64~en-US~10.0.26100.1
[==========================100.0%==========================]
The operation completed successfully.
PS C:\Windows\system32> Dism /Add-Package /Image:"C:\Mount" /PackagePath:"C:\Program Files (x86)\Windows Kits\10\Assessment and Deployment Kit\Windows Preinstallation Environment\amd64\WinPE_OCs\WinPE-Scripting.cab"
Deployment Image Servicing and Management tool
Version: 10.0.26100.5074
Image Version: 10.0.26100.1
Processing 1 of 1 - Adding package WinPE-Scripting-Package~31bf3856ad364e35~amd64~~10.0.26100.1
[==========================100.0%==========================]
The operation completed successfully.
PS C:\Windows\system32> Dism /Add-Package /Image:"C:\Mount" /PackagePath:"C:\Program Files (x86)\Windows Kits\10\Assessment and Deployment Kit\Windows Preinstallation Environment\amd64\WinPE_OCs\en-us\WinPE-Scripting_en-us.cab"
Deployment Image Servicing and Management tool
Version: 10.0.26100.5074
Image Version: 10.0.26100.1
Processing 1 of 1 - Adding package WinPE-Scripting-Package~31bf3856ad364e35~amd64~en-US~10.0.26100.1
[==========================100.0%==========================]
The operation completed successfully.
PS C:\Windows\system32> Dism /Add-Package /Image:"C:\Mount" /PackagePath:"C:\Program Files (x86)\Windows Kits\10\Assessment and Deployment Kit\Windows Preinstallation Environment\amd64\WinPE_OCs\WinPE-PowerShell.cab"
Deployment Image Servicing and Management tool
Version: 10.0.26100.5074
Image Version: 10.0.26100.1
Processing 1 of 1 - Adding package WinPE-PowerShell-Package~31bf3856ad364e35~amd64~~10.0.26100.1
[==========================100.0%==========================]
The operation completed successfully.
PS C:\Windows\system32> Dism /Add-Package /Image:"C:\Mount" /PackagePath:"C:\Program Files (x86)\Windows Kits\10\Assessment and Deployment Kit\Windows Preinstallation Environment\amd64\WinPE_OCs\en-us\WinPE-PowerShell_en-us.cab"
Deployment Image Servicing and Management tool
Version: 10.0.26100.5074
Image Version: 10.0.26100.1
Processing 1 of 1 - Adding package WinPE-PowerShell-Package~31bf3856ad364e35~amd64~en-US~10.0.26100.1
[==========================100.0%==========================]
The operation completed successfully.
PS C:\Windows\system32> Dism /Add-Package /Image:"C:\Mount" /PackagePath:"C:\Program Files (x86)\Windows Kits\10\Assessment and Deployment Kit\Windows Preinstallation Environment\amd64\WinPE_OCs\WinPE-StorageWMI.cab"
Deployment Image Servicing and Management tool
Version: 10.0.26100.5074
Image Version: 10.0.26100.1
Processing 1 of 1 - Adding package WinPE-StorageWMI-Package~31bf3856ad364e35~amd64~~10.0.26100.1
[==========================100.0%==========================]
The operation completed successfully.
PS C:\Windows\system32> Dism /Add-Package /Image:"C:\Mount" /PackagePath:"C:\Program Files (x86)\Windows Kits\10\Assessment and Deployment Kit\Windows Preinstallation Environment\amd64\WinPE_OCs\en-us\WinPE-StorageWMI_en-us.cab"
Deployment Image Servicing and Management tool
Version: 10.0.26100.5074
Image Version: 10.0.26100.1
Processing 1 of 1 - Adding package WinPE-StorageWMI-Package~31bf3856ad364e35~amd64~en-US~10.0.26100.1
[==========================100.0%==========================]
The operation completed successfully.
PS C:\Windows\system32> Dism /Add-Package /Image:"C:\Mount" /PackagePath:"C:\Program Files (x86)\Windows Kits\10\Assessment and Deployment Kit\Windows Preinstallation Environment\amd64\WinPE_OCs\WinPE-DismCmdlets.cab"
Deployment Image Servicing and Management tool
Version: 10.0.26100.5074
Image Version: 10.0.26100.1
Processing 1 of 1 - Adding package WinPE-DismCmdlets-Package~31bf3856ad364e35~amd64~~10.0.26100.1
[==========================100.0%==========================]
The operation completed successfully.
PS C:\Windows\system32> Dism /Add-Package /Image:"C:\Mount" /PackagePath:"C:\Program Files (x86)\Windows Kits\10\Assessment and Deployment Kit\Windows Preinstallation Environment\amd64\WinPE_OCs\en-us\WinPE-DismCmdlets_en-us.cab"
Deployment Image Servicing and Management tool
Version: 10.0.26100.5074
Image Version: 10.0.26100.1
Processing 1 of 1 - Adding package WinPE-DismCmdlets-Package~31bf3856ad364e35~amd64~en-US~10.0.26100.1
[==========================100.0%==========================]
The operation completed successfully.
PS C:\Windows\system32>Dismount-WindowsImage -Path "C:\mount" -Save
Note:-
FIX COMMON DISM ERRORS (Please backup imporant data and then delete unwanted or additional mountpoints.)
Error 0xc1420114 — Mount folder not empty
rd /s /q C:\mount
mkdir C:\mount
Clean stuck mount points (Clean abandoned mounts)
dism /cleanup-mountpoints
Error: The WIM is already mounted
dism /get-mountedwiminfo
dism /unmount-wim /mountdir:C:\mount /discard
Access denied
Run CMD as Administrator.
Error 87 — incorrect option
Check for typos.
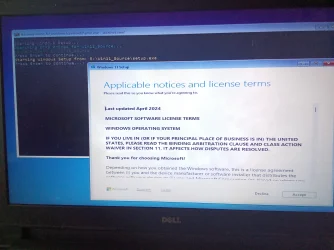
WorkFlow in WinPE environment...
Starting windows Setup...
Searching NTFS drives for Win11_Source...
Found folder: E:\Win11_Source
Press Enter to continue...:
Please find all files including html file having conversation with ChatGPT created by single file extension in browser Edge.
Thank you very much.
Special Thanks to @Kari and ChatGPT.
This project should run setup.exe from WinPE boot disk to install windows 11 on an unsupported pc hardware avoiding error message "This PC can't run Windows 11".
With reference to topic in link from this website WinPE - Create a Custom Windows Install USB dated Feb 22 2022.
Follow the code in this stated link to enable PowerShell in WinPE, copy and paste the commands to elevated PowerShell:. Notice that you can copy all commands at once, and paste them all to elevated PowerShell, which will then run them one by one. Please refer to WorkFlow in Live/Current OS given below.
1.First extract Windows 11 v25H2 iso to folder Win11_Source on any internal drive/partition.
2.Download and install both Windows 11 ADK (Assessment and Deployment Kit), and Windows PE add-on for the ADK, installing ADK first from links below:-
3. When both ADK and WinPE add-on have been installed, open an elevated ADK Deployment and Imaging Tools Environment, a special mode of Command Prompt.
You will find it in Start > All Apps > W > Windows Kits: {Replace D: with correct usb letter in your pc}
copype amd64 C:\WinPE_amd64
MakeWinPEMedia /UFD C:\WinPE_amd64 D:
4.C:\Program Files (x86)\Windows Kits\10\Assessment and Deployment Kit\Deployment Tools>MakeWinPEMedia.cmd /UFD C:\WinPE_amd64 D:
WARNING, ALL DATA ON DISK DRIVE D: WILL BE LOST!
Proceed with Format [Y,N]?Y
Formatting D:...
Setting the boot code on D:...
Copying files to D:...
Success
5.C:\Windows\system32>mkdir C:\Mount\Scripts
6.C:\Windows\system32> Mount-WindowsImage -ImagePath "C:\WinPE_amd64\media\sources\boot.wim" -Index 1 -Path "C:\Mount"
7. WinSetup.cmd,SetupW11.ps1 are to be saved in C:\Mount\Scripts
C:\Mount\
├── Windows\
├── Program Files\
├── Scripts ← MUST BE HERE
└── startnet.cmd is under Windows\System32
WinSetup.cmd runs in startnet.cmd to execute SetupW11.ps1
Contents of WinSetup.cmd(Copy following lines and paste in notepad to save as>All files>Winsetup.cmd)
@echo off
rem
rem Run PowerShell script to start Windows Setup
rem
cls
echo.
echo Starting windows Setup...
powershell -ExecutionPolicy bypass -file "X:\Scripts\SetupW11.ps1"
Contents of SetupW11.ps1 (Prepared with the help of ChatGPT)
Write-Host "Searching NTFS drives for Win11_Source..." -ForegroundColor Cyan
Start-Sleep -Seconds 1
# Search only NTFS partitions (avoid FAT32 WinPE)
$path = Get-Volume |
Where-Object {$_.FileSystem -eq "NTFS"} |
ForEach-Object {
$candidate = "$($_.DriveLetter):\Win11_Source"
if (Test-Path $candidate) { $candidate }
} | Select-Object -First 1
if (-not $path) {
Write-Host "Win11_Source folder NOT found on any NTFS drive!" -ForegroundColor Red
pause
exit
}
Write-Host "Found folder: $path" -ForegroundColor Green
pause
$SetupFile = Join-Path $path "setup.exe"
if (-not (Test-Path $SetupFile)) {
Write-Host "setup.exe NOT found inside Win11_Source!" -ForegroundColor Red
pause
exit
}
Write-Host "Starting Windows Setup from: $SetupFile" -ForegroundColor Yellow
pause
cmd /c "`"$SetupFile`""
# Final pause so WinPE window stays open after running Setup
Write-Host "If Windows Setup did not start, review above messages." -ForegroundColor Magenta
pause
Contents of Bypass.cmd
reg add "HKLM\SYSTEM\Setup\LabConfig" /v "BypassTPMCheck" /t REG_DWORD /d 1
reg add "HKLM\SYSTEM\Setup\LabConfig" /v "BypassRAMCheck" /t REG_DWORD /d 1
reg add "HKLM\SYSTEM\Setup\LabConfig" /v "BypassSecureBootCheck" /t REG_DWORD /d 1
reg add "HKCU\SOFTWARE\Microsoft\PCHC" /v "UpgradeEligibility" /t REG_DWORD /d 1
reg add "HKLM\SYSTEM\Setup\MoSetup" /v "AllowUpgradesWithUnsupportedTPMOrCPU" /t REG_DWORD /d 1
reg add "HKLM\SYSTEM\CurrentControlSet\Control\BitLocker" /v "PreventDeviceEncryption" /t REG_DWORD /d 1
reg add HKLM\SOFTWARE\Microsoft\Windows\CurrentVersion\OOBE /v "BypassNRO" /t REG_DWORD /d 1 /f
We are editing startnet.cmd in boot.wim by following cmd command run as administrator.
7 C:\Windows\System32>notepad C:\mount\Windows\System32\startnet.cmd
startnet.cmd(Delete the original contents and paste these line and Click file>save.
wpeinit
powercfg /s 8c5e7fda-e8bf-4a96-9a85-a6e23a8c635c
echo Running Bypass script...
call X:\Scripts\Bypass.cmd
echo Running Windows Setup launcher...
call X:\Scripts\WinSetup.cmd
echo All operations complete.
WorkFlow in Live/Current OS (First mount boot.wim and then run powershell as administrator to add following packages to boot.wim)
POWERSHELL COMMAND TO MOUNT Boot.wim
PS C:\Windows\system32> Mount-WindowsImage -ImagePath "C:\WinPE_amd64\media\sources\boot.wim" -Index 1 -Path "C:\Mount"
To enable PowerShell in WinPE, copy and paste the following commands to elevated PowerShell:. Notice that you can copy all commands at once, and paste them all to elevated PowerShell, which will then run them one by one:
PS C:\Windows\system32> Dism /Add-Package /Image:"C:\Mount" /PackagePath:"C:\Program Files (x86)\Windows Kits\10\Assessment and Deployment Kit\Windows Preinstallation Environment\amd64\WinPE_OCs\WinPE-WMI.cab"
Deployment Image Servicing and Management tool
Version: 10.0.26100.5074
Image Version: 10.0.26100.1
Processing 1 of 1 - Adding package WinPE-WMI-Package~31bf3856ad364e35~amd64~~10.0.26100.1
[==========================100.0%==========================]
The operation completed successfully.
PS C:\Windows\system32> Dism /Add-Package /Image:"C:\Mount" /PackagePath:"C:\Program Files (x86)\Windows Kits\10\Assessment and Deployment Kit\Windows Preinstallation Environment\amd64\WinPE_OCs\en-us\WinPE-WMI_en-us.cab"
Deployment Image Servicing and Management tool
Version: 10.0.26100.5074
Image Version: 10.0.26100.1
Processing 1 of 1 - Adding package WinPE-WMI-Package~31bf3856ad364e35~amd64~en-US~10.0.26100.1
[==========================100.0%==========================]
The operation completed successfully.
PS C:\Windows\system32> Dism /Add-Package /Image:"C:\Mount" /PackagePath:"C:\Program Files (x86)\Windows Kits\10\Assessment and Deployment Kit\Windows Preinstallation Environment\amd64\WinPE_OCs\WinPE-NetFX.cab"
Deployment Image Servicing and Management tool
Version: 10.0.26100.5074
Image Version: 10.0.26100.1
Processing 1 of 1 - Adding package WinPE-NetFx-Package~31bf3856ad364e35~amd64~~10.0.26100.1
[==========================100.0%==========================]
The operation completed successfully.
PS C:\Windows\system32> Dism /Add-Package /Image:"C:\Mount" /PackagePath:"C:\Program Files (x86)\Windows Kits\10\Assessment and Deployment Kit\Windows Preinstallation Environment\amd64\WinPE_OCs\en-us\WinPE-NetFX_en-us.cab"
Deployment Image Servicing and Management tool
Version: 10.0.26100.5074
Image Version: 10.0.26100.1
Processing 1 of 1 - Adding package WinPE-NetFx-Package~31bf3856ad364e35~amd64~en-US~10.0.26100.1
[==========================100.0%==========================]
The operation completed successfully.
PS C:\Windows\system32> Dism /Add-Package /Image:"C:\Mount" /PackagePath:"C:\Program Files (x86)\Windows Kits\10\Assessment and Deployment Kit\Windows Preinstallation Environment\amd64\WinPE_OCs\WinPE-Scripting.cab"
Deployment Image Servicing and Management tool
Version: 10.0.26100.5074
Image Version: 10.0.26100.1
Processing 1 of 1 - Adding package WinPE-Scripting-Package~31bf3856ad364e35~amd64~~10.0.26100.1
[==========================100.0%==========================]
The operation completed successfully.
PS C:\Windows\system32> Dism /Add-Package /Image:"C:\Mount" /PackagePath:"C:\Program Files (x86)\Windows Kits\10\Assessment and Deployment Kit\Windows Preinstallation Environment\amd64\WinPE_OCs\en-us\WinPE-Scripting_en-us.cab"
Deployment Image Servicing and Management tool
Version: 10.0.26100.5074
Image Version: 10.0.26100.1
Processing 1 of 1 - Adding package WinPE-Scripting-Package~31bf3856ad364e35~amd64~en-US~10.0.26100.1
[==========================100.0%==========================]
The operation completed successfully.
PS C:\Windows\system32> Dism /Add-Package /Image:"C:\Mount" /PackagePath:"C:\Program Files (x86)\Windows Kits\10\Assessment and Deployment Kit\Windows Preinstallation Environment\amd64\WinPE_OCs\WinPE-PowerShell.cab"
Deployment Image Servicing and Management tool
Version: 10.0.26100.5074
Image Version: 10.0.26100.1
Processing 1 of 1 - Adding package WinPE-PowerShell-Package~31bf3856ad364e35~amd64~~10.0.26100.1
[==========================100.0%==========================]
The operation completed successfully.
PS C:\Windows\system32> Dism /Add-Package /Image:"C:\Mount" /PackagePath:"C:\Program Files (x86)\Windows Kits\10\Assessment and Deployment Kit\Windows Preinstallation Environment\amd64\WinPE_OCs\en-us\WinPE-PowerShell_en-us.cab"
Deployment Image Servicing and Management tool
Version: 10.0.26100.5074
Image Version: 10.0.26100.1
Processing 1 of 1 - Adding package WinPE-PowerShell-Package~31bf3856ad364e35~amd64~en-US~10.0.26100.1
[==========================100.0%==========================]
The operation completed successfully.
PS C:\Windows\system32> Dism /Add-Package /Image:"C:\Mount" /PackagePath:"C:\Program Files (x86)\Windows Kits\10\Assessment and Deployment Kit\Windows Preinstallation Environment\amd64\WinPE_OCs\WinPE-StorageWMI.cab"
Deployment Image Servicing and Management tool
Version: 10.0.26100.5074
Image Version: 10.0.26100.1
Processing 1 of 1 - Adding package WinPE-StorageWMI-Package~31bf3856ad364e35~amd64~~10.0.26100.1
[==========================100.0%==========================]
The operation completed successfully.
PS C:\Windows\system32> Dism /Add-Package /Image:"C:\Mount" /PackagePath:"C:\Program Files (x86)\Windows Kits\10\Assessment and Deployment Kit\Windows Preinstallation Environment\amd64\WinPE_OCs\en-us\WinPE-StorageWMI_en-us.cab"
Deployment Image Servicing and Management tool
Version: 10.0.26100.5074
Image Version: 10.0.26100.1
Processing 1 of 1 - Adding package WinPE-StorageWMI-Package~31bf3856ad364e35~amd64~en-US~10.0.26100.1
[==========================100.0%==========================]
The operation completed successfully.
PS C:\Windows\system32> Dism /Add-Package /Image:"C:\Mount" /PackagePath:"C:\Program Files (x86)\Windows Kits\10\Assessment and Deployment Kit\Windows Preinstallation Environment\amd64\WinPE_OCs\WinPE-DismCmdlets.cab"
Deployment Image Servicing and Management tool
Version: 10.0.26100.5074
Image Version: 10.0.26100.1
Processing 1 of 1 - Adding package WinPE-DismCmdlets-Package~31bf3856ad364e35~amd64~~10.0.26100.1
[==========================100.0%==========================]
The operation completed successfully.
PS C:\Windows\system32> Dism /Add-Package /Image:"C:\Mount" /PackagePath:"C:\Program Files (x86)\Windows Kits\10\Assessment and Deployment Kit\Windows Preinstallation Environment\amd64\WinPE_OCs\en-us\WinPE-DismCmdlets_en-us.cab"
Deployment Image Servicing and Management tool
Version: 10.0.26100.5074
Image Version: 10.0.26100.1
Processing 1 of 1 - Adding package WinPE-DismCmdlets-Package~31bf3856ad364e35~amd64~en-US~10.0.26100.1
[==========================100.0%==========================]
The operation completed successfully.
PS C:\Windows\system32>Dismount-WindowsImage -Path "C:\mount" -Save
Note:-
FIX COMMON DISM ERRORS (Please backup imporant data and then delete unwanted or additional mountpoints.)
Error 0xc1420114 — Mount folder not empty
rd /s /q C:\mount
mkdir C:\mount
Clean stuck mount points (Clean abandoned mounts)
dism /cleanup-mountpoints
Error: The WIM is already mounted
dism /get-mountedwiminfo
dism /unmount-wim /mountdir:C:\mount /discard
Access denied
Run CMD as Administrator.
Error 87 — incorrect option
Check for typos.
WorkFlow in WinPE environment...
Starting windows Setup...
Searching NTFS drives for Win11_Source...
Found folder: E:\Win11_Source
Press Enter to continue...:
Please find all files including html file having conversation with ChatGPT created by single file extension in browser Edge.
Thank you very much.
- Windows Build/Version
- Windows 11 v25H2 os build 26200.6584
Attachments
Last edited:
My Computer
At a glance
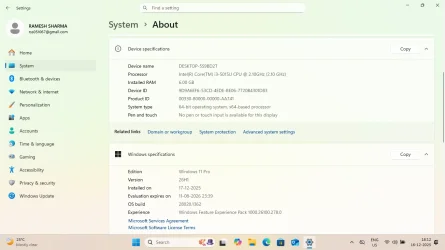
Window 11 v24H2 Build 26100.2033Intel(R) Core(TM) i3-2100 CPU @ 3.10GHz 3.10 GHz4.00 GB (3.89 GB usable)Onboard
- OS
- Window 11 v24H2 Build 26100.2033
- Computer type
- PC/Desktop
- Manufacturer/Model
- ASSEMMBLED
- CPU
- Intel(R) Core(TM) i3-2100 CPU @ 3.10GHz 3.10 GHz
- Motherboard
- ZEBRONICS
- Memory
- 4.00 GB (3.89 GB usable)
- Graphics Card(s)
- Onboard
- Sound Card
- Onboard
- Monitor(s) Displays
- LG
- Screen Resolution
- 1366x768
- Hard Drives
- Toshiba HDD 1 TB
- Keyboard
- Mechanical
- Mouse
- Mechanical
- Internet Speed
- 700 kb/s
- Browser
- Microsoft EDGE, CHROME
- Antivirus
- Microsoft Defender