Installation and Upgrade WinPE - Create a Custom Windows Install USB


Win11USB Banner.png

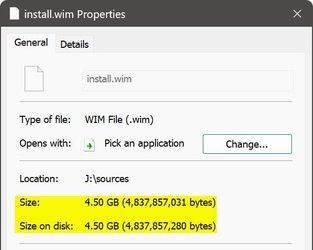
As you all (should) already know, Windows Setup's install.wim file is growing with each new feature upgrade. It's coming close and soon going over the 4 GB size limit of a FAT32 formatted install media. Today, as I write this, (22-FEB-2022), downloading WIM-based most current public release install media as told here in Shawn Brink's tutorial, the install.wim file is 4.5 GB (UK English Windows 11).

There’s nothing in the UEFI specifications that prevents booting a computer from an NTFS formatted USB flash drive. In fact, this so-called limitation is entirely artificial, caused by the single fact that manufacturer has not included correct drivers in UEFI. Luckily, most modern computers can boot from a single-partition NTFS formatted USB flash drive, and install Windows 11 from a single partition USB media containing WIM image larger than 4 GB (maximum file size on FAT32 media).

But, what to do if the WIM file is over 4 GB, and your computer cannot boot from an NTFS formatted media?

This tutorial will show how to create a USB flash drive containing a FAT32 formatted WinPE partition, and a bigger NTFS formatted Windows Setup partition. When computer is booted from this USB flash drive, the WinPE partition takes care of boot, then runs Windows Setup from bigger setup partition on same USB.

The whole process takes 10 to 20 minutes, but only needs to be done once. In the future, the Windows Setup files on USB can be replaced with newer version of Windows 11.


Contents

Use links to jump to any part, browser back button to return to this table


Part One:Create WinPE
Part Two:Edit WinPE boot.wim
Part Three:Make WinPE ISO
Part Four:Partition USB flash drive
Part Five:Create bootable USB install media

Please notice: I have prepared a custom WinPE ISO image for you. You can download it from my OneDrive: WinPEx64.iso. File size is 474 MB.

Parts One, Two and Three in this tutorial will show how I edited and customized this WinPE image, and are intended to those users who want to learn how to do it by themselves.

Short: if you want to make this easy, download the provided WinPE ISO, and start from Part Four, and you are done in three minutes.


Part One

Create WinPE


1.1 Download and install both Windows 11 ADK (Assessment and Deployment Kit), and Windows PE add-on for the ADK, installing ADK first:

Download ADK.jpg

(Click screenshot thumbnails to open images enlarged.)

1.2 When installing ADK, for purpose of this tutorial, you will only need the Deployment Tools module. Unselecting everything else, download size is less than 100 MB:

ADK Install.jpg


1.3 When both ADK and WinPE add-on have been installed, open an elevated ADK Deployment and Imaging Tools Environment, a special mode of Command Prompt. You will find it in Start > All Apps > W > Windows Kits:

Run Tool.jpg


1.4 The prompt is quite long. Shorten it by jumping to root of the drive where ADK was installed with command cd \ (#1 in next screenshot)

1.5 Create 64-bit WinPE files with following command (#2 in next screenshot), where folder D:\WPEx64 is the folder where WinPE files will be created. Folder will be created automatically, it does not need to exist:

copype amd64 D:\WPEx64

Create PE Folder.jpg


For 32-bit WinPE, the command is as follows:

copype x86 D:\WPEx86


Part Two

Edit WinPE boot.wim


2.1 Depending on which bit architecture you selected, either folder D:\WPEx86 or D:\WPEx64 now contains all files and folders to create a WinPE ISO.

2.2 To edit it, we must mount WinPE boot.wim file for offline servicing. First, create a mount point folder. In this example, I made a folder C:\Mount. Open an elevated PowerShell, and enter following command to mount boot.wim:

Mount-WindowsImage -ImagePath D:\WPEx64\Media\Sources\boot.wim -Index 1 -Path C:\Mount

Change -ImagePath folder WPEx64 to WPEx32 if working with 32-bit WinPE.

2.3 Folder C:\Mount now contains WinPE image, and we can edit it. First thing I made when editing the provided custom WinPE image, I added PowerShell support. By default, WinPE does not support PowerShell.

To enable PowerShell in WinPE, copy and paste the following commands to elevated PowerShell:. Notice that you can copy all commands at once, and paste them all to elevated PowerShell, which will then run them one by one:

Code:
Dism /Add-Package /Image:"C:\Mount" /PackagePath:"C:\Program Files (x86)\Windows Kits\10\Assessment and Deployment Kit\Windows Preinstallation Environment\amd64\WinPE_OCs\WinPE-WMI.cab"
Dism /Add-Package /Image:"C:\Mount" /PackagePath:"C:\Program Files (x86)\Windows Kits\10\Assessment and Deployment Kit\Windows Preinstallation Environment\amd64\WinPE_OCs\en-us\WinPE-WMI_en-us.cab"
Dism /Add-Package /Image:"C:\Mount" /PackagePath:"C:\Program Files (x86)\Windows Kits\10\Assessment and Deployment Kit\Windows Preinstallation Environment\amd64\WinPE_OCs\WinPE-NetFX.cab"
Dism /Add-Package /Image:"C:\Mount" /PackagePath:"C:\Program Files (x86)\Windows Kits\10\Assessment and Deployment Kit\Windows Preinstallation Environment\amd64\WinPE_OCs\en-us\WinPE-NetFX_en-us.cab"
Dism /Add-Package /Image:"C:\Mount" /PackagePath:"C:\Program Files (x86)\Windows Kits\10\Assessment and Deployment Kit\Windows Preinstallation Environment\amd64\WinPE_OCs\WinPE-Scripting.cab"
Dism /Add-Package /Image:"C:\Mount" /PackagePath:"C:\Program Files (x86)\Windows Kits\10\Assessment and Deployment Kit\Windows Preinstallation Environment\amd64\WinPE_OCs\en-us\WinPE-Scripting_en-us.cab"
Dism /Add-Package /Image:"C:\Mount" /PackagePath:"C:\Program Files (x86)\Windows Kits\10\Assessment and Deployment Kit\Windows Preinstallation Environment\amd64\WinPE_OCs\WinPE-PowerShell.cab"
Dism /Add-Package /Image:"C:\Mount" /PackagePath:"C:\Program Files (x86)\Windows Kits\10\Assessment and Deployment Kit\Windows Preinstallation Environment\amd64\WinPE_OCs\en-us\WinPE-PowerShell_en-us.cab"
Dism /Add-Package /Image:"C:\Mount" /PackagePath:"C:\Program Files (x86)\Windows Kits\10\Assessment and Deployment Kit\Windows Preinstallation Environment\amd64\WinPE_OCs\WinPE-StorageWMI.cab"
Dism /Add-Package /Image:"C:\Mount" /PackagePath:"C:\Program Files (x86)\Windows Kits\10\Assessment and Deployment Kit\Windows Preinstallation Environment\amd64\WinPE_OCs\en-us\WinPE-StorageWMI_en-us.cab"
Dism /Add-Package /Image:"C:\Mount" /PackagePath:"C:\Program Files (x86)\Windows Kits\10\Assessment and Deployment Kit\Windows Preinstallation Environment\amd64\WinPE_OCs\WinPE-DismCmdlets.cab"
Dism /Add-Package /Image:"C:\Mount" /PackagePath:"C:\Program Files (x86)\Windows Kits\10\Assessment and Deployment Kit\Windows Preinstallation Environment\amd64\WinPE_OCs\en-us\WinPE-DismCmdlets_en-us.cab"

The above commands will add PowerShell to a 64-bit WinPE. If you are creating a 32-bit WinPE, change the folder amd64 at the end of long path, near end of each command to x86. An example using the first of above listed commands:

64-bit WinPE:

Rich (BB code):
Dism /Add-Package /Image:"C:\Mount" /PackagePath:"C:\Program Files (x86)\Windows Kits\10\Assessment and Deployment Kit\Windows Preinstallation Environment\amd64\WinPE_OCs\WinPE-WMI.cab"

32-bit WinPE:

Rich (BB code):
Dism /Add-Package /Image:"C:\Mount" /PackagePath:"C:\Program Files (x86)\Windows Kits\10\Assessment and Deployment Kit\Windows Preinstallation Environment\x86\WinPE_OCs\WinPE-WMI.cab"

2.4 This custom WinPE requires two scripts, a PowerShell script to find out drive letter of the NTFS partition on USB containing setup files, and then run Windows Setup, and a batch file to run that PS script.

Opening mount point folder C:\Mount, I created a folder Scripts on its root to store these two scripts:

Scripts folder created.jpg


2.5 First the small PS script. To save to mount point folder requires elevated rights, so we need to open Notepad elevated (run as administrator). Copy and paste the following code to it:

Powershell:
$SetupVolume = (Get-Volume -FileSystemLabel Setup).DriveLetter
$SetupFile = $SetupVolume + ':\setup.exe'
cmd /c $SetupFile

First line will search the USB for volume (partition) labelled Setup, and set its drive letter in variable $SetupVolume. Second line then creates variable $SetupFile, adding the important :\setup.exe to drive letter found in first line. For instance, if $SetupVolume is F, $SetupFile is F:\setup.exe.

Last line then executes command setup.exe from bigger NTFS partition Setup, which starts Windows Setup.

Save the file in folder C:\Mount\Scripts as SetupW10.ps1. In Save As dialog, remember to select Save As Type as All files:

Save PS Script.jpg


2.6 Next, short batch file. Copy and paste following code to an elevated Notepad:

Code:
@echo off
rem
rem Run PowerShell script to start Windows Setup
rem
cls
echo.
echo Starting windows Setup...
powershell -ExecutionPolicy bypass -file "X:\Scripts\SetupW11.ps1"

Only important line in this batch file is the last one. It executes the PS script made in step 2.5.

Save it to folder C:\Mount\Scripts as WinSetup.cmd. Again, as with the PS script, in Save As dialog, remember to select Save As Type as All files.

2.7 Last but not least, we need to edit file C:\Mount\Windows\System32\startnet.cmd. Startnet.cmd functions exactly like autoexec.bat did in Windows XP and older Windows versions, running every command in it automatically when WinPE boots.

By default, startnet.cmd only contains one command, wpeinit, which enables WinPE networking capabilities. We add two other commands to it.

Open startnet.cmd in an elevated Notepad. Copy and paste following code to it:

Code:
wpeinit
powercfg /s 8c5e7fda-e8bf-4a96-9a85-a6e23a8c635c
X:\Scripts\WinSetup.cmd

The first line is the default command to initialize networking. In second line, we set a High Performance power plan to speed up Windows installation. In last line, we execute the batch file created in step 2.6.

When computer is booted from WinPE media, the contents of WinPE will be copied to RAM disk X. This is why we can use the path X:\Scripts on last command line, there being no need to find out the drive letter for volume containing the Scripts folder.

2.8 In an elevated PowerShell, enter following command to save changes to WinPE:

Dismount-WindowsImage -Path C:\Mount -Save


Part Three

Make WinPE ISO


3.1 Open an elevated ADK Deployment and Imaging Tools Environment as told in step 1.3.

3.2 Enter following command to create WinPE ISO:

MakeWinPEMedia /ISO D:\WPEx64 F:\WinPEx64.iso

Change path D:\WPEx64 to D:\WPEx86 if creating a 32-bit WinPE ISO. Path F:\WinPEx64.iso is the path and name of the ISO file that will be created.


Part Four

Partition USB flash drive


4.1 Plug in an at least 8 GB USB lash drive. Open an elevated PowerShell, start Windows Disk Partitioning utility with command DISKPART.

Enter command LIST DISK to show all attached disks, find out the disk ID for your USB Flash Drive. In my case now, the USB is DISK 3:

Diskpart.jpg


Be careful, absolutely sure that you find out correct Disk ID! In following step, the selected disk will be wiped clean, and new partitions will be created. Selecting wrong disk may cause Windows or data disks being formatted, all data lost.


4.2 Still in DISKPART, run following commands one by one. In first command, replace X (disk ID) with actual Disk ID for your USB flash drive:

select disk X
clean
create partition primary size=1024
format quick fs=fat32 label="Boot"
assign
create partition primary
format quick fs=ntfs label="Setup"
assign

4.3 Quit DISKPART with command EXIT. Your USB flash drive is now correctly partitioned, containing a 1 GB partition Boot, and partition Setup which occupies the rest of the USB:

USB Boot and Setup partitions.jpg


Part Five

Create bootable USB install media


5.1 Mount the WinPE ISO image created in Step 3.2 as a virtual CD / DVD drive (right click, select Mount). Copy its contents, all files and folders, to partition Boot on USB.

5.2 Mount a Windows 11 ISO image as a virtual CD / DVD drive (right click, select Mount). Copy its contents, all files and folders, to partition Setup on USB.

That's it! You have now a bootable USB flash drive to install Windows, even if the install.wim or install.esd file is bigger than FAT32 size limit 4 GB. In the future, when you need install media for a new Windows version, simply format the Setup partition on USB, and copy contents of new ISO to it.

Kari
 

Attachments

  • WIM Size.jpg
    WIM Size.jpg
    24.6 KB · Views: 168
  • win11usb.png
    win11usb.png
    8.1 KB · Views: 125
Last edited:
Downloading now & I'll advise on progress later
 

My Computer

System One

  • OS
    Windows 11 Pro v 23H2 (Build 22631.3374)
    Computer type
    PC/Desktop
    Manufacturer/Model
    Dell Precision 3660 Tower Workstation
    CPU
    12th Gen Intel(R) Core(TM) i9-12900 5.10 GHz
    Motherboard
    64-bit operating system, x64-based processor
    Memory
    32.00 GB
    Graphics Card(s)
    Intel UHD Graphics 770
    Sound Card
    Realtek Audio
    Monitor(s) Displays
    Dell P2714H Monitor
    Screen Resolution
    1920 x 1080
    Hard Drives
    1 x 512GB NVME PC801 NVMe SK hynix Boot
    1 x 1TB Seagate ST1000LM049-2GH172 Internal HDD
    1 x 1TB Seagate STGX4000400 External HDD
    1 x 2TB Seagate STGX4000400 External HDD
    1 x 4TB Seagate STGX4000400 External HDD
    PSU
    300 Watts
    Cooling
    Air
    Keyboard
    Microsoft Wired Keyboard 600
    Mouse
    Microsoft USB Basic Optical Mouse v2.0
    Browser
    Firefox
    Antivirus
    Windows Defender + Malwarebytes Premium
    Other Info
    BaseBoard Manufacturer Dell Inc.
    BaseBoard Product 0J1CP3
    BaseBoard Version A01
Downloading now & I'll advise on progress later
Good.

The error message you are getting says "A media driver your computer needs is missing" "Media" in this case does not mean audio or video, it means storage media.

My suggestions:
  1. If you have already installed Windows 10 or 11 on the PC in question, export drivers as told in that tutorial Step Two, and inject those to your WIM.
  2. If you have not previous W10 or W11 installation on that PC, download all storage drivers (USB, DVD, Memory card, HDD / SSD) from the manufacture's support site, and inject them to WIM, Step One in tutorial.
One or another, not both!

Kari
 

My Computers

System One System Two

  • OS
    Windows 11 PRO x64 Dev
    Manufacturer/Model
    Hyper-V Virtual Machine (host in System 2 specs)
    CPU
    Intel Core i7-8550U
    Memory
    6 GB
    Graphics Card(s)
    Microsoft Hyper-V Video
    Monitor(s) Displays
    Laptop display (17.1") & Samsung U28E590 (27.7")
  • Operating System
    Windows 11 PRO x64 Dev Channel
    Computer type
    Laptop
    Manufacturer/Model
    HP HP ProBook 470 G5
    CPU
    Intel Core i7-8550U
    Motherboard
    HP 837F KBC Version 02.3D.00
    Memory
    16 GB
    Graphics card(s)
    Intel(R) UHD Graphics 620 & NVIDIA GeForce 930MX
    Sound Card
    Conexant ISST Audio
    Monitor(s) Displays
    Laptop display (17.1") & Samsung U28E590 (27.7")
    Hard Drives
    128 GB SSD & 1 TB HDD
    Mouse
    Wireless Logitech MSX mouse
    Keyboard
    Wireless Logitech MK710 keyboard
    Internet Speed
    100 Mbps down, 20 Mbps up
    Browser
    Edge Chromium Dev Channel
    Antivirus
    Windows Defender
    Other Info
    2 * 3 TB USB HDD
    6 TB WD Mirror NAS
I've already exported my current Windouws 11 drivers to be inserted into my WIM, as per Step Two - 76 in total
 

My Computer

System One

  • OS
    Windows 11 Pro v 23H2 (Build 22631.3374)
    Computer type
    PC/Desktop
    Manufacturer/Model
    Dell Precision 3660 Tower Workstation
    CPU
    12th Gen Intel(R) Core(TM) i9-12900 5.10 GHz
    Motherboard
    64-bit operating system, x64-based processor
    Memory
    32.00 GB
    Graphics Card(s)
    Intel UHD Graphics 770
    Sound Card
    Realtek Audio
    Monitor(s) Displays
    Dell P2714H Monitor
    Screen Resolution
    1920 x 1080
    Hard Drives
    1 x 512GB NVME PC801 NVMe SK hynix Boot
    1 x 1TB Seagate ST1000LM049-2GH172 Internal HDD
    1 x 1TB Seagate STGX4000400 External HDD
    1 x 2TB Seagate STGX4000400 External HDD
    1 x 4TB Seagate STGX4000400 External HDD
    PSU
    300 Watts
    Cooling
    Air
    Keyboard
    Microsoft Wired Keyboard 600
    Mouse
    Microsoft USB Basic Optical Mouse v2.0
    Browser
    Firefox
    Antivirus
    Windows Defender + Malwarebytes Premium
    Other Info
    BaseBoard Manufacturer Dell Inc.
    BaseBoard Product 0J1CP3
    BaseBoard Version A01

My Computers

System One System Two

  • OS
    Windows 11 PRO x64 Dev
    Manufacturer/Model
    Hyper-V Virtual Machine (host in System 2 specs)
    CPU
    Intel Core i7-8550U
    Memory
    6 GB
    Graphics Card(s)
    Microsoft Hyper-V Video
    Monitor(s) Displays
    Laptop display (17.1") & Samsung U28E590 (27.7")
  • Operating System
    Windows 11 PRO x64 Dev Channel
    Computer type
    Laptop
    Manufacturer/Model
    HP HP ProBook 470 G5
    CPU
    Intel Core i7-8550U
    Motherboard
    HP 837F KBC Version 02.3D.00
    Memory
    16 GB
    Graphics card(s)
    Intel(R) UHD Graphics 620 & NVIDIA GeForce 930MX
    Sound Card
    Conexant ISST Audio
    Monitor(s) Displays
    Laptop display (17.1") & Samsung U28E590 (27.7")
    Hard Drives
    128 GB SSD & 1 TB HDD
    Mouse
    Wireless Logitech MSX mouse
    Keyboard
    Wireless Logitech MK710 keyboard
    Internet Speed
    100 Mbps down, 20 Mbps up
    Browser
    Edge Chromium Dev Channel
    Antivirus
    Windows Defender
    Other Info
    2 * 3 TB USB HDD
    6 TB WD Mirror NAS
I've already exported my current Windouws 11 drivers to be inserted into my WIM, as per Step Two - 76 in total
Sometimes a good idea to inject key drivers into boot.wim as well.

I have to do it for my octane nvme drive or else installer cannot see drive. You can however, load driver manually during installation at main drive selection page if you prefer.

In very rare cases, I have also had to inject keyboard drivers as well into boot.wim.
 

My Computer

System One

  • OS
    Windows 10 Pro + others in VHDs
    Computer type
    Laptop
    Manufacturer/Model
    ASUS Vivobook 14
    CPU
    I7
    Motherboard
    Yep, Laptop has one.
    Memory
    16 GB
    Graphics Card(s)
    Integrated Intel Iris XE
    Sound Card
    Realtek built in
    Monitor(s) Displays
    N/A
    Screen Resolution
    1920x1080
    Hard Drives
    1 TB Optane NVME SSD, 1 TB NVME SSD
    PSU
    Yep, got one
    Case
    Yep, got one
    Cooling
    Stella Artois
    Keyboard
    Built in
    Mouse
    Bluetooth , wired
    Internet Speed
    72 Mb/s :-(
    Browser
    Edge mostly
    Antivirus
    Defender
    Other Info
    TPM 2.0
@Ian, any news?
 

My Computers

System One System Two

  • OS
    Windows 11 PRO x64 Dev
    Manufacturer/Model
    Hyper-V Virtual Machine (host in System 2 specs)
    CPU
    Intel Core i7-8550U
    Memory
    6 GB
    Graphics Card(s)
    Microsoft Hyper-V Video
    Monitor(s) Displays
    Laptop display (17.1") & Samsung U28E590 (27.7")
  • Operating System
    Windows 11 PRO x64 Dev Channel
    Computer type
    Laptop
    Manufacturer/Model
    HP HP ProBook 470 G5
    CPU
    Intel Core i7-8550U
    Motherboard
    HP 837F KBC Version 02.3D.00
    Memory
    16 GB
    Graphics card(s)
    Intel(R) UHD Graphics 620 & NVIDIA GeForce 930MX
    Sound Card
    Conexant ISST Audio
    Monitor(s) Displays
    Laptop display (17.1") & Samsung U28E590 (27.7")
    Hard Drives
    128 GB SSD & 1 TB HDD
    Mouse
    Wireless Logitech MSX mouse
    Keyboard
    Wireless Logitech MK710 keyboard
    Internet Speed
    100 Mbps down, 20 Mbps up
    Browser
    Edge Chromium Dev Channel
    Antivirus
    Windows Defender
    Other Info
    2 * 3 TB USB HDD
    6 TB WD Mirror NAS
We’ve had a bereavement in the family, so most things - including this - are on temporary on hold.

I will update you as soon as possible.
 

My Computer

System One

  • OS
    Windows 11 Pro v 23H2 (Build 22631.3374)
    Computer type
    PC/Desktop
    Manufacturer/Model
    Dell Precision 3660 Tower Workstation
    CPU
    12th Gen Intel(R) Core(TM) i9-12900 5.10 GHz
    Motherboard
    64-bit operating system, x64-based processor
    Memory
    32.00 GB
    Graphics Card(s)
    Intel UHD Graphics 770
    Sound Card
    Realtek Audio
    Monitor(s) Displays
    Dell P2714H Monitor
    Screen Resolution
    1920 x 1080
    Hard Drives
    1 x 512GB NVME PC801 NVMe SK hynix Boot
    1 x 1TB Seagate ST1000LM049-2GH172 Internal HDD
    1 x 1TB Seagate STGX4000400 External HDD
    1 x 2TB Seagate STGX4000400 External HDD
    1 x 4TB Seagate STGX4000400 External HDD
    PSU
    300 Watts
    Cooling
    Air
    Keyboard
    Microsoft Wired Keyboard 600
    Mouse
    Microsoft USB Basic Optical Mouse v2.0
    Browser
    Firefox
    Antivirus
    Windows Defender + Malwarebytes Premium
    Other Info
    BaseBoard Manufacturer Dell Inc.
    BaseBoard Product 0J1CP3
    BaseBoard Version A01
We’ve had a bereavement in the family, so most things - including this - are on temporary on hold.

I will update you as soon as possible.
Life itself is far more important than computers and Windows. Wishing all the best for you and yours, take care.

Kari
 

My Computers

System One System Two

  • OS
    Windows 11 PRO x64 Dev
    Manufacturer/Model
    Hyper-V Virtual Machine (host in System 2 specs)
    CPU
    Intel Core i7-8550U
    Memory
    6 GB
    Graphics Card(s)
    Microsoft Hyper-V Video
    Monitor(s) Displays
    Laptop display (17.1") & Samsung U28E590 (27.7")
  • Operating System
    Windows 11 PRO x64 Dev Channel
    Computer type
    Laptop
    Manufacturer/Model
    HP HP ProBook 470 G5
    CPU
    Intel Core i7-8550U
    Motherboard
    HP 837F KBC Version 02.3D.00
    Memory
    16 GB
    Graphics card(s)
    Intel(R) UHD Graphics 620 & NVIDIA GeForce 930MX
    Sound Card
    Conexant ISST Audio
    Monitor(s) Displays
    Laptop display (17.1") & Samsung U28E590 (27.7")
    Hard Drives
    128 GB SSD & 1 TB HDD
    Mouse
    Wireless Logitech MSX mouse
    Keyboard
    Wireless Logitech MK710 keyboard
    Internet Speed
    100 Mbps down, 20 Mbps up
    Browser
    Edge Chromium Dev Channel
    Antivirus
    Windows Defender
    Other Info
    2 * 3 TB USB HDD
    6 TB WD Mirror NAS

Attachments

  • dism.log
    121.8 KB · Views: 80
  • WT.log
    15.4 KB · Views: 80

My Computer

System One

  • OS
    Windows 11 Pro v 23H2 (Build 22631.3374)
    Computer type
    PC/Desktop
    Manufacturer/Model
    Dell Precision 3660 Tower Workstation
    CPU
    12th Gen Intel(R) Core(TM) i9-12900 5.10 GHz
    Motherboard
    64-bit operating system, x64-based processor
    Memory
    32.00 GB
    Graphics Card(s)
    Intel UHD Graphics 770
    Sound Card
    Realtek Audio
    Monitor(s) Displays
    Dell P2714H Monitor
    Screen Resolution
    1920 x 1080
    Hard Drives
    1 x 512GB NVME PC801 NVMe SK hynix Boot
    1 x 1TB Seagate ST1000LM049-2GH172 Internal HDD
    1 x 1TB Seagate STGX4000400 External HDD
    1 x 2TB Seagate STGX4000400 External HDD
    1 x 4TB Seagate STGX4000400 External HDD
    PSU
    300 Watts
    Cooling
    Air
    Keyboard
    Microsoft Wired Keyboard 600
    Mouse
    Microsoft USB Basic Optical Mouse v2.0
    Browser
    Firefox
    Antivirus
    Windows Defender + Malwarebytes Premium
    Other Info
    BaseBoard Manufacturer Dell Inc.
    BaseBoard Product 0J1CP3
    BaseBoard Version A01
I am stuck on section 2.2

PS C:\WINDOWS\system32> Mount-WindowsImage -ImagePath D:\WPEx64\Media\Sources\boot.wim -Index 1 -Path C:\Mount
Mount-WindowsImage : The parameter is incorrect.
At line:1 char:1
+ Mount-WindowsImage -ImagePath D:\WPEx64\Media\Sources\boot.wim -Index ...
+ ~~~~~~~~~~~~~~~~~~~~~~~~~~~~~~~~~~~~~~~~~~~~~~~~~~~~~~~~~~~~~~~~~~~~~
+ CategoryInfo : NotSpecified: (:) [Mount-WindowsImage], PSArgumentException
+ FullyQualifiedErrorId : Microsoft.Dism.Commands.MountWindowsImageCommand

PS C:\WINDOWS\system32>

All steps up to this point were followed and completed correctly except I had to change "CopyPE" command to "CopyDandI" but everything else worked fine but now I am getting the above error. I have used the same paths as you did and the previous steps completed successfully. Is there something that I should have done prior to following all these steps or am I missing an "assumption"? Please help.
 
Last edited by a moderator:

My Computer

System One

  • OS
    Windows11 Pro
Sorry about the previous post. I realized I had done something wrong on the PE addon installation. I’m getting a couple errors on the next step but I’ll research those first before I post another req for help.
 

My Computer

System One

  • OS
    Windows11 Pro
snip

Kari
1. SinceSince we are talking about Windows 11, we can forget X86 architecture.
2. I propose to simplify the process detailed in step 2 :
- Ignore steps 2.4, 2.5 and 2.6
- Step 2.7 : replace startnet.cmd by the following statements :

Code:
wpeinit
powercfg /s 8c5e7fda-e8bf-4a96-9a85-a6e23a8c635c
set "ps=(Get-Volume -FileSystemLabel Setup).DriveLetter"
for /f %%a in ('powershell "%ps%"') do set "setupfile=%%a:\setup.exe"
%setupfile%

Caveat : before unmounting boot.wim make sure no file explorer window is open.

That's all.
 

My Computer

System One

  • OS
    Windows 11 Enterprise
    Computer type
    Laptop
    Manufacturer/Model
    Asus K73SV
    CPU
    ntel(R) Core(TM) i5-2410M CPU @ 2.30GHz
    Motherboard
    Asus K73SV Series Notebook
    Memory
    8 GB
    Graphics Card(s)
    Intel HD Graphics 3000 / nVidia GeForce GT 540M
    Sound Card
    Realtek
    Screen Resolution
    1600*900
    Hard Drives
    2 SSD Samsung 860 EVO 1 TB
    Other Info
    This is a Windows 11 no-compliant PC
Since we are talking about Windows 11, we can forget X86 architecture.
Only reference to x86 architecture in this tutorial is in Step 2.3, which shows how to add PowerShell to either x64 or x86 WinPE. Both WinPE architecture versions can be used when creating a custom Windows 11 install media as told in this tutorial.

So, I will not "forget" instructions for a 32 bit WinPE, as it has nothing to do with Windows 11 only being available as 64 bit version. Step 2.3 remains as it is.

Kari
 

My Computers

System One System Two

  • OS
    Windows 11 PRO x64 Dev
    Manufacturer/Model
    Hyper-V Virtual Machine (host in System 2 specs)
    CPU
    Intel Core i7-8550U
    Memory
    6 GB
    Graphics Card(s)
    Microsoft Hyper-V Video
    Monitor(s) Displays
    Laptop display (17.1") & Samsung U28E590 (27.7")
  • Operating System
    Windows 11 PRO x64 Dev Channel
    Computer type
    Laptop
    Manufacturer/Model
    HP HP ProBook 470 G5
    CPU
    Intel Core i7-8550U
    Motherboard
    HP 837F KBC Version 02.3D.00
    Memory
    16 GB
    Graphics card(s)
    Intel(R) UHD Graphics 620 & NVIDIA GeForce 930MX
    Sound Card
    Conexant ISST Audio
    Monitor(s) Displays
    Laptop display (17.1") & Samsung U28E590 (27.7")
    Hard Drives
    128 GB SSD & 1 TB HDD
    Mouse
    Wireless Logitech MSX mouse
    Keyboard
    Wireless Logitech MK710 keyboard
    Internet Speed
    100 Mbps down, 20 Mbps up
    Browser
    Edge Chromium Dev Channel
    Antivirus
    Windows Defender
    Other Info
    2 * 3 TB USB HDD
    6 TB WD Mirror NAS
Only reference to x86 architecture in this tutorial is in Step 2.3, which shows how to add PowerShell to either x64 or x86 WinPE. Both WinPE architecture versions can be used when creating a custom Windows 11 install media as told in this tutorial.

So, I will not "forget" instructions for a 32 bit WinPE, as it has nothing to do with Windows 11 only being available as 64 bit version. Step 2.3 remains as it is.

Kari
Depending on the PC builder and the firmware, you can't boot a 32 bit WinPE on a 64 Bit UEFI PC. No problem with BIOS systems.
 

My Computer

System One

  • OS
    Windows 11 Enterprise
    Computer type
    Laptop
    Manufacturer/Model
    Asus K73SV
    CPU
    ntel(R) Core(TM) i5-2410M CPU @ 2.30GHz
    Motherboard
    Asus K73SV Series Notebook
    Memory
    8 GB
    Graphics Card(s)
    Intel HD Graphics 3000 / nVidia GeForce GT 540M
    Sound Card
    Realtek
    Screen Resolution
    1600*900
    Hard Drives
    2 SSD Samsung 860 EVO 1 TB
    Other Info
    This is a Windows 11 no-compliant PC
Depending on the PC builder and the firmware, you can't boot a 32 bit WinPE on a 64 Bit UEFI PC. No problem with BIOS systems.
I am sorry, but that is not true. You can boot each and every computer with x86 or x64 architecture using a 32 bit WinPE media.

Kari
 

My Computers

System One System Two

  • OS
    Windows 11 PRO x64 Dev
    Manufacturer/Model
    Hyper-V Virtual Machine (host in System 2 specs)
    CPU
    Intel Core i7-8550U
    Memory
    6 GB
    Graphics Card(s)
    Microsoft Hyper-V Video
    Monitor(s) Displays
    Laptop display (17.1") & Samsung U28E590 (27.7")
  • Operating System
    Windows 11 PRO x64 Dev Channel
    Computer type
    Laptop
    Manufacturer/Model
    HP HP ProBook 470 G5
    CPU
    Intel Core i7-8550U
    Motherboard
    HP 837F KBC Version 02.3D.00
    Memory
    16 GB
    Graphics card(s)
    Intel(R) UHD Graphics 620 & NVIDIA GeForce 930MX
    Sound Card
    Conexant ISST Audio
    Monitor(s) Displays
    Laptop display (17.1") & Samsung U28E590 (27.7")
    Hard Drives
    128 GB SSD & 1 TB HDD
    Mouse
    Wireless Logitech MSX mouse
    Keyboard
    Wireless Logitech MK710 keyboard
    Internet Speed
    100 Mbps down, 20 Mbps up
    Browser
    Edge Chromium Dev Channel
    Antivirus
    Windows Defender
    Other Info
    2 * 3 TB USB HDD
    6 TB WD Mirror NAS
I am sorry, but that is not true. You can boot each and every computer with x86 or x64 architecture using a 32 bit WinPE media.

Kari
I just tried creating a Macrium Reflect 32bit usb drive for my 64bit UEFI only (legacy bios is not supported) to check this, I was sure it would work as I know I had done it in the past on my old uefi/bios capable laptop.

For sure, I could select the option to create a 32bit usb drive, but it fell over as Reflect could not find a suitable 32bit driver (dreaded IRST drivers for nvme drives). I am not even sure if such a driver exists - I looked on Intel site but it was not obvious.

So perhaps a more accurate statement is "you can boot each and every computer with x86 or x64 architecture using a 32 bit WinPE media, provided you can find suitable 32bit drivers".

Of course, the same caveat applies for 64bit winpe boot usbs i.e. you need appropriate 64bit drivers but these are more easily obtained.

I will test creating a 32bit Reflect iso in Hyper-V from a 32bit gen 1 windows installation (bypassing IRST driver issue), and then see if I can boot from the 32bit iso in a gen 2 device.
 

My Computer

System One

  • OS
    Windows 10 Pro + others in VHDs
    Computer type
    Laptop
    Manufacturer/Model
    ASUS Vivobook 14
    CPU
    I7
    Motherboard
    Yep, Laptop has one.
    Memory
    16 GB
    Graphics Card(s)
    Integrated Intel Iris XE
    Sound Card
    Realtek built in
    Monitor(s) Displays
    N/A
    Screen Resolution
    1920x1080
    Hard Drives
    1 TB Optane NVME SSD, 1 TB NVME SSD
    PSU
    Yep, got one
    Case
    Yep, got one
    Cooling
    Stella Artois
    Keyboard
    Built in
    Mouse
    Bluetooth , wired
    Internet Speed
    72 Mb/s :-(
    Browser
    Edge mostly
    Antivirus
    Defender
    Other Info
    TPM 2.0
Trying to execute the 64 bit setup.exe on a 32 bit WinPE as suggested, will fail because WinPE doesn't include SYSWOW64. Hence my advice for using a 64 bit WinPE to install Windows 11.
 

My Computer

System One

  • OS
    Windows 11 Enterprise
    Computer type
    Laptop
    Manufacturer/Model
    Asus K73SV
    CPU
    ntel(R) Core(TM) i5-2410M CPU @ 2.30GHz
    Motherboard
    Asus K73SV Series Notebook
    Memory
    8 GB
    Graphics Card(s)
    Intel HD Graphics 3000 / nVidia GeForce GT 540M
    Sound Card
    Realtek
    Screen Resolution
    1600*900
    Hard Drives
    2 SSD Samsung 860 EVO 1 TB
    Other Info
    This is a Windows 11 no-compliant PC
According to MS :
  • For Windows 11: If you're launching Windows Setup from WinPE, make sure your WinPE image includes the WinPE-WMI and WinPE-SecureStartup optional components. If you don't include these optional components, you may see an error that your PC doesn't meet the minimum hardware requirements.
 

My Computer

System One

  • OS
    Windows 11 Enterprise
    Computer type
    Laptop
    Manufacturer/Model
    Asus K73SV
    CPU
    ntel(R) Core(TM) i5-2410M CPU @ 2.30GHz
    Motherboard
    Asus K73SV Series Notebook
    Memory
    8 GB
    Graphics Card(s)
    Intel HD Graphics 3000 / nVidia GeForce GT 540M
    Sound Card
    Realtek
    Screen Resolution
    1600*900
    Hard Drives
    2 SSD Samsung 860 EVO 1 TB
    Other Info
    This is a Windows 11 no-compliant PC
Great tutorial!

In Step 3 I ran into an issue with the MakeWinPEMedia CMD, it kept throwing error:

DiskPart errorlevel -2147212269

Of course googling didn't turn up any results with that exact error (different error level codes), BUT I found the solution - the particular USB port on this Dell Latitude 5520 laptop MATTERED where I had the 16GB Sandisk 3.2 Gen 1 Ultra Fit drive inserted. The port that works is the one directly next to the HDMI port. If the thumb drive is plugged into the other USB port it throws the diskpart error with makeWinPEMedia. Try changing the USB port for your thumb drive!

Posting in case someone encounters this error and this thread\post turns up in a search.
 

My Computer

System One

  • OS
    Windows 11
I don't even bother with a USB boot drive. I created an 8GB partition on an internal drive and copied the Windows setup files to that. I can choose to boot from it if needed. Also means it takes under 5 minutes to install Windows
 
Last edited:

My Computer

System One

  • OS
    Windows 11 Pro 23H2 (RP channel)
    Computer type
    PC/Desktop
    Manufacturer/Model
    Gigabyte
    CPU
    AMD Ryzen 5900X 12-core
    Motherboard
    X570 Aorus Xtreme
    Memory
    64GB Corsair Platinum RGB 3600MHz CL16
    Graphics Card(s)
    MSI Suprim X 3080 Ti
    Sound Card
    Soundblaster AE-5 Plus
    Monitor(s) Displays
    ASUS TUF Gaming VG289Q
    Screen Resolution
    3840x2160
    Hard Drives
    Samsung 990 Pro 2TB
    Samsung 980 Pro 2TB
    Samsung 970 Evo Plus 1TB
    Samsung 870 Evo 4TB
    Samsung T7 Touch 1TB
    PSU
    Asus ROG Strix 1000W
    Case
    Corsair D750 Airflow
    Cooling
    Noctua NH-D15S
    Keyboard
    Asus ROG Flare
    Mouse
    Logitech G903 with PowerPlay charger
    Internet Speed
    500Mb/sec
    Browser
    Microsoft Edge
    Antivirus
    Windows Defender

Latest Support Threads

Back
Top Bottom