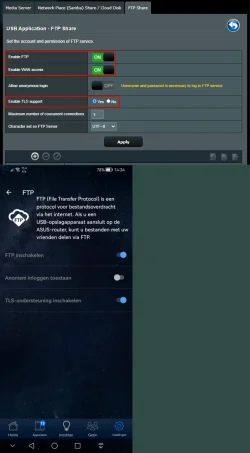
Nope I install Merlin as well. Here are the instructions that I followed myself and it works 100% of the time. If one morning you turn on your computer and it doesn't work, just do a "network reset".
I heard and myself included about whereand how to setup the USB for the ASUS router and windows can talk toeach other. If your a starter, this is the place to be. If yournot, well I can't say much. So let's get started.
STEP #1: Go to System, then click onAdvance System settings. From there, click on “computer name”. Here look for the word “Workgroup”. You must have the word“WORKGROUP” there. To chanage it, you much click on Change andfollow along.
STEP #2: Click on “Network &Internet”, then click on Ethernet, Make sure it's on a PrivateNetwork.
STEP #3: Click on “Network &Internet” again, then click on “Advaned Sharing Settings”. Make sure Private Network, Network Discovery is “ON”, a checkmark in “Setup network connected devices automatically” and thatFile and Printer Sharing is “ON”. Under Public Network, makesure Network Discovery and File and Printer Sharing are both “ON”. Under All Networks, Public Folder Sharing is on, and that FileSharing Connections is set to 128-bit encryption. Password Protectedsharing is “OFF”.
STEP #4: Break
STEP #5: Under Control Panel, AllControl Panel Items, Network and Sharing Center, click on NetworkConnections, then find your Ethernet Controller. Click on that, thenright click on that and go down to “Properties”. Click onInternet Protocol Version 4 (TCP/IPv4), then click on Properties. Then click on “Advance”, then click on “WINS”. Make sureunder NETBIOS settings that the Default is checked.
STEP #6: Find your USB drive that youwant to use, and insert that into the slot for USB 3.0.
STEP #7: Log in to your router. Clickon the icon with is showing your USB drive. Once you click on that amenu will come up, with the titles of Information, Health Scanner andFormat. Format your drive, and set it to format NTFS.
STEP #8: Click on USB Application. Click on Servers Center, then click on “Network Place (Samba)Share/Cloud Disk.
STEP #9: Enable Share
STEP #10: Everything else is “NO”. Depending on your system under “Samba protocol version” Clickon the highest one you can. If you only have SMBv1. This might notwork, as SMB1 is being stop. You can try it, but NOT recommendated.
STEP #11: Under Maximum number ofconcurrent connections, keep it at 5. and hit apply.
STEP #12: Now you'll see a plus sign,a negative sign and a pencil. Click on the “Plus Sign”. A smallwindow will open up to ask you for “account”, “password”, andthen “password”.
STEP #13. Fill out the account namewith anything up to 10 characters. Then fill out the password forthis account. Click “Add”.
STEP# 14: You'll see the name of theaccount. Click on it. Then on the right hand side of the screenyou'll see a paper with a plus sign, then one with a negative signand then one with a pencil. Click on the paper with the plus sign onit. Then enter the folder name that you want.
STEP #15: In the middle you'll see atree with the name of the router, then drive information and then onthe bottom you'll see the name of the folder that you created. Clickon the first button to allow the person to have R/W permission.
STEP #16: Coffee Break
STEP #17: Click on Start and thenclick on This PC, then under “Network locations”. Right click ona blank area. Then click on “Add A Network Location”. Click on“Next”, click “Next”, then click on Browses. A little boxwill pop up with the word “network” in it. Wait. Then click onyour newly USB drive. Click on it, and it should place a yellowfolder on your desktop.
STEP #18: If you run into a problemand this is the only way I've been to figure it out.
A. Click on Start, then click onSettings, then click on Network and Internet, then click on Advancednetwork settings, then click on Network Reset.
B. Wait until your computer reboots,and it should work.
If not, you didn't take long enoughcoffee breaks, and didn't follow the directions. I believe in you and it will work.
GOOD LUCK