I take a lot of screen snips using Snipping Tool.
I have the Snipping Tool's "Multiple Windows" setting enabled so that each click of New creates a new Snipping Tool "window".
I'm not sure when this started but I've only noticed it on Windows 11 and only with Snipping Tool.
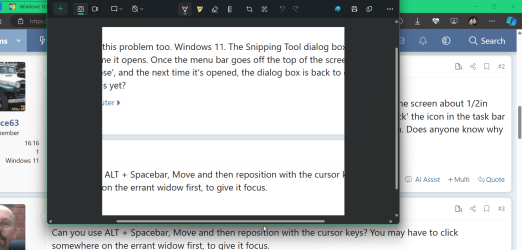
My snipping tool "windows" are creeping up toward the top of the screen and eventually, the menu bar is off the screen.
Since the menu bar is off screen, I cannot click "New" or "Save", etc, and the ability to easily grab and move the "window" is also off screen.
Alt+Tab allows me to switch between the open "windows" but that doesn't help me with the menu bar being off-screen.
Since Cascading appears to be gone, my only choice is to Shift+RightClick > Move each instance which takes a lot of time when I have a lot of instances open.
To get it to temporarily stop, I have to close all instances of Snipping Tool, open a single copy, Move it to the middle of the screen, and close it to "reset" the "default" open position for Snipping Tool. I do not like having the default open location in the middle or lower screen because I then have to move the snips up to see them... and closing the snips towards the top of the screen resets the open location... and eventually, it creeps up and off the screen again.
Also, I cannot seem to force it / replicate it, but it happens frequently for me over time to the point of annoyance.
Is anyone else experiencing this?
Is there still a cascade feature hidden in Windows 11 somewhere?
Is there some alternate setting or other feature that might be helpful here?
Thanks!
My Computers
System One System Two
-
- OS
- Windows 11 Pro
- Computer type
- PC/Desktop
- Manufacturer/Model
- Custom self build
- CPU
- AMD Ryzen 9 7950X3D
- Motherboard
- NZXT N7 B650E (AM5)
- Memory
- G.Skill Trident Z5 NEO RGB 64GB (2 x 32GB) DDR5 6000 CL30-40-40-96 (F5-6000J3040G32GX2-TZ5NR)
- Graphics Card(s)
- AMD Radeon RX 6950 XT (reference)
- Sound Card
- Integrated Digital Audio (S/PDIF)
- Monitor(s) Displays
- 2 x LG 29UM69G-B 29" Ultrawide Gaming Monitor
- Screen Resolution
- 2560x1080
- Hard Drives
- 2TB Samsung 990 PRO M.2
- PSU
- NZXT C1000W Gold
- Case
- NZXT H9 Elite
- Cooling
- NZXT Kraken Z73 RGB
- Keyboard
- Logitech MX Mechanical
- Mouse
- Logitech MX Master 3S
- Internet Speed
- 1 Gbps synchronous
- Browser
- Firefox (w/ Total Cookie Protection and Multi-Account Containers)
- Other Info
- Logitech BRIO 4K Pro webcam
-
- Operating System
- Windows 11 Pro
- Computer type
- Laptop
- Manufacturer/Model
- Lenovo ThinkPad X1 Extreme Gen 5
- CPU
- Intel Core i7-12700H
- Motherboard
- 21DECTO1WW
- Memory
- 32GB DDR5 4800
- Graphics card(s)
- NVIDIA® GeForce RTX™ 3050 Ti 4GB GDDR6
- Hard Drives
- 256GB Micron MTFDKBA256TFK SSD M.2


