Create a single flash drive to boot Win 10 install media, Win 11 media, Macrium recovery media , and more using no 3rd party tools


hsehestedt

Well-known member
Pro User
VIP
Local time
5:49 AM
Posts
2,533
Location
Texas, USA
OS
Win11 Pro 23H2
I came up with an idea for something that surprised me when it worked but I need help understanding how this works.

The goal is to create a single thumb drive, SSD, HDD, etc. from which I can boot Windows 10 install media, Windows 11 install media, Macrium Reflect (or other backup program) recovery media, and still be able to create additional partitions for other purposes. I want to do this without 3rd party tools. After some tinkering I have this all working now.

I need to provide some background first. Bear with me, it's a little long but worth it.

I favor a method for making Windows installation media that uses two partitions. You create a FAT32 partition that holds some of the Windows installation files and an NTFS partition that holds the bulk of it. There are a couple of reasons for doing it this way:

1) Many systems won't boot from a thumb drive unless it is formatted FAT32. Great, but you cannot place any files greater than 4GB on FAT32. This gets around that (yes, I know you can split files, but this avoids that necessity).

2) This method works with everything - x86 and x64 systems as well as BIOS and UEFI based systems.

One of the requirements of this method is that the drive uses a MBR rather than a GPT. This in turn means that the media is limited to 2TB maximum. This matters because I had hoped to use a 4TB portable HDD for this project.

Now, with Win 11 days away and x86 / BIOS based systems in the rearview mirror I realized that I could ditch MBR in favor of GPT, thus eliminating the 2TB limit but sacrificing compatibility with BIOS / x86 systems. Since I no longer care about supporting BIOS and x86 systems I'm 100% fine with this.

Now comes the huge realization...

With MBR you must mark the first partition as "active". However, with GPT this is not necessary. As a result, you can boot from any of multiple partitions. You are also not limited to only four primary partitions. You can have up to 128 partitions, each booting something else and no 2TB limit. The only sacrifice you make is with BIOS and x86 based systems, but who cares? :-)

So, I created a drive like this:

Partition 1: FAT32 for Windows 10 installation
Partition 2: NTFS for Windows 10 installation
Partition 3: FAT32 for Windows 11 installation
Partition 4: NTFS for Windows 11 installation
Partition 5: FAT32 partition that allows me to boot Macrium Reflect in case I need to perform a backup or recovery
Partition 6: NTFS partition (BitLocker encrypted) that holds all my important documents, software, personal photos, and more
Partition 7: NTFS partition to store my Macrium Reflect backups

Partitions 1, 3, and 5 are bootable giving me the ability to boot Windows 10, 11, and Reflect recovery media. When I boot that media on my laptop it looks like this:

Image1.jpg

Note that the SANDISK flash drive shows up three times because there are three FAT32 bootable partitions.

Tested, and it works flawlessly. I can now boot Windows 10 media, Windows 11 media, Macrium Reflect recovery media, and have more partitions for storing other data, including BitLocker protected partitions.

The part of this that I have yet to wrap my mind around is this:

When I boot from partition 1 (Windows 10), how does it know that the remaining Windows files are located on partition 2 and not one of the other partitions? Likewise, when I boot from partition 3 (Windows 11), how does it know to load the remainder from partition 4 and not one of the other partitions? I still need to figure this out, but in the meantime, if you are interested in following my lunacy, here are the steps:

NOTE: The partition sizes below are examples only. Modify partition sizes as you see fit.

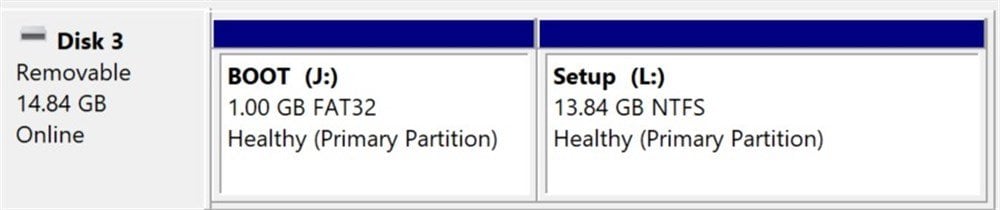
Begin by preparing a disk (thumb drive, SSD, HDD, SD card if your system can boot from one, etc.). Plug in the disk and perform the following steps. Note that I use disk ID 3 in this example, but make sure that you use the correct disk number for your disk!

Run Diskpart.

Within diskpart:

list disk
detail disk

(the above 2 commands will let you identify the correct disk and get the disk number for that disk).

select disk 3
clean
convert GPT

:: Create a FAT32 and NTFS partition for Windows 10

create partition primary size=2500
format fs=fat32 quick
assign

create partition primary size=8000
format fs=ntfs quick
assign

:: Create a FAT32 and NTFS partition for Windows 11

create partition primary size=2500
format fs=fat32 quick
assign

create partition primary size=8000
format fs=ntfs quick
assign

:: Create a partition for the Macrium Reflect recovery disk (other programs recovery disks work here as well)

create partition primary size=1000
format fs=fat32 quick
assign

:: Optional - create any additional partitions. Below I create one more partition to hold other stuff.
:: Note that because I leave off the "size=xxxx" this partition will grab all remaining space on the disk.
:: Create all the partitions you want, on the last one, leave off the "size=xxxx" to use all remaining space.

create partition primary
format fs=ntfs
assign

exit

Now, some assumptions. Below are the drive letters in my example. Yours will likely be different:

Partition 1: E:
Partition 2: F:
Partition 3: G:
Partition 4: H:
Partition 5: I:
Partition 6: J:

Mount your Windows 10 ISO image.
Copy all files and folders from the Windows image EXCEPT the \sources folder to E: (the first FAT32 partition).
Create a folder called "sources" on E:.
From the Windows ISO, copy \sources\boot.wim to E:\sources.
Create a folder called "sources" on F: (the second partition which is formatted with NTFS).
From the \sources folder on your ISO image, copy all files and folders EXCEPT boot.wim to F:\sources.

OPTIONAL:

If your original ISO image already has a file called ei.cfg in the \sources folder, skip this optional section.

If you want the ability to install an edition of Windows other than what shipped on your system, create a file named ei.cfg. As an example, assume you have a laptop that shipped with Win 10 Home but you later upgraded to Professional. When you attempt to reinstall from scratch, Windows may not ask you what edition you want to install. It will simply auto select the Home edition of Windows if your BIOS / firmware contains a signature indicating that the system shipped with home. Creating this file prevents that and allows you to freely choose the edition of Windows to install if more than one is present on your media.

Simply create a text file with these 2 lines:

[Channel]
Retail

Save it as ei.cfg and copy the file to F:\sources (this is the NTFS partition).

END OPTIONAL SECTION

Your drive can now boot Windows 10.

Repeat all the above steps (after the diskpart section) using a Windows 11 ISO image and drives G: and H: (partitions 3 and 4).

You now have both Windows 10 and Windows 11 available as options.

Finally, mount the Macrium Reflect recovery disk and copy all contents to I:\ (partition 5).

You now have Windows 10, 11, and Macrium reflect boot options. Finally do whatever you want with J:. Of course, instead of just creating J: you could have created additional partitions as well. GPT is limited to 128 partitions.

In summary, this is something I've wanted to do for a LONG time (at least Win 10 and Macrium), but it took the realization of a number of pieces before this all came together in my head. I'm still going to try to figure out how some of this works at a low level. Maybe @Kari has some thoughts? :-). But in the meantime, I hope that this helps someone else!
 

My Computers

System One System Two

  • OS
    Win11 Pro 23H2
    Computer type
    PC/Desktop
    Manufacturer/Model
    Home Built
    CPU
    Intel i7-11700K
    Motherboard
    ASUS Prime Z590-A
    Memory
    128GB Crucial Ballistix 3200MHz DRAM
    Graphics Card(s)
    No GPU - CPU graphics only (for now)
    Sound Card
    Realtek (on motherboard)
    Monitor(s) Displays
    HP Envy 32
    Screen Resolution
    2560 x 1440
    Hard Drives
    1 x 1TB NVMe Gen 4 x 4 SSD
    1 x 2TB NVMe Gen 3 x 4 SSD
    2 x 512GB 2.5" SSDs
    2 x 8TB HD
    PSU
    Corsair HX850i
    Case
    Corsair iCue 5000X RGB
    Cooling
    Noctua NH-D15 chromax.black cooler + 10 case fans
    Keyboard
    CODE backlit mechanical keyboard
    Mouse
    Logitech MX Master 3
    Internet Speed
    1Gb Up / 1 Gb Down
    Browser
    Edge
    Antivirus
    Windows Defender
    Other Info
    Additional options installed:
    WiFi 6E PCIe adapter
    ASUS ThunderboltEX 4 PCIe adapter
  • Operating System
    Win11 Pro 23H2
    Computer type
    Laptop
    Manufacturer/Model
    Lenovo ThinkBook 13x Gen 2
    CPU
    Intel i7-1255U
    Memory
    16 GB
    Graphics card(s)
    Intel Iris Xe Graphics
    Sound Card
    Realtek® ALC3306-CG codec
    Monitor(s) Displays
    13.3-inch IPS Display
    Screen Resolution
    WQXGA (2560 x 1600)
    Hard Drives
    2 TB 4 x 4 NVMe SSD
    PSU
    USB-C / Thunderbolt 4 Power / Charging
    Mouse
    Buttonless Glass Precision Touchpad
    Keyboard
    Backlit, spill resistant keyboard
    Internet Speed
    1Gb Up / 1Gb Down
    Browser
    Edge
    Antivirus
    Windows Defender
    Other Info
    WiFi 6e / Bluetooth 5.1 / Facial Recognition / Fingerprint Sensor / ToF (Time of Flight) Human Presence Sensor
Just a quick follow-up to my original post above. Note that when booting from this media, the available boot options may not all look the same. Image below is me bringing up the boot options on my desktop computer. I have attached a 4TB WD Elements HD with a Win 10, Win 11, and Macrium Reflect boot partition. Note that the entry for Macrium Reflect looks different on this machine than that for the 2 Windows entries. Don't let that confuse you if you see it.

Image2.jpg
 

My Computers

System One System Two

  • OS
    Win11 Pro 23H2
    Computer type
    PC/Desktop
    Manufacturer/Model
    Home Built
    CPU
    Intel i7-11700K
    Motherboard
    ASUS Prime Z590-A
    Memory
    128GB Crucial Ballistix 3200MHz DRAM
    Graphics Card(s)
    No GPU - CPU graphics only (for now)
    Sound Card
    Realtek (on motherboard)
    Monitor(s) Displays
    HP Envy 32
    Screen Resolution
    2560 x 1440
    Hard Drives
    1 x 1TB NVMe Gen 4 x 4 SSD
    1 x 2TB NVMe Gen 3 x 4 SSD
    2 x 512GB 2.5" SSDs
    2 x 8TB HD
    PSU
    Corsair HX850i
    Case
    Corsair iCue 5000X RGB
    Cooling
    Noctua NH-D15 chromax.black cooler + 10 case fans
    Keyboard
    CODE backlit mechanical keyboard
    Mouse
    Logitech MX Master 3
    Internet Speed
    1Gb Up / 1 Gb Down
    Browser
    Edge
    Antivirus
    Windows Defender
    Other Info
    Additional options installed:
    WiFi 6E PCIe adapter
    ASUS ThunderboltEX 4 PCIe adapter
  • Operating System
    Win11 Pro 23H2
    Computer type
    Laptop
    Manufacturer/Model
    Lenovo ThinkBook 13x Gen 2
    CPU
    Intel i7-1255U
    Memory
    16 GB
    Graphics card(s)
    Intel Iris Xe Graphics
    Sound Card
    Realtek® ALC3306-CG codec
    Monitor(s) Displays
    13.3-inch IPS Display
    Screen Resolution
    WQXGA (2560 x 1600)
    Hard Drives
    2 TB 4 x 4 NVMe SSD
    PSU
    USB-C / Thunderbolt 4 Power / Charging
    Mouse
    Buttonless Glass Precision Touchpad
    Keyboard
    Backlit, spill resistant keyboard
    Internet Speed
    1Gb Up / 1Gb Down
    Browser
    Edge
    Antivirus
    Windows Defender
    Other Info
    WiFi 6e / Bluetooth 5.1 / Facial Recognition / Fingerprint Sensor / ToF (Time of Flight) Human Presence Sensor
Apologies - one last post for the evening. I just had one more tip that I forgot earlier. All these drive letters result in a heck of a lot of drive letters. If you don't them, simply go into Disk Manager and remove the drive letters from those partitions. They will still boot fine, they will simply be hidden in that copy of Windows (they will show up if you take that drive to another machine). If my test, I had created 7 partitions in total:

2 for Win 10
2 for Win 11
1 for Macrium
1 for all my software and documents
1 for my backups

By hiding the first 5 partitions, all I see is my software and backups partitions. Much cleaner!
 

My Computers

System One System Two

  • OS
    Win11 Pro 23H2
    Computer type
    PC/Desktop
    Manufacturer/Model
    Home Built
    CPU
    Intel i7-11700K
    Motherboard
    ASUS Prime Z590-A
    Memory
    128GB Crucial Ballistix 3200MHz DRAM
    Graphics Card(s)
    No GPU - CPU graphics only (for now)
    Sound Card
    Realtek (on motherboard)
    Monitor(s) Displays
    HP Envy 32
    Screen Resolution
    2560 x 1440
    Hard Drives
    1 x 1TB NVMe Gen 4 x 4 SSD
    1 x 2TB NVMe Gen 3 x 4 SSD
    2 x 512GB 2.5" SSDs
    2 x 8TB HD
    PSU
    Corsair HX850i
    Case
    Corsair iCue 5000X RGB
    Cooling
    Noctua NH-D15 chromax.black cooler + 10 case fans
    Keyboard
    CODE backlit mechanical keyboard
    Mouse
    Logitech MX Master 3
    Internet Speed
    1Gb Up / 1 Gb Down
    Browser
    Edge
    Antivirus
    Windows Defender
    Other Info
    Additional options installed:
    WiFi 6E PCIe adapter
    ASUS ThunderboltEX 4 PCIe adapter
  • Operating System
    Win11 Pro 23H2
    Computer type
    Laptop
    Manufacturer/Model
    Lenovo ThinkBook 13x Gen 2
    CPU
    Intel i7-1255U
    Memory
    16 GB
    Graphics card(s)
    Intel Iris Xe Graphics
    Sound Card
    Realtek® ALC3306-CG codec
    Monitor(s) Displays
    13.3-inch IPS Display
    Screen Resolution
    WQXGA (2560 x 1600)
    Hard Drives
    2 TB 4 x 4 NVMe SSD
    PSU
    USB-C / Thunderbolt 4 Power / Charging
    Mouse
    Buttonless Glass Precision Touchpad
    Keyboard
    Backlit, spill resistant keyboard
    Internet Speed
    1Gb Up / 1Gb Down
    Browser
    Edge
    Antivirus
    Windows Defender
    Other Info
    WiFi 6e / Bluetooth 5.1 / Facial Recognition / Fingerprint Sensor / ToF (Time of Flight) Human Presence Sensor
I have a batch file that does the steps of creating a fat32 and exfat (I use exfat rather than ntfs so it can boot on macs as well) partition. I think it should be easy enough can to modify it so it could install several isos in a loop (or in sequence).

You would have to set a couple of parameters to do this.

I am not 100% certain about the Reflect installation but in principle same 2 partition method should work for it as well wven though not really needed. User would have to specify the mounted drive letter of first iso, and others would follow in sequence.

The maxium number of isos that can be installed would depend on size of usb, and also if any exfat partitions need to be greater than my default 6GB. My batch file assume 8GB per iso, so a 64 GB iso could have up to 8 isos.

I do not know if it possible to get really clever and mark entry name in bios so you can tell later which entry is which. I will ponder on that.
 

My Computer

System One

  • OS
    Windows 10 Pro + others in VHDs
    Computer type
    Laptop
    Manufacturer/Model
    ASUS Vivobook 14
    CPU
    I7
    Motherboard
    Yep, Laptop has one.
    Memory
    16 GB
    Graphics Card(s)
    Integrated Intel Iris XE
    Sound Card
    Realtek built in
    Monitor(s) Displays
    N/A
    Screen Resolution
    1920x1080
    Hard Drives
    1 TB Optane NVME SSD, 1 TB NVME SSD
    PSU
    Yep, got one
    Case
    Yep, got one
    Cooling
    Stella Artois
    Keyboard
    Built in
    Mouse
    Bluetooth , wired
    Internet Speed
    72 Mb/s :-(
    Browser
    Edge mostly
    Antivirus
    Defender
    Other Info
    TPM 2.0
Hi there

@hsehestedt

By extending this to using a decent size external SSD I've also got as well as installation iso's on the SSD - as well as 2 complete "Windows to Go" systems (W11 and W2K22 Server) and a Linux Arch Linux system.

Works great - -- Simply using an old spare SSD connected via SATA->USB adapter --

To get TWO Windows to Go systems needs a bit of "poodlefakery" -- but with a bit of dism / apply image and image 2nd one to ist ssd -- I needed a 2nd ssd initially to "replicate" one Windows to go system on to the ist SSD and some edit with BCD boot.

I'm looking at using GRUB2 as the stand alone bootloader on the external device - there's no reason why that can't be used -- it's perfectly capable of booting any OS from any HDD / device - doesn't need a Linux distro either. That should simplify the whole boot selection process.
(In GRUB there's an "OS Prober" which can be optionally enabled to look for other bootable systems).

Cheers
jimbo
 
Last edited:

My Computer

System One

  • OS
    Windows XP,7,10,11 Linux Arch Linux
    Computer type
    PC/Desktop
    CPU
    2 X Intel i7
I have a batch file that does the steps of creating a fat32 and exfat (I use exfat rather than ntfs so it can boot on macs as well) partition. I think it should be easy enough can to modify it so it could install several isos in a loop (or in sequence).

You would have to set a couple of parameters to do this.

I am not 100% certain about the Reflect installation but in principle same 2 partition method should work for it as well wven though not really needed. User would have to specify the mounted drive letter of first iso, and others would follow in sequence.

The maxium number of isos that can be installed would depend on size of usb, and also if any exfat partitions need to be greater than my default 6GB. My batch file assume 8GB per iso, so a 64 GB iso could have up to 8 isos.

I do not know if it possible to get really clever and mark entry name in bios so you can tell later which entry is which. I will ponder on that.

For the reflect recovery disk, I'm only using a single FAT32 partition because the reflect recovery media is so small so no 2 partition trickery is needed. As for getting the UEFI to display some more intelligible name, that would be fantastic. I'll research and see if I can find anything but we're definitely into new territory for me with this :-).

Currently I have this setup on a 4TB disk. It has 2 partitions for Win 10 boot, 2 for Win 11, 1 for the Macrium Reflect recovery media, 1 that is BitLocker encrypted for all my important documents and private data, and one big partition for Macrium Reflect backups and whatever else I may need temporary storage for.
 

My Computers

System One System Two

  • OS
    Win11 Pro 23H2
    Computer type
    PC/Desktop
    Manufacturer/Model
    Home Built
    CPU
    Intel i7-11700K
    Motherboard
    ASUS Prime Z590-A
    Memory
    128GB Crucial Ballistix 3200MHz DRAM
    Graphics Card(s)
    No GPU - CPU graphics only (for now)
    Sound Card
    Realtek (on motherboard)
    Monitor(s) Displays
    HP Envy 32
    Screen Resolution
    2560 x 1440
    Hard Drives
    1 x 1TB NVMe Gen 4 x 4 SSD
    1 x 2TB NVMe Gen 3 x 4 SSD
    2 x 512GB 2.5" SSDs
    2 x 8TB HD
    PSU
    Corsair HX850i
    Case
    Corsair iCue 5000X RGB
    Cooling
    Noctua NH-D15 chromax.black cooler + 10 case fans
    Keyboard
    CODE backlit mechanical keyboard
    Mouse
    Logitech MX Master 3
    Internet Speed
    1Gb Up / 1 Gb Down
    Browser
    Edge
    Antivirus
    Windows Defender
    Other Info
    Additional options installed:
    WiFi 6E PCIe adapter
    ASUS ThunderboltEX 4 PCIe adapter
  • Operating System
    Win11 Pro 23H2
    Computer type
    Laptop
    Manufacturer/Model
    Lenovo ThinkBook 13x Gen 2
    CPU
    Intel i7-1255U
    Memory
    16 GB
    Graphics card(s)
    Intel Iris Xe Graphics
    Sound Card
    Realtek® ALC3306-CG codec
    Monitor(s) Displays
    13.3-inch IPS Display
    Screen Resolution
    WQXGA (2560 x 1600)
    Hard Drives
    2 TB 4 x 4 NVMe SSD
    PSU
    USB-C / Thunderbolt 4 Power / Charging
    Mouse
    Buttonless Glass Precision Touchpad
    Keyboard
    Backlit, spill resistant keyboard
    Internet Speed
    1Gb Up / 1Gb Down
    Browser
    Edge
    Antivirus
    Windows Defender
    Other Info
    WiFi 6e / Bluetooth 5.1 / Facial Recognition / Fingerprint Sensor / ToF (Time of Flight) Human Presence Sensor
Hi there

@hsehestedt

By extending this to using a decent size external SSD I've also got as well as installation iso's on the SSD - as well as 2 complete "Windows to Go" systems (W11 and W2K22 Server) and a Linux Arch Linux system.

Works great - -- Simply using an old spare SSD connected via SATA->USB adapter --

To get TWO Windows to Go systems needs a bit of "poodlefakery" -- but with a bit of dism / apply image and image 2nd one to ist ssd -- I needed a 2nd ssd initially to "replicate" one Windows to go system on to the ist SSD and some edit with BCD boot.

I'm looking at using GRUB2 as the stand alone bootloader on the external device - there's no reason why that can't be used -- it's perfectly capable of booting any OS from any HDD / device - doesn't need a Linux distro either. That should simplify the whole boot selection process.
(In GRUB there's an "OS Prober" which can be optionally enabled to look for other bootable systems).

Cheers
jimbo

Yeah, I'm aware that GRUB is very useful for this sort of thing. I merely thought this interesting because I needed no third party software at all. Heck, not even any special Microsoft tools. It's just fun to play with. It's also really useful to me because I have a couple machines that won't be able to run Win 11 so having the ability to boot either Win 10 or win 11 install media from the same disk or thumb drive will be handy for me.
 

My Computers

System One System Two

  • OS
    Win11 Pro 23H2
    Computer type
    PC/Desktop
    Manufacturer/Model
    Home Built
    CPU
    Intel i7-11700K
    Motherboard
    ASUS Prime Z590-A
    Memory
    128GB Crucial Ballistix 3200MHz DRAM
    Graphics Card(s)
    No GPU - CPU graphics only (for now)
    Sound Card
    Realtek (on motherboard)
    Monitor(s) Displays
    HP Envy 32
    Screen Resolution
    2560 x 1440
    Hard Drives
    1 x 1TB NVMe Gen 4 x 4 SSD
    1 x 2TB NVMe Gen 3 x 4 SSD
    2 x 512GB 2.5" SSDs
    2 x 8TB HD
    PSU
    Corsair HX850i
    Case
    Corsair iCue 5000X RGB
    Cooling
    Noctua NH-D15 chromax.black cooler + 10 case fans
    Keyboard
    CODE backlit mechanical keyboard
    Mouse
    Logitech MX Master 3
    Internet Speed
    1Gb Up / 1 Gb Down
    Browser
    Edge
    Antivirus
    Windows Defender
    Other Info
    Additional options installed:
    WiFi 6E PCIe adapter
    ASUS ThunderboltEX 4 PCIe adapter
  • Operating System
    Win11 Pro 23H2
    Computer type
    Laptop
    Manufacturer/Model
    Lenovo ThinkBook 13x Gen 2
    CPU
    Intel i7-1255U
    Memory
    16 GB
    Graphics card(s)
    Intel Iris Xe Graphics
    Sound Card
    Realtek® ALC3306-CG codec
    Monitor(s) Displays
    13.3-inch IPS Display
    Screen Resolution
    WQXGA (2560 x 1600)
    Hard Drives
    2 TB 4 x 4 NVMe SSD
    PSU
    USB-C / Thunderbolt 4 Power / Charging
    Mouse
    Buttonless Glass Precision Touchpad
    Keyboard
    Backlit, spill resistant keyboard
    Internet Speed
    1Gb Up / 1Gb Down
    Browser
    Edge
    Antivirus
    Windows Defender
    Other Info
    WiFi 6e / Bluetooth 5.1 / Facial Recognition / Fingerprint Sensor / ToF (Time of Flight) Human Presence Sensor

My Computer

System One

  • OS
    Windows 11
    Computer type
    Laptop
    Manufacturer/Model
    Lenovo X380 Yoga
    CPU
    i7-8650U (8th Gen/Kaby Lake)
    Motherboard
    20LH000MUS (U3E1)
    Memory
    16 GB
    Graphics Card(s)
    Intel UHD Graphics 620
    Sound Card
    Integrated Conexant SmartAudio HD
    Monitor(s) Displays
    FlexView Display
    Screen Resolution
    1920x1080
    Hard Drives
    Toshiba 1 TB PCIe x3 NVMe SSD
    external 5TB Seagate USB-C attached HDD
    PSU
    Lenovo integrated 65W power brick
    Case
    Laptop
    Cooling
    Laptop
    Keyboard
    Integrated Lenovo ThinkPad keyboard
    Mouse
    touchscreen, touchpad
    Internet Speed
    GbE (Spectrum/Charter)
    Browser
    all of em
    Antivirus
    Defender
    Other Info
    Purchased early 2019 as Windows Insider test PC
I have created a batch file that will create 3 iso boot entries e.g. Macrium Reflect, Windows 10, Windows 11

It assumes letters Q, R are not in general use for partitions. It reuses these and all are removed at end.

You need to do a bit of configuration i.e. enter drive number for usb drive (list disk in diskpart to find out)
BIG WARNING - CONFIGURE DRIVE FILE CORRECTLY OR YOU MAY WIPE EXISTING DRIVES

You also need to mount each iso before running batch file, and edit drive letter in initial configuration.

The more adventurous can copy and paste each iso section to extend to 4, 5, 6 etc. You would also have to set partition numbers in each section (PARF, PARE). I have commented it as best as I can.

Note: when you use assign command, to assign letters, you get annoying pops asking you to format drive. You can temporarily stop the Shell Hardware Detection Service - see below, to get around this. The service restarts on a reboot.

Code:
echo on
REM =========================================================================================
REM ======BIG WARNING - FIRST TWO PARAMETER SETS MUST BE CONFIGURED CORRECTLY ===================
REM =========================================================================================

REM SET DRIVE NUMBER OF MOUNTED USB DRIVE - WARNING THIS MUST BE CORRECT.
REM IT IS USUALLY LAST ONE IN DRIVE NUMBER LIST
REM VERY BIG WARNING - IF  YOU CHOOSE WRONG DRIVE YOU WILL WIPE IT!!!
REM SET TO 99 INITIALLY TO PREVENT RISK OF ACCIDENTAL DELETION

SET USBDRIVE=99

REM  SET DRIVE LETTER OF MOUNTED DRIVES - IF DRIVE LETTERS ARE WRONG, BATCH WILL NOT WORK.

SET ISO1=F
SET ISO2=G
SET ISO3=H

REM PARTION NUMBER PARF1 = FAT32 PART 1, PARE1= EXFAT PARTITION 1 ETC.
SET PARF1=1
SET PARE1=2
SET PARF2=3
SET PARE2=4
SET PARF3=5
SET PARE3=6


REM =========================================================================================
REM ================== ALL OTHER PARAMETERS CAN NORMALLY BE LEFT ALONE ======================
REM ============== ONLY CHANGE DRIVE LETTERS IF NEEDED E.G. USED ELSEWHERE ==================
REM =========================================================================================

REM SET DRIVE OF TEMPORARY FILES
set USBTDRV=C


REM SET DRIVE LETTER OF FAT32 PARTITION
set FAT32=Q

REM SET DRIVE LETTER OF EXFAT PARTITION
set EXFAT=R

REM CREATE WORKING DIRECTORY
%USBTDRV%:
cd\
rd usbcreate /s /q
md usbcreate
 

REM LIST DISKS AND CHECK USB DRIVE NUMBER IS SET
echo LIST DISK > %USBTDRV%:\usbcreate\listdisk.txt
CLS
diskpart /s %USBTDRV%:\usbcreate\listdisk.txt
IF %USBDRIVE%==99 goto :NOTSET
 
GOTO :CONT1
:NOTSET

echo.
echo XXXXXXXXXXXXXXXXXXXXXXXXXXXXXXXXXXXXXXXXXXXXXXXXXXXXXXXXXXXXXX
echo X                                                                                                                                 
echo X YOU HAVE NOT SET DRIVE NUMBER OF USB DRIVE                                             
echo X IT IS USUALLY LAST ONE IN THE ABOVE LIST BUT CAN DIFFER    
echo X                                                            
echo X MAKE SURE USB DRIVE IS PLUGGED IN                          
echo X                                                            
echo X WARNING - MAKE SURE DRIVE NUMBER IS RIGHT                  
echo X OR ELSE YOU COULD WIPE WRONG DRIVE                         
echo X                                                            
echo X I ACCEPT NO RESPONSIBILITY FOR ANY MISTAKES                
echo X YOU HAVE BEEN WARNED!!!!!                                  
echo X                                                            
echo XXXXXXXXXXXXXXXXXXXXXXXXXXXXXXXXXXXXXXXXXXXXXXXXXXXXXXXXXXXXXX
 
GOTO :ENDPROG
:CONT1

echo on


REM CREATE EI.CFG
echo [CHANNEL] > %USBTDRV%:\usbcreate\ei.cfg
echo Retail >> %USBTDRV%:\usbcreate\ei.cfg


REM WIPE USB DRIVE
echo select disk %USBDRIVE% > %USBTDRV%:\usbcreate\formatdisk.txt
echo clean >> %USBTDRV%:\usbcreate\formatdisk.txt
echo convert gpt noerr>> %USBTDRV%:\usbcreate\formatdisk.txt
echo exit >> %USBTDRV%:\usbcreate\formatdisk.txt
diskpart /s %USBTDRV%:\usbcreate\formatdisk.txt


REM =========================================================================================
REM FIRST ISO
REM =========================================================================================
SET ISODRIVE=%ISO1%
SET PARF=%PARF1%
SET PARE=%PARE1%

REM FORMAT USB DRIVE
echo select disk %USBDRIVE% > %USBTDRV%:\usbcreate\formatdisk.txt

echo create partition primary size=1500 >> %USBTDRV%:\usbcreate\formatdisk.txt   
echo format fs=fat32 quick >> %USBTDRV%:\usbcreate\formatdisk.txt
echo assign letter=Q >> %USBTDRV%:\usbcreate\formatdisk.txt

echo create partition primary size=7500 >> %USBTDRV%:\usbcreate\formatdisk.txt
echo format fs=exFat quick >> %USBTDRV%:\usbcreate\formatdisk.txt
echo assign letter=R >> %USBTDRV%:\usbcreate\formatdisk.txt

echo exit >> %USBTDRV%:\usbcreate\formatdisk.txt
 
diskpart /s %USBTDRV%:\usbcreate\formatdisk.txt


REM CREATE DRIVE
cd \usbcreate
md baseiso
xcopy %ISODRIVE%:\*.* %USBTDRV%:\usbcreate\baseiso\ /s /y

REM COPY ALL FILES TO EXFAT FOLDER
label %EXFAT%:ISO1-EXFAT
%USBTDRV%:
cd \usbcreate\baseiso
xcopy *.* %EXFAT%:\ /s /y
xcopy %USBTDRV%:\usbcreate\ei.cfg %EXFAT%:\sources /s /y

REM COPY ALL FILES EXCEPT THOSE IN SOURCES FOLDER (DELETE FROM BASEISO)
label %FAT32%:ISO1-FAT32
del %USBTDRV%:\usbcreate\baseiso\sources\*.* /q
cd %USBTDRV%:\usbcreate\baseiso
rd sources /s /q

%USBTDRV%:
cd \usbcreate\baseiso
xcopy *.* %FAT32%:\ /s /y
cd %FAT32%:\
md sources
xcopy %EXFAT%:\sources\boot.wim %FAT32%:\sources\boot.* /s /y

echo select disk %USBDRIVE% > %USBTDRV%:\usbcreate\formatdisk.txt
echo select partition %PARF% >> %USBTDRV%:\usbcreate\formatdisk.txt
echo remove all >> %USBTDRV%:\usbcreate\formatdisk.txt
echo select partition %PARE% >> %USBTDRV%:\usbcreate\formatdisk.txt
echo remove all >> %USBTDRV%:\usbcreate\formatdisk.txt
echo exit >> %USBTDRV%:\usbcreate\formatdisk.txt
diskpart /s %USBTDRV%:\usbcreate\formatdisk.txt


REM DELETE WORKING DIRECTORY
%USBTDRV%:
cd\
rd usbcreate /s /q


REM =========================================================================================
REM END FIRST ISO
REM =========================================================================================

REM =========================================================================================
REM SECOND ISO
REM =========================================================================================
SET ISODRIVE=%ISO2%
SET PARF=%PARF2%
SET PARE=%PARE2%

REM =========================================================================================
REM ================== ALL OTHER PARAMETERS CAN NOMRALLY BE LEFT ALONE ======================
REM ============== ONLY CHANGE DRIVE LETTERS IF NEEDED E.G. USED ELSEWHERE ==================
REM =========================================================================================

REM SET DRIVE OF TEMPORARY FILES
set USBTDRV=C


REM SET DRIVE LETTER OF FAT32 PARTITION
set FAT32=Q

REM SET DRIVE LETTER OF EXFAT PARTITION
set EXFAT=R

REM CREATE WORKING DIRECTORY
%USBTDRV%:
cd\
rd usbcreate /s /q
md usbcreate


REM CREATE EI.CFG
echo [CHANNEL] > %USBTDRV%:\usbcreate\ei.cfg
echo Retail >> %USBTDRV%:\usbcreate\ei.cfg

REM FORMAT USB DRIVE
echo select disk %USBDRIVE% > %USBTDRV%:\usbcreate\formatdisk.txt

echo create partition primary size=1500 >> %USBTDRV%:\usbcreate\formatdisk.txt
echo format fs=fat32 quick >> %USBTDRV%:\usbcreate\formatdisk.txt
echo assign letter=Q >> %USBTDRV%:\usbcreate\formatdisk.txt

echo create partition primary size=7500 >> %USBTDRV%:\usbcreate\formatdisk.txt
echo format fs=exFat quick >> %USBTDRV%:\usbcreate\formatdisk.txt
echo assign letter=R >> %USBTDRV%:\usbcreate\formatdisk.txt

diskpart /s %USBTDRV%:\usbcreate\formatdisk.txt
 
REM CREATE DRIVE
cd \usbcreate
md baseiso
xcopy %ISODRIVE%:\*.* %USBTDRV%:\usbcreate\baseiso\ /s /y

REM COPY ALL FILES TO EXFAT FOLDER
label %EXFAT%:ISO2-EXFAT
%USBTDRV%:
cd \usbcreate\baseiso
xcopy *.* %EXFAT%:\ /s /y
xcopy %USBTDRV%:\usbcreate\ei.cfg %EXFAT%:\sources /s /y

REM COPY ALL FILES EXCEPT THOSE IN SOURCES FOLDER (DELETE FROM BASEISO)
label %FAT32%:ISO2-FAT32
del %USBTDRV%:\usbcreate\baseiso\sources\*.* /q
cd %USBTDRV%:\usbcreate\baseiso
rd sources /s /q

%USBTDRV%:
cd \usbcreate\baseiso
xcopy *.* %FAT32%:\ /s /y
cd %FAT32%:\
md sources
xcopy %EXFAT%:\sources\boot.wim %FAT32%:\sources\boot.* /s /y


REM FORMAT USB DRIVE


echo select disk %USBDRIVE% > %USBTDRV%:\usbcreate\formatdisk.txt
echo select partition %PARF% >> %USBTDRV%:\usbcreate\formatdisk.txt
echo remove all >> %USBTDRV%:\usbcreate\formatdisk.txt
echo select partition %PARE% >> %USBTDRV%:\usbcreate\formatdisk.txt
echo remove all >> %USBTDRV%:\usbcreate\formatdisk.txt
echo exit >> %USBTDRV%:\usbcreate\formatdisk.txt
diskpart /s %USBTDRV%:\usbcreate\formatdisk.txt

REM DELETE WORKING DIRECTORY
%USBTDRV%:
cd\
rd usbcreate /s /q


REM =========================================================================================
REM END OF SECOND ISO
REM =========================================================================================


REM =========================================================================================
REM THIRD ISO
REM =========================================================================================
REM CONFIGURE ISO AND PARTITION NUMBER
SET ISODRIVE=%ISO3%
SET PARF=%PARF3%
SET PARE=%PARE3%

REM =========================================================================================
REM ================== ALL OTHER PARAMETERS CAN NOMRALLY BE LEFT ALONE ======================
REM ============== ONLY CHANGE DRIVE LETTERS IF NEEDED E.G. USED ELSEWHERE ==================
REM =========================================================================================

REM SET DRIVE OF TEMPORARY FILES
set USBTDRV=C


REM SET DRIVE LETTER OF FAT32 PARTITION
set FAT32=Q

REM SET DRIVE LETTER OF EXFAT PARTITION
set EXFAT=R

REM CREATE WORKING DIRECTORY
%USBTDRV%:
cd\
rd usbcreate /s /q
md usbcreate


REM CREATE EI.CFG
echo [CHANNEL] > %USBTDRV%:\usbcreate\ei.cfg
echo Retail >> %USBTDRV%:\usbcreate\ei.cfg

REM FORMAT USB DRIVE
echo select disk %USBDRIVE% > %USBTDRV%:\usbcreate\formatdisk.txt

echo create partition primary size=1500 >> %USBTDRV%:\usbcreate\formatdisk.txt
echo format fs=fat32 quick >> %USBTDRV%:\usbcreate\formatdisk.txt
echo assign letter=Q >> %USBTDRV%:\usbcreate\formatdisk.txt

echo create partition primary size=7500 >> %USBTDRV%:\usbcreate\formatdisk.txt
echo format fs=exFat quick >> %USBTDRV%:\usbcreate\formatdisk.txt
echo assign letter=R >> %USBTDRV%:\usbcreate\formatdisk.txt
diskpart /s %USBTDRV%:\usbcreate\formatdisk.txt


REM CREATE DRIVE
cd \usbcreate
md baseiso
xcopy %ISODRIVE%:\*.* %USBTDRV%:\usbcreate\baseiso\ /s /y

REM COPY ALL FILES TO EXFAT FOLDER
label %EXFAT%:ISO3-EXFAT
%USBTDRV%:
cd \usbcreate\baseiso
xcopy *.* %EXFAT%:\ /s /y
xcopy %USBTDRV%:\usbcreate\ei.cfg %EXFAT%:\sources /s /y

REM COPY ALL FILES EXCEPT THOSE IN SOURCES FOLDER (DELETE FROM BASEISO)
label %FAT32%:ISO3-FAT32
del %USBTDRV%:\usbcreate\baseiso\sources\*.* /q
cd %USBTDRV%:\usbcreate\baseiso
rd sources /s /q


%USBTDRV%:
cd \usbcreate\baseiso
xcopy *.* %FAT32%:\ /s /y
cd %FAT32%:\
md sources
xcopy %EXFAT%:\sources\boot.wim %FAT32%:\sources\boot.* /s /y

REM FORMAT USB DRIVE
echo select disk %USBDRIVE% > %USBTDRV%:\usbcreate\formatdisk.txt
echo select partition %PARF% >> %USBTDRV%:\usbcreate\formatdisk.txt
echo remove all >> %USBTDRV%:\usbcreate\formatdisk.txt
echo select partition %PARE% >> %USBTDRV%:\usbcreate\formatdisk.txt
echo remove all >> %USBTDRV%:\usbcreate\formatdisk.txt
echo exit >> %USBTDRV%:\usbcreate\formatdisk.txt
diskpart /s %USBTDRV%:\usbcreate\formatdisk.txt


REM DELETE WORKING DIRECTORY
%USBTDRV%:
cd\
rd usbcreate /s /q

REM =========================================================================================
REM END OF THIRD ISO
REM =========================================================================================
:ENDPROG


1632938150834.png
 

My Computer

System One

  • OS
    Windows 10 Pro + others in VHDs
    Computer type
    Laptop
    Manufacturer/Model
    ASUS Vivobook 14
    CPU
    I7
    Motherboard
    Yep, Laptop has one.
    Memory
    16 GB
    Graphics Card(s)
    Integrated Intel Iris XE
    Sound Card
    Realtek built in
    Monitor(s) Displays
    N/A
    Screen Resolution
    1920x1080
    Hard Drives
    1 TB Optane NVME SSD, 1 TB NVME SSD
    PSU
    Yep, got one
    Case
    Yep, got one
    Cooling
    Stella Artois
    Keyboard
    Built in
    Mouse
    Bluetooth , wired
    Internet Speed
    72 Mb/s :-(
    Browser
    Edge mostly
    Antivirus
    Defender
    Other Info
    TPM 2.0
Excellent! Thanks cereberus.
 

My Computers

System One System Two

  • OS
    Win11 Pro 23H2
    Computer type
    PC/Desktop
    Manufacturer/Model
    Home Built
    CPU
    Intel i7-11700K
    Motherboard
    ASUS Prime Z590-A
    Memory
    128GB Crucial Ballistix 3200MHz DRAM
    Graphics Card(s)
    No GPU - CPU graphics only (for now)
    Sound Card
    Realtek (on motherboard)
    Monitor(s) Displays
    HP Envy 32
    Screen Resolution
    2560 x 1440
    Hard Drives
    1 x 1TB NVMe Gen 4 x 4 SSD
    1 x 2TB NVMe Gen 3 x 4 SSD
    2 x 512GB 2.5" SSDs
    2 x 8TB HD
    PSU
    Corsair HX850i
    Case
    Corsair iCue 5000X RGB
    Cooling
    Noctua NH-D15 chromax.black cooler + 10 case fans
    Keyboard
    CODE backlit mechanical keyboard
    Mouse
    Logitech MX Master 3
    Internet Speed
    1Gb Up / 1 Gb Down
    Browser
    Edge
    Antivirus
    Windows Defender
    Other Info
    Additional options installed:
    WiFi 6E PCIe adapter
    ASUS ThunderboltEX 4 PCIe adapter
  • Operating System
    Win11 Pro 23H2
    Computer type
    Laptop
    Manufacturer/Model
    Lenovo ThinkBook 13x Gen 2
    CPU
    Intel i7-1255U
    Memory
    16 GB
    Graphics card(s)
    Intel Iris Xe Graphics
    Sound Card
    Realtek® ALC3306-CG codec
    Monitor(s) Displays
    13.3-inch IPS Display
    Screen Resolution
    WQXGA (2560 x 1600)
    Hard Drives
    2 TB 4 x 4 NVMe SSD
    PSU
    USB-C / Thunderbolt 4 Power / Charging
    Mouse
    Buttonless Glass Precision Touchpad
    Keyboard
    Backlit, spill resistant keyboard
    Internet Speed
    1Gb Up / 1Gb Down
    Browser
    Edge
    Antivirus
    Windows Defender
    Other Info
    WiFi 6e / Bluetooth 5.1 / Facial Recognition / Fingerprint Sensor / ToF (Time of Flight) Human Presence Sensor
It assumes letters Q, R are not in general use for partitions
Perhaps not the best choice of letters to use. Click-to-run v1.0, as used for Office 2010, creates a protected Q: virtual drive for the Office programs. The virtual drive was done away with in C2R v2.0, used in later version of Office.

1632954310037.png
Office 2010 Click-to-Run suite... The Q: drive is the virtual file system drive where virtualized applications are located in the file system namespace.
 

My Computers

System One System Two

  • OS
    Windows 11 Home
    Computer type
    Laptop
    Manufacturer/Model
    Acer Aspire 3 A315-23
    CPU
    AMD Athlon Silver 3050U
    Memory
    8GB
    Graphics Card(s)
    Radeon Graphics
    Monitor(s) Displays
    laptop screen
    Screen Resolution
    1366x768 native resolution, up to 2560x1440 with Radeon Virtual Super Resolution
    Hard Drives
    1TB Samsung EVO 870 SSD
    Internet Speed
    50 Mbps
    Browser
    Edge, Firefox
    Antivirus
    Defender
    Other Info
    fully 'Windows 11 ready' laptop. Windows 10 C: partition migrated from my old unsupported 'main machine' then upgraded to 11. A test migration ran Insider builds for 2 months. When 11 was released on 5th October it was re-imaged back to 10 and was offered the upgrade in Windows Update on 20th October. Windows Update offered the 22H2 Feature Update on 20th September 2022. It got the 23H2 Feature Update on 4th November 2023 through Windows Update.

    My SYSTEM THREE is a Dell Latitude 5410, i7-10610U, 32GB RAM, 512GB ssd, supported device running Windows 11 Pro (and all my Hyper-V VMs).

    My SYSTEM FOUR is a 2-in-1 convertible Lenovo Yoga 11e 20DA, Celeron N2930, 4GB RAM, 256GB ssd. Unsupported device: currently running Win10 Pro, plus Win11 Pro RTM and Insider Beta as native boot vhdx.

    My SYSTEM FIVE is a Dell Latitude 3190 2-in-1, Pentium Silver N5030, 4GB RAM, 512GB NVMe ssd, supported device running Windows 11 Pro, plus the Insider Beta, Dev, and Canary builds as a native boot .vhdx.
  • Operating System
    Windows 11 Pro
    Computer type
    Laptop
    Manufacturer/Model
    Dell Lattitude E4310
    CPU
    Intel® Core™ i5-520M
    Motherboard
    0T6M8G
    Memory
    8GB
    Graphics card(s)
    (integrated graphics) Intel HD Graphics
    Screen Resolution
    1366x768
    Hard Drives
    500GB Crucial MX500 SSD
    Browser
    Firefox, Edge
    Antivirus
    Defender
    Other Info
    unsupported machine: Legacy bios, MBR, TPM 1.2, upgraded from W10 to W11 using W10/W11 hybrid install media workaround. In-place upgrade to 22H2 using ISO and a workaround. Feature Update to 23H2 by manually installing the Enablement Package.

    My SYSTEM THREE is a Dell Latitude 5410, i7-10610U, 32GB RAM, 512GB ssd, supported device running Windows 11 Pro (and all my Hyper-V VMs).

    My SYSTEM FOUR is a 2-in-1 convertible Lenovo Yoga 11e 20DA, Celeron N2930, 4GB RAM, 256GB ssd. Unsupported device: currently running Win10 Pro, plus Win11 Pro RTM and Insider Beta as native boot vhdx.

    My SYSTEM FIVE is a Dell Latitude 3190 2-in-1, Pentium Silver N5030, 4GB RAM, 512GB NVMe ssd, supported device running Windows 11 Pro, plus the Insider Beta, Dev, and Canary builds as a native boot .vhdx.
In summary, this is something I've wanted to do for a LONG time (at least Win 10 and Macrium), but it took the realization of a number of pieces before this all came together in my head. I'm still going to try to figure out how some of this works at a low level. Maybe @Kari has some thoughts? :). But in the meantime, I hope that this helps someone else!

I have somewhat different approach, although the principle is the same: small FAT32 partition, big NTFS partitions, and menu to choose what partition to boot. The difference is, that I am not using hardware boot menu, but instead simply boot from WinPE FAT32 partition on USB, which then shows a PowerShell menu to select which Windows image installation will be started. This, menu selection, is done based on the name (label) of the various NTFS partitions, not on drive letter. Quite simple to make, simple to modify.

I have written two tutorials to show how to create a WinPE based USB install media, and how to create a PowerShell menu:

The Crete custom Windows install USB tut is written to show how to create USB install media containing one FAT32 and one NTFS partition. The script in its step 2.5 starts Windows setup from the single NTFS partition labelled (FileSystemLabel) as SETUP:
Code:
$SetupVolume = (Get-Volume -FileSystemLabel Setup).DriveLetter
$SetupFile = $SetupVolume + ':\setup.exe'
cmd /c $SetupFile

In case of multiple Windows images in various NTFS partitions, you need to first create a PS menu, let's say filename Menu.ps1, then edit the batch file in step 2.7 in Crete custom Windows install USB tut to look like this:
Code:
wpeinit
powercfg /s 8c5e7fda-e8bf-4a96-9a85-a6e23a8c635c
cls
powershell -ExecutionPolicy bypass -file "X:\Scripts\Menu.ps1"

Now use the original step 2.5 script in Crete custom Windows install USB tut as base to create selection based actions on PS menu Menu.ps1. Here's the DO - WHILE loop in step 3 in PS menu tut modified to select to install W10 PRO, W10 HOME, W11 PRO, or W11 Home:
Code:
Do {
cls
Invoke-Command $MainMenu
$Select = Read-Host
Switch ($Select)
    {
    1 {
        $SetupVolume = (Get-Volume -FileSystemLabel SetupW10PRO).DriveLetter
        $SetupFile = $SetupVolume + ':\setup.exe'
        cmd /c $SetupFile
       }
    2 {
        $SetupVolume = (Get-Volume -FileSystemLabel SetupW10HOME).DriveLetter
        $SetupFile = $SetupVolume + ':\setup.exe'
        cmd /c $SetupFile
       }
    3 {
        $SetupVolume = (Get-Volume -FileSystemLabel SetupW11PRO).DriveLetter
        $SetupFile = $SetupVolume + ':\setup.exe'
        cmd /c $SetupFile
       }
    4 {
        $SetupVolume = (Get-Volume -FileSystemLabel SetupW11HOME).DriveLetter
        $SetupFile = $SetupVolume + ':\setup.exe'
        cmd /c $SetupFile
       }
    }
}
While ($Select -ne 5)

Parameter FileSystemLabel tells system to run WIndows Setup from correct partition.

Really, looks complicated but is quite simple.

Kari
 
Last edited:

My Computers

System One System Two

  • OS
    Windows 11 PRO x64 Dev
    Manufacturer/Model
    Hyper-V Virtual Machine (host in System 2 specs)
    CPU
    Intel Core i7-8550U
    Memory
    6 GB
    Graphics Card(s)
    Microsoft Hyper-V Video
    Monitor(s) Displays
    Laptop display (17.1") & Samsung U28E590 (27.7")
  • Operating System
    Windows 11 PRO x64 Dev Channel
    Computer type
    Laptop
    Manufacturer/Model
    HP HP ProBook 470 G5
    CPU
    Intel Core i7-8550U
    Motherboard
    HP 837F KBC Version 02.3D.00
    Memory
    16 GB
    Graphics card(s)
    Intel(R) UHD Graphics 620 & NVIDIA GeForce 930MX
    Sound Card
    Conexant ISST Audio
    Monitor(s) Displays
    Laptop display (17.1") & Samsung U28E590 (27.7")
    Hard Drives
    128 GB SSD & 1 TB HDD
    Mouse
    Wireless Logitech MSX mouse
    Keyboard
    Wireless Logitech MK710 keyboard
    Internet Speed
    100 Mbps down, 20 Mbps up
    Browser
    Edge Chromium Dev Channel
    Antivirus
    Windows Defender
    Other Info
    2 * 3 TB USB HDD
    6 TB WD Mirror NAS
Kari, you never ever cease to amaze me. It's late for me so I'm only briefly glancing at this, but this looks to be exactly the missing info I was seeking. I have no idea why I would be surprised that you filled in the missing piece for me, but I can't wait to try this in the morning.

THANK YOU!
 

My Computers

System One System Two

  • OS
    Win11 Pro 23H2
    Computer type
    PC/Desktop
    Manufacturer/Model
    Home Built
    CPU
    Intel i7-11700K
    Motherboard
    ASUS Prime Z590-A
    Memory
    128GB Crucial Ballistix 3200MHz DRAM
    Graphics Card(s)
    No GPU - CPU graphics only (for now)
    Sound Card
    Realtek (on motherboard)
    Monitor(s) Displays
    HP Envy 32
    Screen Resolution
    2560 x 1440
    Hard Drives
    1 x 1TB NVMe Gen 4 x 4 SSD
    1 x 2TB NVMe Gen 3 x 4 SSD
    2 x 512GB 2.5" SSDs
    2 x 8TB HD
    PSU
    Corsair HX850i
    Case
    Corsair iCue 5000X RGB
    Cooling
    Noctua NH-D15 chromax.black cooler + 10 case fans
    Keyboard
    CODE backlit mechanical keyboard
    Mouse
    Logitech MX Master 3
    Internet Speed
    1Gb Up / 1 Gb Down
    Browser
    Edge
    Antivirus
    Windows Defender
    Other Info
    Additional options installed:
    WiFi 6E PCIe adapter
    ASUS ThunderboltEX 4 PCIe adapter
  • Operating System
    Win11 Pro 23H2
    Computer type
    Laptop
    Manufacturer/Model
    Lenovo ThinkBook 13x Gen 2
    CPU
    Intel i7-1255U
    Memory
    16 GB
    Graphics card(s)
    Intel Iris Xe Graphics
    Sound Card
    Realtek® ALC3306-CG codec
    Monitor(s) Displays
    13.3-inch IPS Display
    Screen Resolution
    WQXGA (2560 x 1600)
    Hard Drives
    2 TB 4 x 4 NVMe SSD
    PSU
    USB-C / Thunderbolt 4 Power / Charging
    Mouse
    Buttonless Glass Precision Touchpad
    Keyboard
    Backlit, spill resistant keyboard
    Internet Speed
    1Gb Up / 1Gb Down
    Browser
    Edge
    Antivirus
    Windows Defender
    Other Info
    WiFi 6e / Bluetooth 5.1 / Facial Recognition / Fingerprint Sensor / ToF (Time of Flight) Human Presence Sensor
You are welcome!
 

My Computers

System One System Two

  • OS
    Windows 11 PRO x64 Dev
    Manufacturer/Model
    Hyper-V Virtual Machine (host in System 2 specs)
    CPU
    Intel Core i7-8550U
    Memory
    6 GB
    Graphics Card(s)
    Microsoft Hyper-V Video
    Monitor(s) Displays
    Laptop display (17.1") & Samsung U28E590 (27.7")
  • Operating System
    Windows 11 PRO x64 Dev Channel
    Computer type
    Laptop
    Manufacturer/Model
    HP HP ProBook 470 G5
    CPU
    Intel Core i7-8550U
    Motherboard
    HP 837F KBC Version 02.3D.00
    Memory
    16 GB
    Graphics card(s)
    Intel(R) UHD Graphics 620 & NVIDIA GeForce 930MX
    Sound Card
    Conexant ISST Audio
    Monitor(s) Displays
    Laptop display (17.1") & Samsung U28E590 (27.7")
    Hard Drives
    128 GB SSD & 1 TB HDD
    Mouse
    Wireless Logitech MSX mouse
    Keyboard
    Wireless Logitech MK710 keyboard
    Internet Speed
    100 Mbps down, 20 Mbps up
    Browser
    Edge Chromium Dev Channel
    Antivirus
    Windows Defender
    Other Info
    2 * 3 TB USB HDD
    6 TB WD Mirror NAS
Yeah, I lied. After I saw this there was no way I was going sleep. I've gone through all of it and it seems remarkably simple. After I do a walkthrough in the morning I guess I'll have to add this to my program so already planning the coding.

Darn it, Kari. You cause me such lack of sleep :)
 

My Computers

System One System Two

  • OS
    Win11 Pro 23H2
    Computer type
    PC/Desktop
    Manufacturer/Model
    Home Built
    CPU
    Intel i7-11700K
    Motherboard
    ASUS Prime Z590-A
    Memory
    128GB Crucial Ballistix 3200MHz DRAM
    Graphics Card(s)
    No GPU - CPU graphics only (for now)
    Sound Card
    Realtek (on motherboard)
    Monitor(s) Displays
    HP Envy 32
    Screen Resolution
    2560 x 1440
    Hard Drives
    1 x 1TB NVMe Gen 4 x 4 SSD
    1 x 2TB NVMe Gen 3 x 4 SSD
    2 x 512GB 2.5" SSDs
    2 x 8TB HD
    PSU
    Corsair HX850i
    Case
    Corsair iCue 5000X RGB
    Cooling
    Noctua NH-D15 chromax.black cooler + 10 case fans
    Keyboard
    CODE backlit mechanical keyboard
    Mouse
    Logitech MX Master 3
    Internet Speed
    1Gb Up / 1 Gb Down
    Browser
    Edge
    Antivirus
    Windows Defender
    Other Info
    Additional options installed:
    WiFi 6E PCIe adapter
    ASUS ThunderboltEX 4 PCIe adapter
  • Operating System
    Win11 Pro 23H2
    Computer type
    Laptop
    Manufacturer/Model
    Lenovo ThinkBook 13x Gen 2
    CPU
    Intel i7-1255U
    Memory
    16 GB
    Graphics card(s)
    Intel Iris Xe Graphics
    Sound Card
    Realtek® ALC3306-CG codec
    Monitor(s) Displays
    13.3-inch IPS Display
    Screen Resolution
    WQXGA (2560 x 1600)
    Hard Drives
    2 TB 4 x 4 NVMe SSD
    PSU
    USB-C / Thunderbolt 4 Power / Charging
    Mouse
    Buttonless Glass Precision Touchpad
    Keyboard
    Backlit, spill resistant keyboard
    Internet Speed
    1Gb Up / 1Gb Down
    Browser
    Edge
    Antivirus
    Windows Defender
    Other Info
    WiFi 6e / Bluetooth 5.1 / Facial Recognition / Fingerprint Sensor / ToF (Time of Flight) Human Presence Sensor
Kari, I have a question as I step through this.

In your PS script, I fully understand running setup.exe for the Window 10 or 11 media. However, I was also adding another partition for the Macrium Reflect recovery media.

Where I am confused is that there is no executable on the root of the recovery media that I can reference in the PS script. Do you have any thoughts on what I can place in that PS script to launch other WinPE based programs such as Macrium Reflect? Actually, if I'm not mistaken Macrium Reflect is based upon WinRE media rather than WinPE but the same question applies.
 

My Computers

System One System Two

  • OS
    Win11 Pro 23H2
    Computer type
    PC/Desktop
    Manufacturer/Model
    Home Built
    CPU
    Intel i7-11700K
    Motherboard
    ASUS Prime Z590-A
    Memory
    128GB Crucial Ballistix 3200MHz DRAM
    Graphics Card(s)
    No GPU - CPU graphics only (for now)
    Sound Card
    Realtek (on motherboard)
    Monitor(s) Displays
    HP Envy 32
    Screen Resolution
    2560 x 1440
    Hard Drives
    1 x 1TB NVMe Gen 4 x 4 SSD
    1 x 2TB NVMe Gen 3 x 4 SSD
    2 x 512GB 2.5" SSDs
    2 x 8TB HD
    PSU
    Corsair HX850i
    Case
    Corsair iCue 5000X RGB
    Cooling
    Noctua NH-D15 chromax.black cooler + 10 case fans
    Keyboard
    CODE backlit mechanical keyboard
    Mouse
    Logitech MX Master 3
    Internet Speed
    1Gb Up / 1 Gb Down
    Browser
    Edge
    Antivirus
    Windows Defender
    Other Info
    Additional options installed:
    WiFi 6E PCIe adapter
    ASUS ThunderboltEX 4 PCIe adapter
  • Operating System
    Win11 Pro 23H2
    Computer type
    Laptop
    Manufacturer/Model
    Lenovo ThinkBook 13x Gen 2
    CPU
    Intel i7-1255U
    Memory
    16 GB
    Graphics card(s)
    Intel Iris Xe Graphics
    Sound Card
    Realtek® ALC3306-CG codec
    Monitor(s) Displays
    13.3-inch IPS Display
    Screen Resolution
    WQXGA (2560 x 1600)
    Hard Drives
    2 TB 4 x 4 NVMe SSD
    PSU
    USB-C / Thunderbolt 4 Power / Charging
    Mouse
    Buttonless Glass Precision Touchpad
    Keyboard
    Backlit, spill resistant keyboard
    Internet Speed
    1Gb Up / 1Gb Down
    Browser
    Edge
    Antivirus
    Windows Defender
    Other Info
    WiFi 6e / Bluetooth 5.1 / Facial Recognition / Fingerprint Sensor / ToF (Time of Flight) Human Presence Sensor
Kari, I'm running into some difficulties with the instructions you provided. Clearly, I'm not understanding something quite correctly so let me tell what I did and maybe you can inform me where I have slipped up.

First, I follow the steps in your tutorial named "WinPE - Create a custom Windows install USB" to setup boot.wim for servicing and add PowerShell support.

Next, in your e-mail from last night, I see 3 blocks of code. My understanding is that the first block I don't actually do anything with. You were presenting it as an example of what was done in the tutorial and as the basis for the 3rd block of code.

Now I take the code block 2 and save it to a \scripts folder on my mounted boot.wim as startnet.cmd.

Finally I take the 3rd block of code and also save it to the \scripts folder as menu.ps1. NOTE: In the text of your e-mail, you reference menu.ps. I made the assumption that this should be menu.ps1 since that is the name referenced in the batch file.

In my PS script, I changed the volume labels as follows and used those same labels on the flash drive:

SetupW10Pro > SetupW10
SetupW10HOME > SetupW11

I now save and dismount the boot.wim and use MakeWinPEMedia to create the final ISO image.

I prep a flash drive and drop the WinPE and Windows images into the proper partitions as instructed.

I can successfully boot from the media but it simply drops me to a command prompt at the system32 folder within WinPE. I change to the scripts folder and manually run startnet.cmd to see what would happen. It runs and trys to kick off the PS script, which yields the error in the image below:


Image1.jpg


So, my questions:

1) From my description above, can you tell what I fouled up? Clearly, I misunderstood something, just not sure what. Tried it twice with same result each time so far.

2) As per my previous note, I'm also confused as to how to handle media other than Windows setup, such as a Macrium Reflect recovery disk. The PS script executes setup.exe for Windows media, but something like Macrium simply has its own bootloader, right? If I put Macrium on its own FAT32 partition, it will be presented by the UEFI as another boot entry and that will work, I'm just not sure how (or if) I can reference it from a PS menu as you have presented.

Thanks!
 

My Computers

System One System Two

  • OS
    Win11 Pro 23H2
    Computer type
    PC/Desktop
    Manufacturer/Model
    Home Built
    CPU
    Intel i7-11700K
    Motherboard
    ASUS Prime Z590-A
    Memory
    128GB Crucial Ballistix 3200MHz DRAM
    Graphics Card(s)
    No GPU - CPU graphics only (for now)
    Sound Card
    Realtek (on motherboard)
    Monitor(s) Displays
    HP Envy 32
    Screen Resolution
    2560 x 1440
    Hard Drives
    1 x 1TB NVMe Gen 4 x 4 SSD
    1 x 2TB NVMe Gen 3 x 4 SSD
    2 x 512GB 2.5" SSDs
    2 x 8TB HD
    PSU
    Corsair HX850i
    Case
    Corsair iCue 5000X RGB
    Cooling
    Noctua NH-D15 chromax.black cooler + 10 case fans
    Keyboard
    CODE backlit mechanical keyboard
    Mouse
    Logitech MX Master 3
    Internet Speed
    1Gb Up / 1 Gb Down
    Browser
    Edge
    Antivirus
    Windows Defender
    Other Info
    Additional options installed:
    WiFi 6E PCIe adapter
    ASUS ThunderboltEX 4 PCIe adapter
  • Operating System
    Win11 Pro 23H2
    Computer type
    Laptop
    Manufacturer/Model
    Lenovo ThinkBook 13x Gen 2
    CPU
    Intel i7-1255U
    Memory
    16 GB
    Graphics card(s)
    Intel Iris Xe Graphics
    Sound Card
    Realtek® ALC3306-CG codec
    Monitor(s) Displays
    13.3-inch IPS Display
    Screen Resolution
    WQXGA (2560 x 1600)
    Hard Drives
    2 TB 4 x 4 NVMe SSD
    PSU
    USB-C / Thunderbolt 4 Power / Charging
    Mouse
    Buttonless Glass Precision Touchpad
    Keyboard
    Backlit, spill resistant keyboard
    Internet Speed
    1Gb Up / 1Gb Down
    Browser
    Edge
    Antivirus
    Windows Defender
    Other Info
    WiFi 6e / Bluetooth 5.1 / Facial Recognition / Fingerprint Sensor / ToF (Time of Flight) Human Presence Sensor
First, please allow me to take some time with this. I am suffering from serious insomnia, sleeping an hour or two when I can. It causes some concentration and focusing issues, which makes my posting quite irregular. I will check, if my instructions are correct, or if a sleep-deprived me has forgotten something.

Finally I take the 3rd block of code and also save it to the \scripts folder as menu.ps1. NOTE: In the text of your e-mail, you reference menu.ps. I made the assumption that this should be menu.ps1 since that is the name referenced in the batch file.

Menu.ps was a clear typo, it should be Menu.ps1. Fixed now.

1) From my description above, can you tell what I fouled up? Clearly, I misunderstood something, just not sure what. Tried it twice with same result each time so far.

I will check everything.

2) As per my previous note, I'm also confused as to how to handle media other than Windows setup, such as a Macrium Reflect recovery disk.

Yeah, the problem with my method is, that it needs each partition to have an executable, script or batch to run. As I only need Reflect Rescue maybe two or three times a year, I simply have decided not to bother. In those rare occasions I need it, I just use a dedicated Rescue USB,

Honestly, this is where I meet the limits of my knowledge. I have absolutely no idea about how to add Macrium Rescue as menu option to my PS menu.

Kari
 

My Computers

System One System Two

  • OS
    Windows 11 PRO x64 Dev
    Manufacturer/Model
    Hyper-V Virtual Machine (host in System 2 specs)
    CPU
    Intel Core i7-8550U
    Memory
    6 GB
    Graphics Card(s)
    Microsoft Hyper-V Video
    Monitor(s) Displays
    Laptop display (17.1") & Samsung U28E590 (27.7")
  • Operating System
    Windows 11 PRO x64 Dev Channel
    Computer type
    Laptop
    Manufacturer/Model
    HP HP ProBook 470 G5
    CPU
    Intel Core i7-8550U
    Motherboard
    HP 837F KBC Version 02.3D.00
    Memory
    16 GB
    Graphics card(s)
    Intel(R) UHD Graphics 620 & NVIDIA GeForce 930MX
    Sound Card
    Conexant ISST Audio
    Monitor(s) Displays
    Laptop display (17.1") & Samsung U28E590 (27.7")
    Hard Drives
    128 GB SSD & 1 TB HDD
    Mouse
    Wireless Logitech MSX mouse
    Keyboard
    Wireless Logitech MK710 keyboard
    Internet Speed
    100 Mbps down, 20 Mbps up
    Browser
    Edge Chromium Dev Channel
    Antivirus
    Windows Defender
    Other Info
    2 * 3 TB USB HDD
    6 TB WD Mirror NAS
Fantastic. Thanks, Kari. Please consider this low priority. Get some sleep! That is far more important.

You've already answered the most important part to me.
 

My Computers

System One System Two

  • OS
    Win11 Pro 23H2
    Computer type
    PC/Desktop
    Manufacturer/Model
    Home Built
    CPU
    Intel i7-11700K
    Motherboard
    ASUS Prime Z590-A
    Memory
    128GB Crucial Ballistix 3200MHz DRAM
    Graphics Card(s)
    No GPU - CPU graphics only (for now)
    Sound Card
    Realtek (on motherboard)
    Monitor(s) Displays
    HP Envy 32
    Screen Resolution
    2560 x 1440
    Hard Drives
    1 x 1TB NVMe Gen 4 x 4 SSD
    1 x 2TB NVMe Gen 3 x 4 SSD
    2 x 512GB 2.5" SSDs
    2 x 8TB HD
    PSU
    Corsair HX850i
    Case
    Corsair iCue 5000X RGB
    Cooling
    Noctua NH-D15 chromax.black cooler + 10 case fans
    Keyboard
    CODE backlit mechanical keyboard
    Mouse
    Logitech MX Master 3
    Internet Speed
    1Gb Up / 1 Gb Down
    Browser
    Edge
    Antivirus
    Windows Defender
    Other Info
    Additional options installed:
    WiFi 6E PCIe adapter
    ASUS ThunderboltEX 4 PCIe adapter
  • Operating System
    Win11 Pro 23H2
    Computer type
    Laptop
    Manufacturer/Model
    Lenovo ThinkBook 13x Gen 2
    CPU
    Intel i7-1255U
    Memory
    16 GB
    Graphics card(s)
    Intel Iris Xe Graphics
    Sound Card
    Realtek® ALC3306-CG codec
    Monitor(s) Displays
    13.3-inch IPS Display
    Screen Resolution
    WQXGA (2560 x 1600)
    Hard Drives
    2 TB 4 x 4 NVMe SSD
    PSU
    USB-C / Thunderbolt 4 Power / Charging
    Mouse
    Buttonless Glass Precision Touchpad
    Keyboard
    Backlit, spill resistant keyboard
    Internet Speed
    1Gb Up / 1Gb Down
    Browser
    Edge
    Antivirus
    Windows Defender
    Other Info
    WiFi 6e / Bluetooth 5.1 / Facial Recognition / Fingerprint Sensor / ToF (Time of Flight) Human Presence Sensor
@hsehestedt, could you please post line 3 of your Menu.ps1 file.

EDIT, over an hour later:
I mean, your screenshot shows error is in line 3, caused by variable $MainMenu being called in that line. If so, there's something wrong in your script. Better would be, if you could post the complete Menu.ps1 code.
 
Last edited:

My Computers

System One System Two

  • OS
    Windows 11 PRO x64 Dev
    Manufacturer/Model
    Hyper-V Virtual Machine (host in System 2 specs)
    CPU
    Intel Core i7-8550U
    Memory
    6 GB
    Graphics Card(s)
    Microsoft Hyper-V Video
    Monitor(s) Displays
    Laptop display (17.1") & Samsung U28E590 (27.7")
  • Operating System
    Windows 11 PRO x64 Dev Channel
    Computer type
    Laptop
    Manufacturer/Model
    HP HP ProBook 470 G5
    CPU
    Intel Core i7-8550U
    Motherboard
    HP 837F KBC Version 02.3D.00
    Memory
    16 GB
    Graphics card(s)
    Intel(R) UHD Graphics 620 & NVIDIA GeForce 930MX
    Sound Card
    Conexant ISST Audio
    Monitor(s) Displays
    Laptop display (17.1") & Samsung U28E590 (27.7")
    Hard Drives
    128 GB SSD & 1 TB HDD
    Mouse
    Wireless Logitech MSX mouse
    Keyboard
    Wireless Logitech MK710 keyboard
    Internet Speed
    100 Mbps down, 20 Mbps up
    Browser
    Edge Chromium Dev Channel
    Antivirus
    Windows Defender
    Other Info
    2 * 3 TB USB HDD
    6 TB WD Mirror NAS

Latest Support Threads

Back
Top Bottom