Installation and Upgrade Create Windows 11 Bootable USB Installation Media

  • Thread starter Thread starter Brink
  • Start date Published: Start date Updated Updated:
  • Featured
  • Tags Tags
    boot usb

Win11USB Banner.png

This tutorial will show you how to create a bootable USB flash drive used to install Windows 11 with UEFI support.

You can use a Windows 11 installation USB flash drive to clean install, upgrade, reset, or repair Windows 11.

The installation USB can also be used as a recovery drive to boot to WinRE (aka: advanced startup).


You must be signed in as an administrator to create a bootable Windows 11 installation USB.

The USB flash drive needs to be at least 8 GB or larger in size.


Contents

  • Option One: Create Windows 11 Bootable USB Installation Media with Media Creation Tool
  • Option Two: Create Windows 11 Bootable USB Installation Media with Rufus [Good on unsupported hardware]
  • Option Three: Create Windows 11 Bootable USB Installation Media in Command Prompt


Option One

Create Windows 11 Bootable USB Installation Media with Media Creation Tool


This will be for a Windows 11 Version 24H2 build 26100.4349 USB.


1 Click/tap on the Download button below, and click/tap on the Download Now button at Microsoft's site below Create Windows 11 Installation Media. (see screenshot below)


Windows_11_MCT-1.png

2 Save the mediacreationtool.exe file version 10.0.26100.1 to your desktop, and run it.

Windows_11_MCT-2.png

3 If prompted by UAC, click/tap on Yes.

4 Click/tap on Accept for the license terms. (see screenshot below)

Windows_11_MCT-3.png

5 Uncheck the Use the recommended options for this PC box. (see screenshot below)

Leaving the Use the recommended options for this PC box checked will have the Media Creation Tool download an ISO that's the same language, edition, and architecture as the current PC.


Windows_11_MCT-4.png

6 Select (dot) USB flash drive, and click/tap on Next. (see screenshot below)

Windows_11_MCT-5.png

7 Connect your USB flash drive, click/tap on the Refresh drive list link, select the USB flash drive, and click/tap on Next. (see screenshot below)

Windows_11_MCT-6.png

8 It will now start Downloading Windows 11 and Creating Windows 11 media. (see screenshot below)

Windows_11_MCT-7.png

9 Click/tap on Finish when the USB flash drive is ready. (see screenshot below)

Windows_11_MCT-8.png


Option Two

Create Windows 11 Bootable USB Installation Media with Rufus


This is a good option if you are installing Windows 11 on a PC with unsupported hardware.


1 If you have not already, you will need to download a Windows 11 ISO file.

2 Download the latest version of Rufus, and save its .exe file to your desktop.


This is a standalone exe file that doesn't install anything to your PC. For Rufus FAQs, see: rufus FAQ on GitHub


3 Connect the 8 GB or larger USB flash drive.

This USB flash drive will be formatted and lose all data on it.


4 Run the Rufus .exe file, and click/tap on Yes if prompted by UAC.

5 Change the following settings in Rufus, and click/tap on Start when finished. (see screenshot below)
  • Under Device, select the USB flash drive you want to format and use.
  • Under Boot selection, click/tap on the SELECT button, and navigate to and select the Windows 11 ISO file.
  • Under Image option (if available), select Standard Windows installation.
  • Under Partition scheme, select GPT.
  • Under Target system, select UEFI (non CSM).
  • Under Volume label, you can enter any name you like for the USB flash drive, or leave the default name.
  • Under File system, select FAT32 or NTFS.
  • Under Cluster size, select the (Default) (ex: 4096 bytes) it has listed.
Rufus-1.png

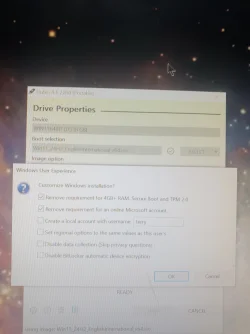
6 Check or uncheck the "Customize Windows installation" options you want, and click/tap on OK. (see screenshot below)
  • Remove Requirement for 4GB+ RAM, Secure Boot and TPM 2.0 – Check this option if you want to install Windows 11 on a computer with unsupported hardware.
  • Remove requirement for an online Microsoft account - Check this option to skip the Microsoft Account requirement. Windows 11 will not ask you to sign in with a Microsoft Account during the initial setup.
  • Disable data collection (Skip privacy questions) – Windows 11 will not ask you to send diagnostic data, enable location, advertisement ID, and other things some users consider privacy-invading.
  • Set a local account using the same name as this user's – Rufus will copy the current local account to the new installation.
  • Set regional options using the same values as this user's – Rufus will copy the current regional settings to the new installation.
  • Disable data collection (Skip privacy questions) - Windows Setup will not ask you to "Choose privacy settings for your device" during installation.
  • Disable BitLocker automatic device encryption - Windows will not automatically turn on BitLocker or Device Encryption for your OS drive if setting up a Microsoft account during installation.
Rufus-1b.png

7 Click/tap on OK to confirm. (see screenshot below)

Rufus-2.png

8 Rufus will now start creating the bootable USB flash drive. (see screenshot below)

Rufus-3.png

9 When finished, click/tap on Close to close Rufus. (see screenshot below)

Rufus-5.png


Option Three

Create Windows 11 Bootable USB Installation Media in Command Prompt


This option will use the dual FAT32 and NTFS partitions on the USB since the install.wim file for Windows 11 is usually over 4GB in size that prevents using only the FAT32 file system.


1 If you have not already, you will need to download a Windows 11 ISO file.

2 Connect the 8 GB or larger USB flash drive.

This USB flash drive will be formatted and lose all data on it.


3 Open an elevated Windows Terminal, and select Windows PowerShell or Command Prompt.

4 Type diskpart into the elevated terminal, and press Enter. (see screenshot below step 18)

5 Type list disk into the elevated terminal, press Enter, and make note of the Disk # (ex: 3) for the USB flash drive from step 2.

6 Type select disk # into the elevated terminal, and press Enter.

Substitute # in the command above with the actual Disk # (ex: 3) from step 5) above for the USB flash drive.

For example: select disk 3


7 Type clean into the elevated terminal, and press Enter.

8 Type convert mbr into the elevated terminal, and press Enter.

9 Type create partition primary size=1024 into the elevated terminal, and press Enter.

10 Type create partition primary into the elevated terminal, and press Enter.

11 Type select partition 1 into the elevated terminal, and press Enter.

12 Type format fs=fat32 quick into the elevated terminal, and press Enter.

13 Type assign letter=X into the elevated terminal, and press Enter.

14 Type active into the elevated terminal and press Enter.

15 Type select partition 2 into the elevated terminal, and press Enter.

16 Type format fs=ntfs quick into the elevated terminal, and press Enter.

17 Type assign letter=Y into the elevated terminal, and press Enter.

18 You can now close the elevated Windows terminal.

diskpart.png

19 Open File Explorer (Win+E) to This PC. You will see the USB has two partitions. Partition "X" with FAT32 file system, and partition "Y" with NTFS file system. (see screenshot below)

File_Explorer_USB.png

20 Mount the ISO file from step 1.

21 Perform the following steps to copy the mounted ISO contents to the USB X: (FAT32) partition:
  1. Click/tap on the mounted ISO in the navigation pane of File Explorer to open it.
  2. Select everything except the sources folder in the mounted ISO.
  3. Right click or press and hold on the selected files.
  4. Click/tap on Show more options (Shift+F10).
Copy-1.png

22 Click/tap on Send to, and click/tap on the USB Drive (X: ). (see screenshot below)

Copy-2.png

23 Perform the following steps to copy the "boot", "efi", "support", and "sources" folder from the mounted ISO to the USB Y: (NTFS) partition:
  1. Click/tap on the mounted ISO in the navigation pane of File Explorer to open it.
  2. Select the boot, efi, support, and sources folder in the mounted ISO.
  3. Right click or press and hold on the selected folders.
  4. Click/tap on Show more options (Shift+F10).
Copy-3.png

24 Click/tap on Send to, and click/tap on the USB Drive (Y: ). (see screenshot below)

It may take a while to finish copying the "boot", "efi", "support, and "sources" folders to the USB Y: (NTFS) partition.


Copy-4.png

25 Open the USB X: (FAT32) partition, and create a new folder (Ctrl+Shift+N) named sources. (see screenshots below)

sources-1.png
sources-2.png

26 Open the Y:\sources folder from the USB Y: (NTFS) partition, and Cut (Win+X) the boot.wim file. (see screenshots below)

move_boot.wim-1.png
move_boot.wim-2.png

27 Paste (Ctrl+V) the boot.wim file from the USB Y: (NTFS) partition in step 24 into the new sources folder in the USB X: (FAT32) partition from step 23. (see screenshot below)

move_boot.wim-3.png

28 The Windows 11 bootable USB installation media is now ready.

29 You can unmount the ISO file.

30 You can now close all File Explorer windows.


That's it,
Shawn Brink


Last edited:
what build of rufus are you using? titlebar is cut off

EDIT:
.https://rufus.ie/downloads/

there have been a few issues with 4.6 not creating bootable images correctly (but i havent seen it missing any options before). go to that link and get the 4.5p.exe (portable build of 4.5. try that and see if that option shows
 

My Computer

System One

  • OS
    Windows 11 Pro
Did same for 4.5p , wierd
what build of windows 11 are you burning? this addresses why it wasnt showing on 21H2 iso, but i've still never seen this before... so maybe someone else can shed more light if you have a 23h2 or 24h2 iso

.https://github.com/pbatard/rufus/issues/1958


EDIT:
worst case... you can just SHIFT+F10 on the network setup wizard and run:
Code:
%systemroot%\System32\oobe\BypassNRO.cmd
 

My Computer

System One

  • OS
    Windows 11 Pro
Windows 11 version 24H2
Was iso downloaded
 

My Computer

System One

  • OS
    win10 win11
    Computer type
    PC/Desktop
    Manufacturer/Model
    dell
Windows 11 version 24H2
Was iso downloaded
in the rufus portable folder, open the "rufus.ini" with notepad and compare... you can try overwriting if you want. option shows for me with 24h2 iso:

Code:
Locale = en-US
CommCheck64 = 221376218
UpdateCheckInterval = -1
ShowAdvancedDriveProperties = 1
ShowAdvancedFormatOptions = 1
LastUpdateCheck = 13327697158
CheckForBetas = 1
WindowsUserExperienceOptions = 16711837
 

My Computer

System One

  • OS
    Windows 11 Pro
Locale = en-US
CommCheck64 = 10981453
UpdateCheckInterval = 86400
LastUpdateCheck = 13384825719
ShowAdvancedDriveProperties = 0
ShowAdvancedFormatOptions = 1
PreferredSaveImageType = vhdx
WindowsUserExperienceOptions = 16711709
 

My Computer

System One

  • OS
    win10 win11
    Computer type
    PC/Desktop
    Manufacturer/Model
    dell
Sorted it.
Deleted ini file
Restarted rufus
Redownloaded 22h2 as iso
And bingo now can see
Appreciate help 👍
 

Attachments

  • 17403614509422424129065560954439.webp
    17403614509422424129065560954439.webp
    638.7 KB · Views: 10

My Computer

System One

  • OS
    win10 win11
    Computer type
    PC/Desktop
    Manufacturer/Model
    dell
Windows 11 version 24H2 build 26100.4349 now available to download as ISO or USB with MCT.


26100.4349.webp
 

My Computers

System One System Two

  • OS
    Windows 11 Pro for Workstations
    Computer type
    PC/Desktop
    Manufacturer/Model
    Custom self build
    CPU
    Intel i7-8700K 5 GHz
    Motherboard
    ASUS ROG Maximus XI Formula Z390
    Memory
    64 GB (4x16GB) G.SKILL TridentZ RGB DDR4 3600 MHz (F4-3600C18D-32GTZR)
    Graphics Card(s)
    ASUS ROG-STRIX-GTX1080TI-O11G-GAMING (11GB GDDR5X)
    Sound Card
    Integrated Digital Audio (S/PDIF)
    Monitor(s) Displays
    2 x Samsung Odyssey G75 27"
    Screen Resolution
    2560x1440
    Hard Drives
    1TB Samsung 990 PRO M.2,
    4TB Samsung 990 PRO M.2,
    8TB WD MyCloudEX2Ultra NAS
    PSU
    Seasonic Prime Titanium 850W
    Case
    Thermaltake Core P3 wall mounted
    Cooling
    Corsair Hydro H115i
    Keyboard
    Logitech wireless K800
    Mouse
    Logitech MX Master 3
    Internet Speed
    1 Gbps Download and 35 Mbps Upload
    Browser
    Chrome and Edge
    Antivirus
    Microsoft Defender
    Other Info
    Logitech Z625 speaker system,
    Logitech BRIO 4K Pro webcam,
    HP Color LaserJet Pro MFP M477fdn,
    CyberPower CP1500PFCLCD
    Galaxy S23 Plus phone
  • Operating System
    Windows 11 Pro
    Computer type
    Laptop
    Manufacturer/Model
    Surface Laptop 7 Copilot+ PC
    CPU
    Snapdragon X Elite (12 core) 3.42 GHz
    Memory
    16 GB LPDDR5x-7467 MHz
    Monitor(s) Displays
    15" HDR
    Screen Resolution
    2496 x 1664
    Hard Drives
    1 TB SSD
    Internet Speed
    Wi-Fi 7 and Bluetooth 5.4
    Browser
    Chrome and Edge
    Antivirus
    Microsoft Defender
Windows 11 version 24H2 build 26100.4349 now available to download as ISO or USB with MCT.
Note that if you use the MCT to make an ISO for 26100.4349 it will create one with an install.esd that is larger than the Fat32 4GB file size limit, unlike earlier 24H2 ISOs. You can no longer mount the ISO and just copy it to a USB to make an install USB, as you could with the MCT's previous 26100.2033 ISO.

1750965299000.webp


If you need to make a 26100.4349 USB then you can only make it directly with the MCT. It will make one with a split windows image install.swm/install2.swm to stay within the Fat32 4GB limit.

1750965030559.webp
 

My Computers

System One System Two

  • OS
    Windows 11 Home
    Computer type
    Laptop
    Manufacturer/Model
    Acer Aspire 3 A315-23
    CPU
    AMD Athlon Silver 3050U
    Memory
    8GB
    Graphics Card(s)
    Radeon Graphics
    Monitor(s) Displays
    laptop screen
    Screen Resolution
    1366x768 native resolution, up to 2560x1440 with Radeon Virtual Super Resolution
    Hard Drives
    1TB Samsung EVO 870 SSD
    Internet Speed
    150 Mbps
    Browser
    Edge, Firefox
    Antivirus
    Defender
    Other Info
    fully 'Windows 11 ready' laptop. Windows 10 C: partition migrated from my old unsupported 'main machine' then upgraded to 11. A test migration ran Insider builds for 2 months. When 11 was released on 5th October 2021 it was re-imaged back to 10 and was offered the upgrade in Windows Update on 20th October. Windows Update offered the 22H2 Feature Update on 20th September 2022. It got the 23H2 Feature Update on 4th November 2023 through Windows Update, and 24H2 on 3rd October 2024 through Windows Update by setting the Target Release Version for 24H2.

    My SYSTEM THREE is a Dell Latitude 5410, i7-10610U, 32GB RAM, 512GB NVMe ssd, supported device running Windows 11 Pro.

    My SYSTEM FOUR is a 2-in-1 convertible Lenovo Yoga 11e 20DA, Celeron N2930, 8GB RAM, 256GB ssd. Unsupported device: currently running Win10 Pro, plus Win11 Pro RTM and Insider Dev, Beta, and RP 24H2 as native boot vhdx.

    My SYSTEM FIVE is a Dell Latitude 3190 2-in-1, Pentium Silver N5030, 8GB RAM, 512GB NVMe ssd, supported device running Windows 11 Pro, plus Insider Beta, Dev, and Canary builds (and a few others) as a native boot .vhdx.

    My SYSTEM SIX is a Dell Latitude 5550, Core Ultra 7 165H, 64GB RAM, 1TB NVMe SSD, supported device, Windows 11 Pro 24H2, Hyper-V host machine.
  • Operating System
    Windows 11 Pro
    Computer type
    Laptop
    Manufacturer/Model
    Dell Latitude E4310
    CPU
    Intel® Core™ i5-520M
    Motherboard
    0T6M8G
    Memory
    8GB
    Graphics card(s)
    (integrated graphics) Intel HD Graphics
    Screen Resolution
    1366x768
    Hard Drives
    500GB Crucial MX500 SSD
    Browser
    Firefox, Edge
    Antivirus
    Defender
    Other Info
    unsupported machine: Legacy bios, MBR, TPM 1.2, upgraded from W10 to W11 using W10/W11 hybrid install media workaround. In-place upgrade to 22H2 using ISO and a workaround. Feature Update to 23H2 by manually installing the Enablement Package. In-place upgrade to 24H2 using hybrid 23H2/24H2 install media. Also running Insider Beta, Dev, and Canary builds as a native boot .vhdx.

    My SYSTEM THREE is a Dell Latitude 5410, i7-10610U, 32GB RAM, 512GB NVMe ssd, supported device running Windows 11 Pro.

    My SYSTEM FOUR is a 2-in-1 convertible Lenovo Yoga 11e 20DA, Celeron N2930, 8GB RAM, 256GB ssd. Unsupported device: currently running Win10 Pro, plus Win11 Pro RTM and Insider Dev, Beta, and RP 24H2 as native boot vhdx.

    My SYSTEM FIVE is a Dell Latitude 3190 2-in-1, Pentium Silver N5030, 8GB RAM, 512GB NVMe ssd, supported device running Windows 11 Pro, plus Insider Beta, Dev, and Canary builds (and a few others) as a native boot .vhdx.

    My SYSTEM SIX is a Dell Latitude 5550, Core Ultra 7 165H, 64GB RAM, 1TB NVMe SSD, supported device, Windows 11 Pro 24H2, Hyper-V host machine.
It will make one with a split windows image install.swm/install2.swm to stay within the Fat32 4GB limit.

the two swm files are the same size as the esd.

did you watch what it was doing?

Does it split the esd directly or does it convert, split, reconvert

maybe /split-image can split esd directly. I haven't tried

the install.wim version is bigger

installwim-4349.webp
 

My Computers

System One System Two

  • OS
    Win7,Win11
    Computer type
    PC/Desktop
    CPU
    i5-9400
    Motherboard
    gigabyte b365m ds3h
    Memory
    2x8gb 3200mhz
    Monitor(s) Displays
    benq gw2480
    PSU
    bequiet pure power 11 400CM
    Cooling
    cryorig m9i
  • Operating System
    win7,win11
    Computer type
    PC/Desktop
    CPU
    pentium g5400
    Motherboard
    gigabyte b365m ds3h
    Memory
    1x8gb 2400
    PSU
    xfx pro 450

My Computer

System One

  • OS
    Windows 11 Pro 24H2 (Build 26100.4484)
    Computer type
    PC/Desktop
    Manufacturer/Model
    Dell Precision 3660 Tower Workstation
    CPU
    12th Gen Intel(R) Core(TM) i9-12900 5.10 GHz
    Motherboard
    64-bit operating system, x64-based processor
    Memory
    32.00 GB
    Graphics Card(s)
    Intel UHD Graphics 770
    Sound Card
    Realtek Audio
    Monitor(s) Displays
    Dell P2714H Monitor
    Screen Resolution
    1920 x 1080
    Hard Drives
    1 x 512GB NVME PC801 NVMe SK hynix - BOOT
    1 x 1TB Seagate ST1000LM049-2GH172 Internal HDD
    1 x 1TB Seagate STGX4000400 External HDD
    1 x 2TB Seagate STGX4000400 External HDD
    1 x 4TB Seagate STGX4000400 External HDD
    PSU
    300 Watts
    Cooling
    Air
    Keyboard
    Microsoft Wired Keyboard 600
    Mouse
    Microsoft USB Basic Optical Mouse v2.0
    Browser
    Firefox
    Antivirus
    Windows Defender + Malwarebytes Premium
    Other Info
    BaseBoard Manufacturer Dell Inc.
    BaseBoard Product 0J1CP3
    BaseBoard Version A01
the two swm files are the same size as the esd.

did you watch what it was doing?

Does it split the esd directly or does it convert, split, reconvert

maybe /split-image can split esd directly. I haven't tried
There's little you can watch while the MCT is working, just the '% done' count. Wherever the MCT is downloading the components and creating the installer (that would be C:\$WINDOWS.~BT, C:\$Windows.~WS, and C:\ESD) it's all done by the time it starts copying the files to the USB (or writes the ISO) and it all gets cleaned up when you close the MCT.

the install.wim version is bigger

View attachment 137840
If you download the ISO direct from Microsoft you get one with an install.wim. If you use the MCT it downloads the components and uses them to build the ISO on your PC. Two reasons this install.wim is larger, firstly the MCT's .esd format uses heavier compression than .wim. Second, the direct download ISO's install.wim contains more editions than the MCT's install.esd. The MCT does not include Pro for Workstations, for example.
 

My Computers

System One System Two

  • OS
    Windows 11 Home
    Computer type
    Laptop
    Manufacturer/Model
    Acer Aspire 3 A315-23
    CPU
    AMD Athlon Silver 3050U
    Memory
    8GB
    Graphics Card(s)
    Radeon Graphics
    Monitor(s) Displays
    laptop screen
    Screen Resolution
    1366x768 native resolution, up to 2560x1440 with Radeon Virtual Super Resolution
    Hard Drives
    1TB Samsung EVO 870 SSD
    Internet Speed
    150 Mbps
    Browser
    Edge, Firefox
    Antivirus
    Defender
    Other Info
    fully 'Windows 11 ready' laptop. Windows 10 C: partition migrated from my old unsupported 'main machine' then upgraded to 11. A test migration ran Insider builds for 2 months. When 11 was released on 5th October 2021 it was re-imaged back to 10 and was offered the upgrade in Windows Update on 20th October. Windows Update offered the 22H2 Feature Update on 20th September 2022. It got the 23H2 Feature Update on 4th November 2023 through Windows Update, and 24H2 on 3rd October 2024 through Windows Update by setting the Target Release Version for 24H2.

    My SYSTEM THREE is a Dell Latitude 5410, i7-10610U, 32GB RAM, 512GB NVMe ssd, supported device running Windows 11 Pro.

    My SYSTEM FOUR is a 2-in-1 convertible Lenovo Yoga 11e 20DA, Celeron N2930, 8GB RAM, 256GB ssd. Unsupported device: currently running Win10 Pro, plus Win11 Pro RTM and Insider Dev, Beta, and RP 24H2 as native boot vhdx.

    My SYSTEM FIVE is a Dell Latitude 3190 2-in-1, Pentium Silver N5030, 8GB RAM, 512GB NVMe ssd, supported device running Windows 11 Pro, plus Insider Beta, Dev, and Canary builds (and a few others) as a native boot .vhdx.

    My SYSTEM SIX is a Dell Latitude 5550, Core Ultra 7 165H, 64GB RAM, 1TB NVMe SSD, supported device, Windows 11 Pro 24H2, Hyper-V host machine.
  • Operating System
    Windows 11 Pro
    Computer type
    Laptop
    Manufacturer/Model
    Dell Latitude E4310
    CPU
    Intel® Core™ i5-520M
    Motherboard
    0T6M8G
    Memory
    8GB
    Graphics card(s)
    (integrated graphics) Intel HD Graphics
    Screen Resolution
    1366x768
    Hard Drives
    500GB Crucial MX500 SSD
    Browser
    Firefox, Edge
    Antivirus
    Defender
    Other Info
    unsupported machine: Legacy bios, MBR, TPM 1.2, upgraded from W10 to W11 using W10/W11 hybrid install media workaround. In-place upgrade to 22H2 using ISO and a workaround. Feature Update to 23H2 by manually installing the Enablement Package. In-place upgrade to 24H2 using hybrid 23H2/24H2 install media. Also running Insider Beta, Dev, and Canary builds as a native boot .vhdx.

    My SYSTEM THREE is a Dell Latitude 5410, i7-10610U, 32GB RAM, 512GB NVMe ssd, supported device running Windows 11 Pro.

    My SYSTEM FOUR is a 2-in-1 convertible Lenovo Yoga 11e 20DA, Celeron N2930, 8GB RAM, 256GB ssd. Unsupported device: currently running Win10 Pro, plus Win11 Pro RTM and Insider Dev, Beta, and RP 24H2 as native boot vhdx.

    My SYSTEM FIVE is a Dell Latitude 3190 2-in-1, Pentium Silver N5030, 8GB RAM, 512GB NVMe ssd, supported device running Windows 11 Pro, plus Insider Beta, Dev, and Canary builds (and a few others) as a native boot .vhdx.

    My SYSTEM SIX is a Dell Latitude 5550, Core Ultra 7 165H, 64GB RAM, 1TB NVMe SSD, supported device, Windows 11 Pro 24H2, Hyper-V host machine.
You can always convert an ESD to WIM.

For those asking why it matters, it is because some Windows tools such as certain DISM operations, can only be performed on a WIM file, not on ESD files.
 

My Computers

System One System Two

  • OS
    Win11 Pro 24H2
    Computer type
    PC/Desktop
    Manufacturer/Model
    Self-built
    CPU
    Intel i7 11700K
    Motherboard
    ASUS Prime Z590-A MB
    Memory
    64GB (Waiting for warranty replacement of another 64GB for 128GB total)
    Graphics Card(s)
    No GPU - Built-in Intel Graphics
    Sound Card
    Integrated
    Monitor(s) Displays
    HP Envy 32
    Screen Resolution
    2560 x 1440
    Hard Drives
    1 x 1TB NVMe SSD
    1 x 2TB NVMe SSD
    1 x 4TB NVMe SSD
    3 x 512GB 2.5" SSD
    1 x 4TB 2.5" SSD
    5 x 8TB Seagate Barracuda HDD
    PSU
    Corsair HX850i
    Case
    Corsair iCUE RGB 5000X mid tower case
    Cooling
    Noctua NF-S12A chromax.black.swap case fans (Qty. 7) & Home Computer Specifications, Configuration, and Usage Notes General Specifications ASUS Prime Z590-A motherboard, serial number M1M0KC222467ARP Intel Core i7-11700K CPU (11th Gen Rocket Lake / LGA 1200 Socket) 128GB Crucial Ballistix RGB DDR4 3200 MHz DRAM (4 x 32GB) Corsair iCUE RGB 5000X mid tower case Noctua NH-D15 chromax.black CPU cooler Noctua NF-S12A chromax.black.swap case fans (Qty. 7) & Corsair LL-120 RGB Fans (Qty. 3)
    Keyboard
    Corsair K70 Max RGB Magnetic Keyboard
    Mouse
    Logitech MX Master 3
    Internet Speed
    1Gb Up / 1 Gb Down
    Browser
    Edge
    Antivirus
    Windows Defender
    Other Info
    The five 8TB drives and three 512GB SSDs are part of a DrivePool using StableBit DrivePool software. The three SSDs are devoted purely to caching for the 8TB drives. All of the important data is stored in triplicate so that I can withstand simultaneous failure of 2 disks.

    Networking: 2.5Gbps Ethernet and WiFi 6e
  • Operating System
    Win11 Pro 23H2
    Computer type
    Laptop
    Manufacturer/Model
    Lenovo ThinkBook 13x Gen 2
    CPU
    Intel i7-1255U
    Memory
    16 GB
    Graphics card(s)
    Intel Iris Xe Graphics
    Sound Card
    Realtek® ALC3306-CG codec
    Monitor(s) Displays
    13.3-inch IPS Display
    Screen Resolution
    WQXGA (2560 x 1600)
    Hard Drives
    2 TB 4 x 4 NVMe SSD
    PSU
    USB-C / Thunderbolt 4 Power / Charging
    Keyboard
    Backlit, spill resistant keyboard
    Mouse
    Buttonless Glass Precision Touchpad
    Internet Speed
    1Gb Up / 1Gb Down
    Browser
    Edge
    Antivirus
    Windows Defender
    Other Info
    WiFi 6e / Bluetooth 5.1 / Facial Recognition / Fingerprint Sensor / ToF (Time of Flight) Human Presence Sensor
If you've already downloaded Media Creation Tool to install 24H2, you don't need to download MCT again. It's the same file.

MS pushed a different products.cab to a hidden URL that MCT checks every time it runs. Running it now will get you a new install version.
 
Last edited:

My Computer

System One

  • OS
    Windows 7

Latest Support Threads

Back
Top Bottom