Hyper V WU question(s)


CornishRattler

Well-known member
Pro User
VIP
Local time
5:45 PM
Posts
1,993
Location
Cornwall UK
OS
Windows 11 Pro Beta, 11 Dev, W11 Canary
Being new to virtualisation my dev vm updated to 526 and as I normally do I cleaned up after getting rid of previous installations and such. The size of the VM however still doubled in size, I don't have checkpoints enabled or save on exit, any ideas? Is this normal for VM's?

TIA
 

My Computer

System One

  • OS
    Windows 11 Pro Beta, 11 Dev, W11 Canary
    Computer type
    Laptop
    Manufacturer/Model
    Dell Alienware M15 Ryzen Edition R6
    CPU
    AMD Ryzen™ 9 5900HX
    Memory
    32GB
    Graphics Card(s)
    NVIDIA® GeForce RTX™ 3070 8GB GDDR6
    Hard Drives
    1 x Samsung 980 Pro 1TB
    1 x Samsung 970 Evo Plus 1TB
Being new to virtualisation my dev vm updated to 526 and as I normally do I cleaned up after getting rid of previous installations and such. The size of the VM however still doubled in size, I don't have checkpoints enabled or save on exit, any ideas? Is this normal for VM's?

TIA
This is quite normal but irritating. When you clean up the installation, the space is freed up for use but the old data is not physically deleted but is not accessible. This is similar to when you delete files on a normal drive - they are not physically deleted but all reference to them has gone so space can be reused.


I have tried various online methods to shrink the vhd to get rid of this deleted file space but nothing worked. The only solution I have ever found is to create a new vhd which is slightly larger than the stored files on old vhd and clone the old vhd to new vhd, and then you can expand new vhd (I use dynamic vhds so expanding size of new vhd does not take any real space).

I also limit size of dynamic vhd so it cannot continue to grow.
 
Last edited:

My Computer

System One

  • OS
    Windows 10 Pro + others in VHDs
    Computer type
    Laptop
    Manufacturer/Model
    ASUS Vivobook 14
    CPU
    I7
    Motherboard
    Yep, Laptop has one.
    Memory
    16 GB
    Graphics Card(s)
    Integrated Intel Iris XE
    Sound Card
    Realtek built in
    Monitor(s) Displays
    N/A
    Screen Resolution
    1920x1080
    Hard Drives
    1 TB Optane NVME SSD, 1 TB NVME SSD
    PSU
    Yep, got one
    Case
    Yep, got one
    Cooling
    Stella Artois
    Keyboard
    Built in
    Mouse
    Bluetooth , wired
    Internet Speed
    72 Mb/s :-(
    Browser
    Edge mostly
    Antivirus
    Defender
    Other Info
    TPM 2.0
Is the option to compact the Virtual Disk not working for you? Seems to work for me.

First, shutdown the VM. Then, in Hyper-V manager, under the VM, choose settings, select Hard Drive, Edit, follow the wizard using the option to "Compact" the virtual hard disk.

NOTE: I know that in other Hypervisors such as VMware, the compact operation works better if you first go into the VM and optimize the disk within Windows on that VM. That way, if the disk is heavily fragmented, it will consolidate the data and allow optimization to work better. Windows should do that automatically within your VM on a regular schedule but it might be worth trying just before the compact operation. You also want to run the disk cleanup utility to remove excess "stuff" that is no longer needed before the compact operation.
 

My Computers

System One System Two

  • OS
    Win11 Pro 23H2
    Computer type
    PC/Desktop
    Manufacturer/Model
    Home Built
    CPU
    Intel i7-11700K
    Motherboard
    ASUS Prime Z590-A
    Memory
    128GB Crucial Ballistix 3200MHz DRAM
    Graphics Card(s)
    No GPU - CPU graphics only (for now)
    Sound Card
    Realtek (on motherboard)
    Monitor(s) Displays
    HP Envy 32
    Screen Resolution
    2560 x 1440
    Hard Drives
    1 x 1TB NVMe Gen 4 x 4 SSD
    1 x 2TB NVMe Gen 3 x 4 SSD
    2 x 512GB 2.5" SSDs
    2 x 8TB HD
    PSU
    Corsair HX850i
    Case
    Corsair iCue 5000X RGB
    Cooling
    Noctua NH-D15 chromax.black cooler + 10 case fans
    Keyboard
    CODE backlit mechanical keyboard
    Mouse
    Logitech MX Master 3
    Internet Speed
    1Gb Up / 1 Gb Down
    Browser
    Edge
    Antivirus
    Windows Defender
    Other Info
    Additional options installed:
    WiFi 6E PCIe adapter
    ASUS ThunderboltEX 4 PCIe adapter
  • Operating System
    Win11 Pro 23H2
    Computer type
    Laptop
    Manufacturer/Model
    Lenovo ThinkBook 13x Gen 2
    CPU
    Intel i7-1255U
    Memory
    16 GB
    Graphics card(s)
    Intel Iris Xe Graphics
    Sound Card
    Realtek® ALC3306-CG codec
    Monitor(s) Displays
    13.3-inch IPS Display
    Screen Resolution
    WQXGA (2560 x 1600)
    Hard Drives
    2 TB 4 x 4 NVMe SSD
    PSU
    USB-C / Thunderbolt 4 Power / Charging
    Mouse
    Buttonless Glass Precision Touchpad
    Keyboard
    Backlit, spill resistant keyboard
    Internet Speed
    1Gb Up / 1Gb Down
    Browser
    Edge
    Antivirus
    Windows Defender
    Other Info
    WiFi 6e / Bluetooth 5.1 / Facial Recognition / Fingerprint Sensor / ToF (Time of Flight) Human Presence Sensor
Is the option to compact the Virtual Disk not working for you? Seems to work for me.

First, shutdown the VM. Then, in Hyper-V manager, under the VM, choose settings, select Hard Drive, Edit, follow the wizard using the option to "Compact" the virtual hard disk.

NOTE: I know that in other Hypervisors such as VMware, the compact operation works better if you first go into the VM and optimize the disk within Windows on that VM. That way, if the disk is heavily fragmented, it will consolidate the data and allow optimization to work better. Windows should do that automatically within your VM on a regular schedule but it might be worth trying just before the compact operation. You also want to run the disk cleanup utility to remove excess "stuff" that is no longer needed before the compact operation.
Just found that a little earlier, will have a play after running a back up
 

My Computer

System One

  • OS
    Windows 11 Pro Beta, 11 Dev, W11 Canary
    Computer type
    Laptop
    Manufacturer/Model
    Dell Alienware M15 Ryzen Edition R6
    CPU
    AMD Ryzen™ 9 5900HX
    Memory
    32GB
    Graphics Card(s)
    NVIDIA® GeForce RTX™ 3070 8GB GDDR6
    Hard Drives
    1 x Samsung 980 Pro 1TB
    1 x Samsung 970 Evo Plus 1TB
You can do it this way, but a bit of a palaver.

1) mount vhd as a drive on host pc - this is 65 GB

1641657888871.png

2) add a drive letter to OS partition if one is not assigned in disk management (I added J)

1641658120907.png


3) run minitool partition wizard to shrink C drive and move recovery partition so all unallocated space is at end.

before
1641658201174.png

after
1641658284491.png


You will see space on drives is still same as before even though logical size is much smaller.

1641658390722.png

4) Go to Hyper-V and select edit disk option, and select the vhd
1641658533602.png

1641658586638.png

5) click next and select compact option.
Note sometimes compact option does not appear. If this happens, mount vhd as a host drive, and delete something unimportant, then dismount vhd


1641660357119.png

VHD is now physically reduced in size to 47 GB

1641660477988.png

Of course VHD is now and needs to be re-expanded

6) From edit disk action, select expand

1641660604861.png


Select size you want e.g. 100 GB

1641660680522.png

stored space is now still 47 GB

1641660943543.png

8) Now final step is to increase C partition again (reverse of step 3)

I do not have screen dumps but you move recovery partition to end, and expand C drive.
 

Attachments

  • 1641658695822.png
    1641658695822.png
    19.4 KB · Views: 0

My Computer

System One

  • OS
    Windows 10 Pro + others in VHDs
    Computer type
    Laptop
    Manufacturer/Model
    ASUS Vivobook 14
    CPU
    I7
    Motherboard
    Yep, Laptop has one.
    Memory
    16 GB
    Graphics Card(s)
    Integrated Intel Iris XE
    Sound Card
    Realtek built in
    Monitor(s) Displays
    N/A
    Screen Resolution
    1920x1080
    Hard Drives
    1 TB Optane NVME SSD, 1 TB NVME SSD
    PSU
    Yep, got one
    Case
    Yep, got one
    Cooling
    Stella Artois
    Keyboard
    Built in
    Mouse
    Bluetooth , wired
    Internet Speed
    72 Mb/s :-(
    Browser
    Edge mostly
    Antivirus
    Defender
    Other Info
    TPM 2.0
Is the option to compact the Virtual Disk not working for you? Seems to work for me.

First, shutdown the VM. Then, in Hyper-V manager, under the VM, choose settings, select Hard Drive, Edit, follow the wizard using the option to "Compact" the virtual hard disk.

NOTE: I know that in other Hypervisors such as VMware, the compact operation works better if you first go into the VM and optimize the disk within Windows on that VM. That way, if the disk is heavily fragmented, it will consolidate the data and allow optimization to work better. Windows should do that automatically within your VM on a regular schedule but it might be worth trying just before the compact operation. You also want to run the disk cleanup utility to remove excess "stuff" that is no longer needed before the compact operation.
Yeah - see my other post added.

Compact on its own, even in Hyper-V doesn't really gain all the space (sometimes hardly any) - it is probably due the the unmoveable files. I use minitool (as that is much faster than defragging) on vhd to shrink and expand c drive in conjunction with edit disk options. New post is a bit of a palaver but gains maximum reclamation of space.

I have probably slightly overcomplicated it - you could probably do some steps from within VM but would have to install minitool on each vm.

But in the end, with Macrium Reflect, it is probably just as easy to clone to smaller drive and then expand drive.

I have just used posted method on 3 vms and reduced each from 60 GB to 40 GB approx.
 

My Computer

System One

  • OS
    Windows 10 Pro + others in VHDs
    Computer type
    Laptop
    Manufacturer/Model
    ASUS Vivobook 14
    CPU
    I7
    Motherboard
    Yep, Laptop has one.
    Memory
    16 GB
    Graphics Card(s)
    Integrated Intel Iris XE
    Sound Card
    Realtek built in
    Monitor(s) Displays
    N/A
    Screen Resolution
    1920x1080
    Hard Drives
    1 TB Optane NVME SSD, 1 TB NVME SSD
    PSU
    Yep, got one
    Case
    Yep, got one
    Cooling
    Stella Artois
    Keyboard
    Built in
    Mouse
    Bluetooth , wired
    Internet Speed
    72 Mb/s :-(
    Browser
    Edge mostly
    Antivirus
    Defender
    Other Info
    TPM 2.0
@CornishRattler

Probably the best solution once you have a reasonable idea of how much (or how little) space your VM needs is to create a FIXED SIZE vhdx file.

Using a fixed size vhdx improves the I/O reasonably significantly on the VM -- with "Classical VMS" the big problem is that the Virtual data disk(s) get very fragmented when using dynamically expanding bits. It's easier to move / copy / re-allocate / convert to other VM systems etc with a single Fixed size vdisk. Also if you have if you have macrium the Viboot facilty works excellently for manipulating the VM.

I know there will be some disagreement over this - however I've used VM systems on all sorts of Hosts over the years and apart from using "Physical Raw disks" the best performance I/O wise I've found is to use a single FIXED SIZE virtual drive rather than dynamically expanding - which usually happens in a multiple of 2 / 4 gb pieces.

So once you know what the size you need is then just use that. I've found for a reasonable W11 system with Office 2021, Adobe photoshop, and a few other things a 60GB size is more than sufficient. Again it depends on what you need your VM to do -- for some if it's just to test a bog standard Windows system 25 - 30 GB might be OK.

This VM (running W11 build 22000.376) Windows 11 Pro with just basically Office 2021 LTSC including Project and Visio , Firefox, latest updates, Adobe photoshop, VLC, Filezilla, SAP GUI front end for accessing SAP Work databases and systems, and a few things in addition occupies around 35 GB on a VHDX file-- I'll add a few more things more so 45GB will probably be more than sufficient -- so I can re-create this VM easily enough. However storage space is cheap enough and this VM is on an NVME type device with a lot of spare space so I probably won't bother.

Screenshot 2022-01-09 103719.png


The computer sees the file as :


Screenshot 2022-01-09 104750.png
Cheers
jimbo
 
Last edited:

My Computer

System One

  • OS
    Windows XP,7,10,11 Linux Arch Linux
    Computer type
    PC/Desktop
    CPU
    2 X Intel i7
@CornishRattler

Probably the best solution once you have a reasonable idea of how much (or how little) space your VM needs is to create a FIXED SIZE vhdx file.

Using a fixed size vhdx improves the I/O reasonably significantly on the VM -- with "Classical VMS" the big problem is that the Virtual data disk(s) get very fragmented when using dynamically expanding bits. It's easier to move / copy / re-allocate / convert to other VM systems etc with a single Fixed size vdisk. Also if you have if you have macrium the Viboot facilty works excellently for manipulating the VM.

I know there will be some disagreement over this - however I've used VM systems on all sorts of Hosts over the years and apart from using "Physical Raw disks" the best performance I/O wise I've found is to use a single FIXED SIZE virtual drive rather than dynamically expanding - which usually happens in a multiple of 2 / 4 gb pieces.

So once you know what the size you need is then just use that. I've found for a reasonable W11 system with Office 2021, Adobe photoshop, and a few other things a 60GB size is more than sufficient. Again it depends on what you need your VM to do -- for some if it's just to test a bog standard Windows system 25 - 30 GB might be OK.

This VM (running W11 build 22000.376) Windows 11 Pro with just basically Office 2021 LTSC including Project and Visio , Firefox, latest updates, Adobe photoshop, VLC, Filezilla, SAP GUI front end for accessing SAP Work databases and systems, and a few things in addition occupies around 35 GB on a VHDX file-- I'll add a few more things more so 45GB will probably be more than sufficient -- so I can re-create this VM easily enough. However storage space is cheap enough and this VM is on an NVME type device with a lot of spare space so I probably won't bother.

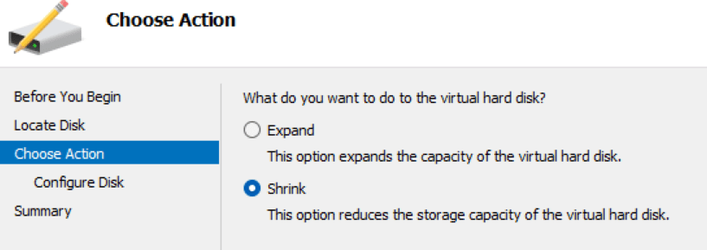
View attachment 18090


The computer sees the file as :


View attachment 18091
Cheers
jimbo
I prefer dynamic - you always end up oversizing with fixed.
 

My Computer

System One

  • OS
    Windows 10 Pro + others in VHDs
    Computer type
    Laptop
    Manufacturer/Model
    ASUS Vivobook 14
    CPU
    I7
    Motherboard
    Yep, Laptop has one.
    Memory
    16 GB
    Graphics Card(s)
    Integrated Intel Iris XE
    Sound Card
    Realtek built in
    Monitor(s) Displays
    N/A
    Screen Resolution
    1920x1080
    Hard Drives
    1 TB Optane NVME SSD, 1 TB NVME SSD
    PSU
    Yep, got one
    Case
    Yep, got one
    Cooling
    Stella Artois
    Keyboard
    Built in
    Mouse
    Bluetooth , wired
    Internet Speed
    72 Mb/s :-(
    Browser
    Edge mostly
    Antivirus
    Defender
    Other Info
    TPM 2.0
Cheers all for the replies and suggestions, I’ve actually gone down the route of triple booting and given up on VMs for a bit. So I’ve ended up with a W11 beta, W11 dev and W10 triple boot. At least this way I have zero sound and BT issues that have dogged my very short journey with Hyper V. VMware at the moment is no go on W11 with an AMD cpu.

I figured this way too updates can be cleaned up without losing daft amounts of space every time
 

My Computer

System One

  • OS
    Windows 11 Pro Beta, 11 Dev, W11 Canary
    Computer type
    Laptop
    Manufacturer/Model
    Dell Alienware M15 Ryzen Edition R6
    CPU
    AMD Ryzen™ 9 5900HX
    Memory
    32GB
    Graphics Card(s)
    NVIDIA® GeForce RTX™ 3070 8GB GDDR6
    Hard Drives
    1 x Samsung 980 Pro 1TB
    1 x Samsung 970 Evo Plus 1TB
Cheers all for the replies and suggestions, I’ve actually gone down the route of triple booting and given up on VMs for a bit. So I’ve ended up with a W11 beta, W11 dev and W10 triple boot. At least this way I have zero sound and BT issues that have dogged my very short journey with Hyper V. VMware at the moment is no go on W11 with an AMD cpu.

I figured this way too updates can be cleaned up without losing daft amounts of space every time
I usually install the Beta and Dev versions in dynamically expanding native boot virtual hardrives which means you do not have to setup fixed partitioning for the two Insider installs.

There is a minor downside that you cannot do build upgrades with native booting vhds, but this is easily fixed by temporarily attaching vhd to Hyper-V vms (do not even need to be activated) to update VHDs, then reattaching as host native boot vhds.

Overall, this is much more space efficient as you do not need to create fixed partitions for the vhds.
 

My Computer

System One

  • OS
    Windows 10 Pro + others in VHDs
    Computer type
    Laptop
    Manufacturer/Model
    ASUS Vivobook 14
    CPU
    I7
    Motherboard
    Yep, Laptop has one.
    Memory
    16 GB
    Graphics Card(s)
    Integrated Intel Iris XE
    Sound Card
    Realtek built in
    Monitor(s) Displays
    N/A
    Screen Resolution
    1920x1080
    Hard Drives
    1 TB Optane NVME SSD, 1 TB NVME SSD
    PSU
    Yep, got one
    Case
    Yep, got one
    Cooling
    Stella Artois
    Keyboard
    Built in
    Mouse
    Bluetooth , wired
    Internet Speed
    72 Mb/s :-(
    Browser
    Edge mostly
    Antivirus
    Defender
    Other Info
    TPM 2.0
I usually install the Beta and Dev versions in dynamically expanding native boot virtual hardrives which means you do not have to setup fixed partitioning for the two Insider installs.

There is a minor downside that you cannot do build upgrades with native booting vhds, but this is easily fixed by temporarily attaching vhd to Hyper-V vms (do not even need to be activated) to update VHDs, then reattaching as host native boot vhds.

Overall, this is much more space efficient as you do not need to create fixed partitions for the vhds.
Hi there
as always its a trade off between space and disk i/o performance -- "you pays your money and takes your choice".

If you tend to boot (Native) from vhdx files then having a fixed size vhdx makes better sense --especially if you are using a physical vhdx as your regular Host system. If you are running test beds or the VM's fairly casually then having dynamically expanding vhdx files would certainly be OK.

Incidentally booting from Vhdx physical drives makes running totally from an external SSD / NVME device a real doddle even if say a laptops internal HDD has totally failed. Having a fully bootable system on an external ssd makes a great recovery / rescue system.

Simple enough to do there are posts on this but a simple quick reminder for those interested : -- create the external disk with one EFI and one MSR partition, create a vhdx file, use dism.exe /Apply-Image to the vhdx for the target Windows using an iso either from MCT or UUPDUMP (UUPDUMP IMO is the better option as I believe the MCT checks whether the computer is "capable of running W11 " before proceeding with the download. UUPDUMP just makes the iso. Then switch to director on the traget windows e.g w:\windows\system32 and run bcdboot W:\windows /s S: /f UEFI where S (the big S) is the letter of the efi partition on the external drive. "Seemples".

Incidentally updating the vhdx to later versions of Windows is fine using the HYPER-V method although after the update you might need to run bcdboot again.

(Note --if using a Physical VHDX in HYPER-V to update to newer Windows version you will need a tiny 100MB or so bootable efi file and set the HYPER-V to boot from a file and point to the efi file. Create a small vhdx and install the efi boot system from Tianocore / EDK II and then when booting from the HYPER-V machine just browse to the efi file found on your computer).

Here's what you need :

In the small vhdx file create efi partition, format fat32 and copy the efi file to it.

copy UefiShell/X64/Shell.efi file to EFI\boot folder and rename it to bootx64.efi


For those that don't like messing around with the efi system then a more laborious way is to initially create the whole vhdx VM in HYPER-V and the installation in the standard way via Windows install and then V2P (convert Virtual machine to physical) , run bcdboot and update drivers as required.IMO a lot more work each time !!.

Cheers
jimbo
 
Last edited:

My Computer

System One

  • OS
    Windows XP,7,10,11 Linux Arch Linux
    Computer type
    PC/Desktop
    CPU
    2 X Intel i7

Latest Support Threads

Back
Top Bottom