Solved Remove "Recommended" section of Start Menu


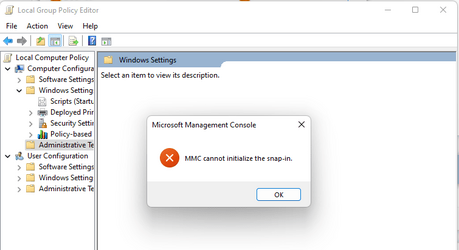
.net error2.png
it say like this what to do
 

My Computer My Computer

At a glance

windows 11 pro for workstationsi3 m3808 gbnone
OS
windows 11 pro for workstations
Computer type
Laptop
Manufacturer/Model
samsung rv509
CPU
i3 m380
Motherboard
in built
Memory
8 gb
Graphics Card(s)
none
Sound Card
in built
Monitor(s) Displays
1(in-built)
Screen Resolution
1366x720
Hard Drives
500 gb
PSU
in built
Case
none
Keyboard
hp(ck-440g) .,wireless
Mouse
enter voyager(wireless)
Internet Speed
~10 to 190 mbps wired
Browser
vivaldi,opera,chrome,brave
Antivirus
none(defender disabled)
Other Info
no tpm
no secure boot

Does anyone know what ExplorerPatcher is doing under the hood for removing the Recommended Section of the start menu?
If it's just a registry value, I would gladly do that instead of installing an entire tool.

EDIT:
OK, after poking around the github page discussions and the code, it is not a simple registry tweak.
He is manipulating the UI automation tree to just not generate the Recommended Section.
Guess I'll keep ExplorerPatcher.

Heads-up to future installers: Your Taskbar will be reverted to Windows 10-style upon running Explorer Patcher the first time. At least in the case of version 22000.795.48.2 and Windows 11 Pro 22000.795. Just right-click on the taskbar and click properties to access ExplorerPatcher and change it if you like.

It feels so nice to have the entire Start Menu now.
 
Last edited:

My Computer My Computer

At a glance

Windows 11 ProAMD Ryzen 5 3600VENGEANCE® LPX 16GBNVIDIA 3060 Ti FE
OS
Windows 11 Pro
Computer type
PC/Desktop
Manufacturer/Model
Custom
CPU
AMD Ryzen 5 3600
Motherboard
MS MPG X570 Gaming Plus
Memory
VENGEANCE® LPX 16GB
Graphics Card(s)
NVIDIA 3060 Ti FE
Sound Card
Realtek Audio (On-Board)
Monitor(s) Displays
Sceptre Curved 27" (C275B-144RN)
Case
Lian Li PC-A10B
Cooling
AMD Wraith
Keyboard
Logitech G-15
Mouse
Logitech G502
Internet Speed
1G
@Brink
Hello, :-)

The group policy is located below in Windows 11 build 22610, but it's not actually working yet.

View attachment 28003
Can you please share the powershell code to remove this? I want to inject it into my system images instead of having to do it manually. Or just drop the registry tweak file please.
 

My Computer My Computer

At a glance

Win11
OS
Win11
@Brink

Can you please share the powershell code to remove this? I want to inject it into my system images instead of having to do it manually. Or just drop the registry tweak file please.
There's a REG file in the tutorial below that you could use if you like, but this will only work in the "Education" and "Enterprise" editions.


My Computers My Computers

  • At a glance

    Windows 11 Pro for WorkstationsIntel i7-8700K 5 GHz64 GB (4x16GB) G.SKILL TridentZ RGB DDR4 3600...ASUS ROG-STRIX-GTX1080TI-O11G-GAMING (11GB GD...
    OS
    Windows 11 Pro for Workstations
    Computer type
    PC/Desktop
    Manufacturer/Model
    Custom self build
    CPU
    Intel i7-8700K 5 GHz
    Motherboard
    ASUS ROG Maximus XI Formula Z390
    Memory
    64 GB (4x16GB) G.SKILL TridentZ RGB DDR4 3600 MHz (F4-3600C18D-32GTZR)
    Graphics Card(s)
    ASUS ROG-STRIX-GTX1080TI-O11G-GAMING (11GB GDDR5X)
    Sound Card
    Integrated Digital Audio (S/PDIF)
    Monitor(s) Displays
    2 x Samsung Odyssey G75 27"
    Screen Resolution
    2560x1440
    Hard Drives
    1TB Samsung 990 PRO M.2,
    4TB Samsung 990 PRO M.2,
    TerraMaster F8 SSD Plus NAS
    PSU
    Seasonic Prime Titanium 850W
    Case
    Thermaltake Core P3 wall mounted
    Cooling
    Corsair Hydro H115i
    Keyboard
    Amazon Basics Wired Full Keyboard MD005
    Mouse
    Logitech MX Master 4
    Internet Speed
    2 Gbps Download and 100 Mbps Upload
    Browser
    Chrome and Edge
    Antivirus
    Microsoft Defender
    Other Info
    Logitech Z625 speaker system,
    Logitech BRIO 4K Pro webcam,
    HP Color LaserJet Pro MFP M477fdn,
    CyberPower CP1500PFCLCD
    Galaxy S23 Plus phone
  • At a glance

    Windows 11 ProSnapdragon X Elite (12 core) 3.42 GHz16 GB LPDDR5x-7467 MHz
    Operating System
    Windows 11 Pro
    Computer type
    Laptop
    Manufacturer/Model
    Surface Laptop 7 Copilot+ PC
    CPU
    Snapdragon X Elite (12 core) 3.42 GHz
    Memory
    16 GB LPDDR5x-7467 MHz
    Monitor(s) Displays
    15" HDR
    Screen Resolution
    2496 x 1664
    Hard Drives
    1 TB SSD
    Internet Speed
    Wi-Fi 7 and Bluetooth 5.4
    Browser
    Chrome and Edge
    Antivirus
    Microsoft Defender
There's a REG file in the tutorial below that you could use if you like, but this will only work in the "Education" and "Enterprise" editions.

What if I've got Pro on all my machines?
 

My Computer My Computer

At a glance

Win11
OS
Win11
What if I've got Pro on all my machines?
You'll be out of luck unless you use some 3rd party Start menu customization program that could break things. :(

You could have it always show as an empty section like below though.


My Computers My Computers

  • At a glance

    Windows 11 Pro for WorkstationsIntel i7-8700K 5 GHz64 GB (4x16GB) G.SKILL TridentZ RGB DDR4 3600...ASUS ROG-STRIX-GTX1080TI-O11G-GAMING (11GB GD...
    OS
    Windows 11 Pro for Workstations
    Computer type
    PC/Desktop
    Manufacturer/Model
    Custom self build
    CPU
    Intel i7-8700K 5 GHz
    Motherboard
    ASUS ROG Maximus XI Formula Z390
    Memory
    64 GB (4x16GB) G.SKILL TridentZ RGB DDR4 3600 MHz (F4-3600C18D-32GTZR)
    Graphics Card(s)
    ASUS ROG-STRIX-GTX1080TI-O11G-GAMING (11GB GDDR5X)
    Sound Card
    Integrated Digital Audio (S/PDIF)
    Monitor(s) Displays
    2 x Samsung Odyssey G75 27"
    Screen Resolution
    2560x1440
    Hard Drives
    1TB Samsung 990 PRO M.2,
    4TB Samsung 990 PRO M.2,
    TerraMaster F8 SSD Plus NAS
    PSU
    Seasonic Prime Titanium 850W
    Case
    Thermaltake Core P3 wall mounted
    Cooling
    Corsair Hydro H115i
    Keyboard
    Amazon Basics Wired Full Keyboard MD005
    Mouse
    Logitech MX Master 4
    Internet Speed
    2 Gbps Download and 100 Mbps Upload
    Browser
    Chrome and Edge
    Antivirus
    Microsoft Defender
    Other Info
    Logitech Z625 speaker system,
    Logitech BRIO 4K Pro webcam,
    HP Color LaserJet Pro MFP M477fdn,
    CyberPower CP1500PFCLCD
    Galaxy S23 Plus phone
  • At a glance

    Windows 11 ProSnapdragon X Elite (12 core) 3.42 GHz16 GB LPDDR5x-7467 MHz
    Operating System
    Windows 11 Pro
    Computer type
    Laptop
    Manufacturer/Model
    Surface Laptop 7 Copilot+ PC
    CPU
    Snapdragon X Elite (12 core) 3.42 GHz
    Memory
    16 GB LPDDR5x-7467 MHz
    Monitor(s) Displays
    15" HDR
    Screen Resolution
    2496 x 1664
    Hard Drives
    1 TB SSD
    Internet Speed
    Wi-Fi 7 and Bluetooth 5.4
    Browser
    Chrome and Edge
    Antivirus
    Microsoft Defender
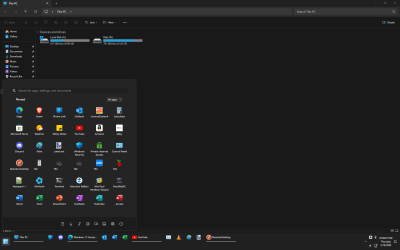
ExplorerPatcher is the most commonly-used option to remove the "Recommended" section on Windows 11 Home and Pro. That said, there are two additional methods that I that I have used over the years that do not involve keeping ExplorerPatcher installed (method #2 does not require ExplorerPatcher at all). This bears mentioning because this opens the door to using other applications, like StartAllBack, at the same time. It's pretty nice to have a clean Windows 11 start menu and a Windows 10 taskbar properly-themed to fit the Windows 11 design language. I'd rather have a Windows 11-themed Windows 10 start menu as well, but this will do...
1710472772045.png

Both methods can be used at the same time to resolve various issues/annoyances unique to each method. Unfortunately, using both methods at the same time will incur the worst drawback of method #1 - the chance of the start menu breaking after Windows updates, requiring some tinkering. More on that to come. Overly-detailed and long-winded post inbound...

Method #1 → Sideload ExplorerPatcher functionality for hiding the "Recommended" section
  • Steps:
    • Uninstall any start menu/taskbar/explorer customizations (ExplorerPatcher, StartAllBack, Start11, QTTabBar, etc.)
    • Download the latest version of ExplorerPatcher and install it
    • Uninstall ExplorerPatcher after you see a notification indicating that the latest symbols have been downloaded
    • Download the attached zip folder, and unzip it
    • Copy/move 11SM-recommended.bat (credit to some Reddit user - the post has long since been deleted, and I don't remember who) and the latest version of ExplorerPatcher (ep_setup.exe) to your desktop
    • Run the .bat file as administrator
    • Press 1 followed by the enter key to remove the "Recommended" section
    • Wait for explorer to restart
    • Press 0 followed by the enter key to close the window
  • Pros:
    • No monetary cost to the end user
    • This works alongside StartAllBack because ExplorerPatcher is not actually installed (not sure about Start11, but I bet it would work)
    • This method works immediately when your computer starts - ideal if you really hate the "Recommended" section and want to minimize your chances of seeing it at all
  • Cons:
    • On very rare occasions, the "Recommended" section might be visible when opening the start menu
      • Close the start menu and open it again, and it'll be gone
      • This is resolved if you use the method #2 in addition to this method
    • Reordering pinned apps in the space where the "Recommended" section was can be somewhat janky
      • This is resolved if you use the method #2 in addition to this method
    • This method could break in various ways in the future
      • I do not recommend implementing this on someone else's computer if they are not tech-savvy due to the unpredictable nature of how this method reacts to Windows updates (see the "major con" below)
      • I've had to make changes to the .bat file once after Valinet made some under-the-hood changes to the way that the "Recommended" section is hidden by ExplorerPatcher
        • It was a change to help the removal of the "Recommended" section stick better - a much-needed improvement
        • This made the fix for the "major con" below much simpler (used to require registry changes in addition)
        • This could be a major con unto itself, but this only happened once over a period of two years
  • Major Con - Chance of the Start Menu Breaking After Windows Updates:
    • Microsoft tends to push out an update roughly once per quarter that impacts symbols linked to the start menu, taskbar, and/or explorer
    • You'll know when this is happening if you are unable to open the start menu after updates are installed
    • Some tinkering will be required to fix this (takes ~5 minutes):
      • Download the latest version of ExplorerPatcher
      • Copy/move 11SM-recommended.bat and the latest version of ExplorerPatcher (ep_setup.exe) to your desktop
      • Run the .bat file as administrator
      • Press 2 followed by the enter key to restore the "Recommended" section (the start menu will start working again)
      • Wait for explorer to restart
      • Press 0 followed by the enter key to close the window
      • To hide the "Recommended" section again, repeat the steps detailed above from the beginning
  • Note:
    • If there was a way to automatically download the latest symbols file after windows updates (or even each time you start your computer), then that could resolve the major con detailed above
    • Perhaps a similar approach could be used to sideload other functionality from ExplorerPatcher (i.e. Windows 10 start menu)
Method #2 → Use the Power Start Menu app on the Microsoft Store
  • Steps:
  • Pros:
    • This works alongside StartAllBack (not sure about Start11, but I bet it would work)
    • This method has always continued to work following major and minor updates to Windows
      • I recommend sticking with this method exclusively if you wish to avoid tinkering after Windows updates to fix method #1
    • This app allows far more customization of the Windows 11 start menu beyond what Microsoft and ExplorerPatcher offer, such as the option to replace the search bar with another row of pinned apps
    • No janky behavior when reordering pinned apps
      • This is true even if you use method #1 in addition to this method
      • Using both methods may require tinkering after Windows updates to fix method #1
    • The purchase is a one-time thing, and you can use it across multiple computers
  • Cons:
    • Costs money to the end user
    • The app doesn't start up very quickly when Windows loads, so you might see the "Recommended" section for a minute or so
      • This is resolved if you use the method #1 in addition to this method
      • Using both methods may require tinkering after Windows updates to fix method #1
    • May fail to start on very slow computers (happens roughly 5% of the time on my Surface Pro 3)
      • Simply open the app to fix this
      • You may not notice if method #1 is used in addition to this method, and if you are not using customizations in Power Start Menu that are exclusive to that app (i.e. hiding the search bar)
    • Can stop working if you have to restart explorer for any reason (happens roughly 10% of the time)
      • Simply open the app to fix this
      • You may not notice if method #1 is used in addition to this method, and if you are not using customizations in Power Start Menu that are exclusive to that app (i.e. hiding the search bar)
 

Attachments

My Computer My Computer

At a glance

Windows 11AMD Ryzen 7 3700X32 GB (8×4) Corsair VengeanceGigabyte GeForce RTX 2060 WINDFORCE OC 6G
OS
Windows 11
Computer type
PC/Desktop
Manufacturer/Model
Custom Build
CPU
AMD Ryzen 7 3700X
Motherboard
ASUS TUF Gaming X570-Pro (Wi-Fi)
Memory
32 GB (8×4) Corsair Vengeance
Graphics Card(s)
Gigabyte GeForce RTX 2060 WINDFORCE OC 6G

Latest Support Threads

Back
Top Bottom