Installation and Upgrade Repair Install Windows 11 with an In-place Upgrade


  • Staff
Windows_11_banner.png

This tutorial will show you how to do a repair install of Windows 11 by performing an in-place upgrade without losing anything.

If you need to repair or create a new recovery partition or having problems with the Windows 11 operating system on your PC, and the usual solutions will not fix it, you can do a repair install of Windows 11 by performing an in-place upgrade without losing anything.

You will keep all accounts, apps, and personal data.

You must be signed in as an administrator to perform a repair install of Windows 11.

You will only be able to perform a repair install of Windows 11 from within Windows 11. You will not be able to perform a repair install at boot or in Safe Mode.

You will need at least 20 GB of free space on the Windows drive to perform an in-place upgrade.


When you perform a repair install (in-place upgrade), the previous version of Windows in the Windows.old folder (up to 10 days after upgrade) will automatically get replaced by the current Windows. It is recommended to create a system image first if you would like to be able to go back to current previous Windows before it gets replaced.


Contents

  • Option One: Repair Install Windows 11 via Windows Update
  • Option Two: Repair Install Windows 11 using ISO or USB Installation Media


Option One

Repair Install Windows 11 via Windows Update


This will download and install a repair version of the OS. This operation reinstalls the OS that you have and will not remove any files, settings, or apps.


1 Open Settings (Win+I).

2 Click/tap on System on the left side, and click/tap on Recovery on the right side. (see screenshot below)


Windows_Update_repair_install-1.png

3 Click/tap on the Reinstall now button for "Fix problems using Windows Update". (see screenshot below)

Windows_Update_repair_install-2.png

4 Click/tap on OK to confirm. (see screenshot below)

Windows_Update_repair_install-3.png

5 Windows Update will now open and automatically start downloading and installing the repair version of your Windows 11. (see screenshot below)

Windows_Update_repair_install-4.png

6 When Windows Update has finished, click/tap on Restart now when prompted to perform the repair install. (see screenshot below)

Windows_Update_repair_install-5.png

7 When the repair install of Windows 11 has finished, you can dismiss the lock screen and sign in to Windows 11. (see screenshots below)

Lock_screen.jpg
Sign-in_screen.jpg

8 You will now be on your desktop in Windows 11. (see screenshot below)

Repair_install_Windows11-15.png


Option Two

Repair Install Windows 11 using ISO or USB Installation Media


1 Disable or uninstall any 3rd party AV or security program you have installed first to prevent it from interfering with the repair install of Windows 11. You can enable or reinstall it again after Windows 11 has finished installing.

It may be required to use the removal tool from the AV program developer to fully remove it.


2 If the Windows drive is encrypted by BitLocker, then you will need to either suspend or turn off BitLocker for the Windows drive before doing a repair install. Once installation has finished, you can resume or turn on BitLocker again.

3 Do the step below depending on how you want to install Windows 11.
  • step 4: To Repair Install Windows 11 with an ISO file
  • step 5: To Repair Install Windows 11 with USB Installation Media

The Windows 11 installation media (ISO or USB) must be the same edition, same version, and same or higher build as the currently installed Windows 11.

The Windows 11 installation media (ISO or USB) must be for the same language as your currently installed Windows 11.


4 To Repair Install Windows 11 with an ISO file

A) If you have not already, you will need to download a Windows 11 ISO file.​

B) Mount the ISO file, and go to step 6 below.​

5 To Repair Install Windows 11 with USB Installation Media

This does not have to be a bootable USB.


A) Connect and open the Windows 11 USB, and go to step 6 below. (see screenshot below)​

Repair_install_Windows11-1.png

6 Run the setup.exe file to start Windows 11 Setup. (see screenshot below)

Repair_install_Windows11-2.png

7 If prompted by UAC, click/tap on Yes. (see screenshot below)

Repair_install_Windows11-3.png

8 Windows 11 Setup will now start preparing. (see screenshot below)

Repair_install_Windows11-4.png

9 Click/tap on the Change how Setup downloads updates link. (see screenshot below)

You can check or uncheck (default) I want to help make the installation better depending on what you want. This will send setup info to Microsoft to help improve.


Repair_install_Windows11-5.png

10 Select (dot) Not right now for "Get updates, drivers and optional features". (see screenshot below)

Choosing to "download updates, drivers and optional features" will only add unnecessary overhead during the repair install, and could cause the repair install to stall if there was an issue.

You can check for updates via Windows Update after the repair install has finished to avoid this.


Repair_install_Windows11-6.png

11 Windows 11 Setup will now start getting things ready. (see screenshots below)

Repair_install_Windows11-7.png
Repair_install_Windows11-8.png

12 Click/tap on Accept for the license terms. (see screenshot below)

Repair_install_Windows11-9.png

13 Windows 11 Setup will now check to make sure you're ready to install and have enough space. (see screenshots below)

Repair_install_Windows11-10.png
Repair_install_Windows11-10b.png

14 Click/tap on the Change what to keep link. (see left screenshot below)

After doing step 15, click/tap on Install when ready to start the repair install of Windows 11. (see right screenshot below)


Repair_install_Windows11-11.png
Repair_install_Windows11-12.png

15 Select (dot) Keep personal files and apps, and click/tap on Next. (see left screenshot below)

If you only have Nothing available to select, then the installation media is not the same version or language as what you currently have installed.

When you click/tap on Next, you will go back to step 13. When you get to step 14 again, click/tap on Install when ready to start the repair install of Windows 11. (see right screenshot below)


If wanted, you can close the Windows 11 Setup window at this point to safely cancel the repair install before it starts. It will be too late after this step.


Repair_install_Windows11-13.png
Repair_install_Windows11-12.png

16 Windows 11 Setup will now start the repair install of Windows 11. (see screenshot below)

Your PC will restart several times. This might take a while.


Repair_install_Windows11-14.png

17 When the repair install of Windows 11 has finished, you can dismiss the lock screen and sign in to Windows 11. (see screenshots below)

Lock_screen.jpg
Sign-in_screen.jpg

18 You will now be on your desktop in Windows 11. (see screenshot below)

Repair_install_Windows11-15.png


That's it,
Shawn Brink


Attachments

  • Windows_11.png
    Windows_11.png
    5.1 KB · Views: 2,386
Last edited:
An additional use for an in place upgrade repair is to create a new Windows recovery partition.

For example:
a) a missing Windows recovery partition
b) a reagentc /disable that does respond to reagentc /enable

If the repair is successful there may be reduced free space within the primary partition for the new recovery partition.
When I do a repair install, I always delete the Recovery partition and re-size the Windows drive to fill the space. The repair creates a new, up-to-date Recovery partition.
 

My Computer

System One

  • OS
    Windows 11 Pro 23H2 (RP channel)
    Computer type
    PC/Desktop
    Manufacturer/Model
    Gigabyte
    CPU
    AMD Ryzen 5900X 12-core
    Motherboard
    X570 Aorus Xtreme
    Memory
    64GB Corsair Platinum RGB 3600MHz CL16
    Graphics Card(s)
    MSI Suprim X 3080 Ti
    Sound Card
    Soundblaster AE-5 Plus
    Monitor(s) Displays
    ASUS TUF Gaming VG289Q
    Screen Resolution
    3840x2160
    Hard Drives
    Samsung 990 Pro 2TB
    Samsung 980 Pro 2TB
    Samsung 970 Evo Plus 1TB
    Samsung 870 Evo 4TB
    Samsung T7 Touch 1TB
    PSU
    Asus ROG Strix 1000W
    Case
    Corsair D750 Airflow
    Cooling
    Noctua NH-D15S
    Keyboard
    Asus ROG Flare
    Mouse
    Logitech G903 with PowerPlay charger
    Internet Speed
    500Mb/sec
    Browser
    Microsoft Edge
    Antivirus
    Windows Defender
When I do a repair install, I always delete the Recovery partition and re-size the Windows drive to fill the space. The repair creates a new, up-to-date Recovery partition.

If you deleted the recovery partition did you run reagentc /disable or not run the command before the repair?

If you deleted the recovery partition and did not resize the Windows drive did you have unallocated free space on the right side of the new recovery partition?

If you did not delete the recovery partition did you find that there were sometimes additional recovery partitions after the repair?
 

My Computer

System One

  • OS
    Windows 10
    Computer type
    Laptop
    Manufacturer/Model
    HP
    CPU
    Intel(R) Core(TM) i7-4800MQ CPU @ 2.70GHz
    Motherboard
    Product : 190A Version : KBC Version 94.56
    Memory
    16 GB Total: Manufacturer : Samsung MemoryType : DDR3 FormFactor : SODIMM Capacity : 8GB Speed : 1600
    Graphics Card(s)
    NVIDIA Quadro K3100M; Intel(R) HD Graphics 4600
    Sound Card
    IDT High Definition Audio CODEC; PNP Device ID HDAUDIO\FUNC_01&VEN_111D&DEV_76E0
    Hard Drives
    Model Hitachi HTS727575A9E364
    Antivirus
    Microsoft Defender
    Other Info
    Mobile Workstation
If you deleted the recovery partition did you run reagentc /disable or not run the command before the repair?

If you deleted the recovery partition and did not resize the Windows drive did you have unallocated free space on the right side of the new recovery partition?

If you did not delete the recovery partition did you find that there were sometimes additional recovery partitions after the repair?
The Recovery partition comes after the Windows partition, I have a D: partition after.

I simply delete the Recovery partition using Diskpart, resize the Windows partition then the repair creates a new one, I don't use any other commands
 

My Computer

System One

  • OS
    Windows 11 Pro 23H2 (RP channel)
    Computer type
    PC/Desktop
    Manufacturer/Model
    Gigabyte
    CPU
    AMD Ryzen 5900X 12-core
    Motherboard
    X570 Aorus Xtreme
    Memory
    64GB Corsair Platinum RGB 3600MHz CL16
    Graphics Card(s)
    MSI Suprim X 3080 Ti
    Sound Card
    Soundblaster AE-5 Plus
    Monitor(s) Displays
    ASUS TUF Gaming VG289Q
    Screen Resolution
    3840x2160
    Hard Drives
    Samsung 990 Pro 2TB
    Samsung 980 Pro 2TB
    Samsung 970 Evo Plus 1TB
    Samsung 870 Evo 4TB
    Samsung T7 Touch 1TB
    PSU
    Asus ROG Strix 1000W
    Case
    Corsair D750 Airflow
    Cooling
    Noctua NH-D15S
    Keyboard
    Asus ROG Flare
    Mouse
    Logitech G903 with PowerPlay charger
    Internet Speed
    500Mb/sec
    Browser
    Microsoft Edge
    Antivirus
    Windows Defender
To re-create a missing Recovery partition or to repair a corrupted Recovery partition, you don't necessarily need to repair install Windows with an in-place upgrade. If you do, you'll have to go through Windows Settings again, as the "you'll lose nothing" part of the description doesn't apply to all of the settings found in there (although it does apply to most of them, still nevertheless...). So, unless you aren't too fussed about losing some of your settings as a result, there exists a better way to fix the Recovery partition:

That being said, I find that the Recovery partition is not actually needed, as 1/ the Windows installation media that you can create with the Media Creation Tool or 2/ a USB flash drive on which Ventoy has been installed before you simply copied the Windows installation ISO file directly to this same USB flash drive or 3/ anything that you can use to go in WinPE lets you do the same, plus more. That's just because, when the language selection menu of Windows Setup appears (or when, e.g., the main menu screen of the WinPE-based Rescue Media of Acronis True Image 2021 appears) you can simply press SHIFT+F10 to open a command prompt so, next, you will be able to use all the features of WinPE anyway in the first place...
 

My Computers

System One System Two

  • OS
    11 Home
    Computer type
    Laptop
    Manufacturer/Model
    Asus TUF Gaming (2024)
    CPU
    i7 13650HX
    Memory
    16GB DDR5
    Graphics Card(s)
    GeForce RTX 4060 Mobile
    Sound Card
    Eastern Electric MiniMax DAC Supreme; Emotiva UMC-200; Astell & Kern AK240
    Monitor(s) Displays
    Sony Bravia XR-55X90J
    Screen Resolution
    3840×2160
    Hard Drives
    512GB SSD internal
    37TB external
    PSU
    Li-ion
    Cooling
    2× Arc Flow Fans, 4× exhaust vents, 5× heatpipes
    Keyboard
    Logitech K800
    Mouse
    Logitech G402
    Internet Speed
    20Mbit/s up, 250Mbit/s down
    Browser
    FF
  • Operating System
    11 Home
    Computer type
    Laptop
    Manufacturer/Model
    Medion S15450
    CPU
    i5 1135G7
    Memory
    16GB DDR4
    Graphics card(s)
    Intel Iris Xe
    Sound Card
    Eastern Electric MiniMax DAC Supreme; Emotiva UMC-200; Astell & Kern AK240
    Monitor(s) Displays
    Sony Bravia XR-55X90J
    Screen Resolution
    3840×2160
    Hard Drives
    2TB SSD internal
    37TB external
    PSU
    Li-ion
    Mouse
    Logitech G402
    Keyboard
    Logitech K800
    Internet Speed
    20Mbit/s up, 250Mbit/s down
    Browser
    FF
In a recent thread there were 2 orphaned or non-functioning windows recovery partitions.

reagentc /info displayed disabled.

reagentc /enable did not fix reagentc /disable


Code:
PS C:\WINDOWS\system32> reagentc /info
Windows Recovery Environment (Windows RE) and system reset configuration
Information:

    Windows RE status:         Disabled
    Windows RE location:
    Boot Configuration Data (BCD) identifier: ca0ca6ee-3dea-11ee-80f6-b87b0af04bcb
    Recovery image location:
    Recovery image index:      0
    Custom image location:
    Custom image index:        0

REAGENTC.EXE: Operation Successful.

PS C:\WINDOWS\system32> reagentc /enable
REAGENTC.EXE: Operation Successful.

PS C:\WINDOWS\system32> reagentc /info
Windows Recovery Environment (Windows RE) and system reset configuration
Information:

    Windows RE status:         Disabled
    Windows RE location:
    Boot Configuration Data (BCD) identifier: ca0ca6ee-3dea-11ee-80f6-b87b0af04bcb
    Recovery image location:
    Recovery image index:      0
    Custom image location:
    Custom image index:        0

REAGENTC.EXE: Operation Successful.

PS C:\WINDOWS\system32>


For an in place upgrade repair I'd looked for references to see whether the method would repair or create a new Windows recovery partition.

If it were to repair would it repair the first (smaller) or second (larger) recovery partition?

If it were to create a new recovery partition what would be the new drive partition layout or architecture?

There were no references found about repair or replace the existing recovery partitions.


Code:
  Volume ###  Ltr  Label        Fs     Type        Size     Status     Info
  ----------  ---  -----------  -----  ----------  -------  ---------  --------
  Volume 1     C                NTFS   Partition    930 GB  Healthy    Boot 
  Volume 2                      FAT32  Partition    100 MB  Healthy    System
  Volume 3                      NTFS   Partition    646 MB  Healthy    Hidden
  Volume 4                      NTFS   Partition    724 MB  Healthy    Hidden

  Partition ###  Type              Size     Offset
  -------------  ----------------  -------  -------
  Partition 1    System             100 MB  1024 KB
  Partition 2    Reserved            16 MB   101 MB
  Partition 3    Primary            930 GB   117 MB
  Partition 4    Recovery           646 MB   930 GB
  Partition 5    Recovery           724 MB   930 GB


Some options that I'd considered were:

a) deleting only the first orphaned recovery partition followed by an in place upgrade repair

b) deleting only the second orphaned recovery partition followed by an in place upgrade repair

c) deleting both orphaned recovery partitions followed by an in place upgrade repair

d) deleting both orphaned recovery partitions followed by a command line creation of a recovery partition

e) not deleting any orphaned recovery partitions followed by an in place upgrade repair


A reference commenting on how an in place repair modifies recovery partitions was not found.


Backup plans were considered and option e was chosen.


In the thread the in place upgrade repair did not fix any of the orphaned recovery partitions.


In the thread the in place upgrade repair reduced the free space in the primary partition and created a new recovery partition immediately to the right of the primary partition.


At the present time I'm wondering whether this was a unique fix for this computers problems or whether it can be applied to any orphaned recovery partition(s).

If it can be applied to any orphaned recovery partition(s) then the optimal choice was option d.

It's what BrianInEngland had reported in post #141.
 
Last edited:

My Computer

System One

  • OS
    Windows 10
    Computer type
    Laptop
    Manufacturer/Model
    HP
    CPU
    Intel(R) Core(TM) i7-4800MQ CPU @ 2.70GHz
    Motherboard
    Product : 190A Version : KBC Version 94.56
    Memory
    16 GB Total: Manufacturer : Samsung MemoryType : DDR3 FormFactor : SODIMM Capacity : 8GB Speed : 1600
    Graphics Card(s)
    NVIDIA Quadro K3100M; Intel(R) HD Graphics 4600
    Sound Card
    IDT High Definition Audio CODEC; PNP Device ID HDAUDIO\FUNC_01&VEN_111D&DEV_76E0
    Hard Drives
    Model Hitachi HTS727575A9E364
    Antivirus
    Microsoft Defender
    Other Info
    Mobile Workstation
In a recent thread there were 2 orphaned or non-functioning windows recovery partitions.

reagentc /info displayed disabled.

reagentc /enable did not fix reagentc /disable


Code:
PS C:\WINDOWS\system32> reagentc /info
Windows Recovery Environment (Windows RE) and system reset configuration
Information:

    Windows RE status:         Disabled
    Windows RE location:
    Boot Configuration Data (BCD) identifier: ca0ca6ee-3dea-11ee-80f6-b87b0af04bcb
    Recovery image location:
    Recovery image index:      0
    Custom image location:
    Custom image index:        0

REAGENTC.EXE: Operation Successful.

PS C:\WINDOWS\system32> reagentc /enable
REAGENTC.EXE: Operation Successful.

PS C:\WINDOWS\system32> reagentc /info
Windows Recovery Environment (Windows RE) and system reset configuration
Information:

    Windows RE status:         Disabled
    Windows RE location:
    Boot Configuration Data (BCD) identifier: ca0ca6ee-3dea-11ee-80f6-b87b0af04bcb
    Recovery image location:
    Recovery image index:      0
    Custom image location:
    Custom image index:        0

REAGENTC.EXE: Operation Successful.

PS C:\WINDOWS\system32>


For an in place upgrade repair I'd looked for references to see whether the method would repair or create a new Windows recovery partition.

If it were to repair would it repair the first (smaller) or second (larger) recovery partition?

If it were to create a new recovery partition what would be the new drive partition layout or architecture?

There were no references found about repair or replace the existing recovery partitions.


Code:
  Volume ###  Ltr  Label        Fs     Type        Size     Status     Info
  ----------  ---  -----------  -----  ----------  -------  ---------  --------
  Volume 1     C                NTFS   Partition    930 GB  Healthy    Boot
  Volume 2                      FAT32  Partition    100 MB  Healthy    System
  Volume 3                      NTFS   Partition    646 MB  Healthy    Hidden
  Volume 4                      NTFS   Partition    724 MB  Healthy    Hidden

  Partition ###  Type              Size     Offset
  -------------  ----------------  -------  -------
  Partition 1    System             100 MB  1024 KB
  Partition 2    Reserved            16 MB   101 MB
  Partition 3    Primary            930 GB   117 MB
  Partition 4    Recovery           646 MB   930 GB
  Partition 5    Recovery           724 MB   930 GB


Some options that I'd considered were:

a) deleting only the first orphaned recovery partition followed by an in place upgrade repair

b) deleting only the second orphaned recovery partition followed by an in place upgrade repair

c) deleting both orphaned recovery partitions followed by an in place upgrade repair

d) deleting both orphaned recovery partitions followed by a command line creation of a recovery partition

e) not deleting any orphaned recovery partitions followed by an in place upgrade repair


A reference commenting on how an in place repair modifies recovery partitions was not found.


Backup plans were considered and option e was chosen.


In the thread the in place upgrade repair did not fix any of the orphaned recovery partitions.


In the thread the in place upgrade repair reduced the free space in the primary partition and created a new recovery partition immediately to the right of the primary partition.


At the present time I'm wondering whether this was a unique fix for this computers problems or whether it can be applied to any orphaned recovery partition(s).

If it can be applied to any orphaned recovery partition(s) then the optimal choice was option d.

It's what BrianInEngland had reported in post #141.
If you want a completely 'new' recovery partition, then yes deleting any existing ones would be the best option, followed by either the Repair install or by using the commands to create it.

My 'main' drive is shown in the pic. I just delete the Recovery, extend the C: partition into the space, then let Windows Repair do it's thing. This of course gives an up-to-date Recovery image as well, based on the current Windows ISO version.

Strangely my partner's PC has a recovery partition BEFORE the C: drive, as well as one after.
 

Attachments

  • Screenshot 2023-08-28 192920.png
    Screenshot 2023-08-28 192920.png
    15.5 KB · Views: 28

My Computer

System One

  • OS
    Windows 11 Pro 23H2 (RP channel)
    Computer type
    PC/Desktop
    Manufacturer/Model
    Gigabyte
    CPU
    AMD Ryzen 5900X 12-core
    Motherboard
    X570 Aorus Xtreme
    Memory
    64GB Corsair Platinum RGB 3600MHz CL16
    Graphics Card(s)
    MSI Suprim X 3080 Ti
    Sound Card
    Soundblaster AE-5 Plus
    Monitor(s) Displays
    ASUS TUF Gaming VG289Q
    Screen Resolution
    3840x2160
    Hard Drives
    Samsung 990 Pro 2TB
    Samsung 980 Pro 2TB
    Samsung 970 Evo Plus 1TB
    Samsung 870 Evo 4TB
    Samsung T7 Touch 1TB
    PSU
    Asus ROG Strix 1000W
    Case
    Corsair D750 Airflow
    Cooling
    Noctua NH-D15S
    Keyboard
    Asus ROG Flare
    Mouse
    Logitech G903 with PowerPlay charger
    Internet Speed
    500Mb/sec
    Browser
    Microsoft Edge
    Antivirus
    Windows Defender
During the in place upgrade repair the new recovery partition was smaller in size than one of the orphaned recovery partitions:

(The 702 GB partition was the new recovery partition created by the in place upgrade repair)


Code:
  Volume ###  Ltr  Label        Fs     Type        Size     Status     Info
  ----------  ---  -----------  -----  ----------  -------  ---------  --------
  Volume 1     C                NTFS   Partition    929 GB  Healthy    Boot 
  Volume 2                      FAT32  Partition    100 MB  Healthy    System
  Volume 3                      NTFS   Partition    702 MB  Healthy    Hidden
  Volume 4                      NTFS   Partition    646 MB  Healthy    Hidden
  Volume 5                      NTFS   Partition    724 MB  Healthy    Hidden

  Partition ###  Type              Size     Offset
  -------------  ----------------  -------  -------
  Partition 1    System             100 MB  1024 KB
  Partition 2    Reserved            16 MB   101 MB
  Partition 3    Primary            929 GB   117 MB
  Partition 4    Recovery           702 MB   929 GB
  Partition 5    Recovery           646 MB   930 GB
  Partition 6    Recovery           724 MB   930 GB


The C: partition before and after:


Code:
Partition 3    Primary            930 GB   117 MB

Code:
Partition 3    Primary            929 GB   117 MB
 

My Computer

System One

  • OS
    Windows 10
    Computer type
    Laptop
    Manufacturer/Model
    HP
    CPU
    Intel(R) Core(TM) i7-4800MQ CPU @ 2.70GHz
    Motherboard
    Product : 190A Version : KBC Version 94.56
    Memory
    16 GB Total: Manufacturer : Samsung MemoryType : DDR3 FormFactor : SODIMM Capacity : 8GB Speed : 1600
    Graphics Card(s)
    NVIDIA Quadro K3100M; Intel(R) HD Graphics 4600
    Sound Card
    IDT High Definition Audio CODEC; PNP Device ID HDAUDIO\FUNC_01&VEN_111D&DEV_76E0
    Hard Drives
    Model Hitachi HTS727575A9E364
    Antivirus
    Microsoft Defender
    Other Info
    Mobile Workstation
Strangely my partner's PC has a recovery partition BEFORE the C: drive, as well as one after.


The older Windows versions had had the recovery partition as the first partition.

When Windows was upgraded it created a new recovery partition on the right side of the windows partition.
The prior recovery partition was orphaned.

The new recovery partition was to support automatic failover.


Code:
Recovery tools partition
This partition must be at least 300 MB.

The Windows Recovery Environment (Windows RE) tools require additional free space:

A minimum of 100 MB is required but 250 MB is recommended, to accommodate future updates, especially with custom partition layouts.


When calculating free space, note:

The recovery image, winre.wim, is typically between 500-700MB, depending on what drivers, languages, and customizations you add.

The file system itself can take up additional space. 
For example, NTFS may reserve 5-15MB or more on a 750MB partition.

This partition must use the Type ID: DE94BBA4-06D1-4D40-A16A-BFD50179D6AC.

The recovery tools should be in a separate partition than the Windows partition to support automatic failover and to
support booting partitions encrypted with Windows BitLocker Drive Encryption.

We recommend that you place this partition immediately after the Windows partition. 
This allows Windows to modify and recreate the partition later if future updates require a larger recovery image.


My Computer

System One

  • OS
    Windows 10
    Computer type
    Laptop
    Manufacturer/Model
    HP
    CPU
    Intel(R) Core(TM) i7-4800MQ CPU @ 2.70GHz
    Motherboard
    Product : 190A Version : KBC Version 94.56
    Memory
    16 GB Total: Manufacturer : Samsung MemoryType : DDR3 FormFactor : SODIMM Capacity : 8GB Speed : 1600
    Graphics Card(s)
    NVIDIA Quadro K3100M; Intel(R) HD Graphics 4600
    Sound Card
    IDT High Definition Audio CODEC; PNP Device ID HDAUDIO\FUNC_01&VEN_111D&DEV_76E0
    Hard Drives
    Model Hitachi HTS727575A9E364
    Antivirus
    Microsoft Defender
    Other Info
    Mobile Workstation
I just tested in a VM
deleting C:\$WINDOWS.~BT\Sources\appraiserres.dll doesn't work anymore on unsupported machine
repair install stops saying something failed
 

My Computer

System One

  • OS
    windows 11
    Computer type
    PC/Desktop
    Manufacturer/Model
    OEM
    CPU
    Intel i5-3570K
    Motherboard
    Asrock B75M-GL
    Graphics Card(s)
    none
    Sound Card
    none
    Screen Resolution
    1920x1080
    Browser
    Microsoft Edge
    Antivirus
    Microsoft
    Other Info
    22621.2428
I just tested in a VM
deleting C:\$WINDOWS.~BT\Sources\appraiserres.dll doesn't work anymore on unsupported machine
repair install stops saying something failed
Yes, that changed a while back. Setup now complains if it's missing, or a substitute one. I tried several alternative older appraiserres.dll files, Setup seemed to detect if a 'wrong' .dll was there and failed saying 'something went wrong'. The only reliable way is to create a zero byte 'new text document' and rename it as appraiserres.dll. Then replace the one in C:\$WINDOWS.~BT\Sources with this dummy file.
 

My Computers

System One System Two

  • OS
    Windows 11 Home
    Computer type
    Laptop
    Manufacturer/Model
    Acer Aspire 3 A315-23
    CPU
    AMD Athlon Silver 3050U
    Memory
    8GB
    Graphics Card(s)
    Radeon Graphics
    Monitor(s) Displays
    laptop screen
    Screen Resolution
    1366x768 native resolution, up to 2560x1440 with Radeon Virtual Super Resolution
    Hard Drives
    1TB Samsung EVO 870 SSD
    Internet Speed
    50 Mbps
    Browser
    Edge, Firefox
    Antivirus
    Defender
    Other Info
    fully 'Windows 11 ready' laptop. Windows 10 C: partition migrated from my old unsupported 'main machine' then upgraded to 11. A test migration ran Insider builds for 2 months. When 11 was released on 5th October it was re-imaged back to 10 and was offered the upgrade in Windows Update on 20th October. Windows Update offered the 22H2 Feature Update on 20th September 2022. It got the 23H2 Feature Update on 4th November 2023 through Windows Update.

    My SYSTEM THREE is a Dell Latitude 5410, i7-10610U, 32GB RAM, 512GB NVMe ssd, supported device running Windows 11 Pro (and all my Hyper-V VMs).

    My SYSTEM FOUR is a 2-in-1 convertible Lenovo Yoga 11e 20DA, Celeron N2930, 8GB RAM, 256GB ssd. Unsupported device: currently running Win10 Pro, plus Win11 Pro RTM and Insider Beta as native boot vhdx.

    My SYSTEM FIVE is a Dell Latitude 3190 2-in-1, Pentium Silver N5030, 4GB RAM, 512GB NVMe ssd, supported device running Windows 11 Pro, plus the Insider Beta, Dev, and Canary builds as a native boot .vhdx.
  • Operating System
    Windows 11 Pro
    Computer type
    Laptop
    Manufacturer/Model
    Dell Lattitude E4310
    CPU
    Intel® Core™ i5-520M
    Motherboard
    0T6M8G
    Memory
    8GB
    Graphics card(s)
    (integrated graphics) Intel HD Graphics
    Screen Resolution
    1366x768
    Hard Drives
    500GB Crucial MX500 SSD
    Browser
    Firefox, Edge
    Antivirus
    Defender
    Other Info
    unsupported machine: Legacy bios, MBR, TPM 1.2, upgraded from W10 to W11 using W10/W11 hybrid install media workaround. In-place upgrade to 22H2 using ISO and a workaround. Feature Update to 23H2 by manually installing the Enablement Package. Also running Insider Beta, Dev, and Canary builds as a native boot .vhdx.

    My SYSTEM THREE is a Dell Latitude 5410, i7-10610U, 32GB RAM, 512GB NVMe ssd, supported device running Windows 11 Pro (and all my Hyper-V VMs).

    My SYSTEM FOUR is a 2-in-1 convertible Lenovo Yoga 11e 20DA, Celeron N2930, 8GB RAM, 256GB ssd. Unsupported device: currently running Win10 Pro, plus Win11 Pro RTM and Insider Beta as native boot vhdx.

    My SYSTEM FIVE is a Dell Latitude 3190 2-in-1, Pentium Silver N5030, 4GB RAM, 512GB NVMe ssd, supported device running Windows 11 Pro, plus the Insider Beta, Dev, and Canary builds as a native boot .vhdx.
Yes, that changed a while back. Setup now complains if it's missing, or a substitute one. I tried several alternative older appraiserres.dll files, Setup seemed to detect if a 'wrong' .dll was there and failed saying 'something went wrong'. The only reliable way is to create a zero byte 'new text document' and rename it as appraiserres.dll. Then replace the one in C:\$WINDOWS.~BT\Sources with this dummy file.
That’s a little scary as my system is unsupported, meaning I wonder what the next version will do to hinder the upgrade (or installation)
 

My Computers

System One System Two

  • OS
    Windows 11 Pro 23H2 Build: 22631.3374
    Computer type
    PC/Desktop
    Manufacturer/Model
    Sin-built
    CPU
    Intel(R) Core(TM) i7-4770K CPU @ 3.50GHz (4th Gen?)
    Motherboard
    ASUS ROG Maximus VI Formula
    Memory
    32.0 GB of I forget and the box is in storage.
    Graphics Card(s)
    Gigabyte nVidia GeForce GTX 1660 Super OC 6GB
    Sound Card
    Onboard
    Monitor(s) Displays
    4 x LG 23MP75 1 x 24" LG M38H 1 x 32" LF6300 TV Monitor 1 x Wacom Pro 22" Tablet
    Screen Resolution
    All over the place
    Hard Drives
    2 x WD something Something 8TB HDD's / 2 x WD something Something 4TB HDD's / 1 x EVO 1TB SSD / 2 x QVO 1TB SSD's / 1 x EVO 250 GB SSD / 2 x QVO 1TB (External Hub) / 1 x EVO 1TB (Portable Backup Case)
    PSU
    Silverstone 1500
    Case
    NZXT Phantom 820 Full-Tower Case
    Cooling
    Noctua NH-D15 Elite Class Dual Tower CPU Cooler / 6 x EziDIY 120mm / 2 x Corsair 140mm somethings / 1 x 140mm Thermaltake something / 2 x 200mm Corsair.
    Keyboard
    Corsair K95 / Logitech diNovo Edge Wireless
    Mouse
    Logitech G402 / G502 / Mx Masters / MX Air Cordless
    Internet Speed
    100/40Mbps
    Browser
    All sorts
    Antivirus
    Kaspersky Premium
    Other Info
    I’m on a horse.
  • Operating System
    Windows 11 Pro 22621.2215
    Computer type
    Laptop
    Manufacturer/Model
    LENOVO Yoga 7i EVO OLED 14" Touchscreen i5 12 Core 16GB/512GB
    CPU
    Intel Core 12th Gen i5-1240P Processor (1.7 - 4.4GHz)
    Memory
    16GB LPDDR5 RAM
    Graphics card(s)
    Graphics processor is an Intel Iris Xe
    Sound Card
    optimized with Dolby Atmos®
    Screen Resolution
    QHD 2880 x 1800 OLED
    Hard Drives
    M.2 512GB
    Other Info
    …still on a horse.
That’s a little scary as my system is unsupported, meaning I wonder what the next version will do to hinder the upgrade (or installation)
Currently I'm running several 'next versions' on my unsupported System Four (see 'Other Info' in my specs) - the Beta, Dev and Canary Insider builds. Dev and Beta get weekly feature updates, Beta just gets CU's now. Replacing appraiserres.dll with a zero byte dummy file is all I need to do to bypass the system checks during the Dev or Canary upgrades.
 

My Computers

System One System Two

  • OS
    Windows 11 Home
    Computer type
    Laptop
    Manufacturer/Model
    Acer Aspire 3 A315-23
    CPU
    AMD Athlon Silver 3050U
    Memory
    8GB
    Graphics Card(s)
    Radeon Graphics
    Monitor(s) Displays
    laptop screen
    Screen Resolution
    1366x768 native resolution, up to 2560x1440 with Radeon Virtual Super Resolution
    Hard Drives
    1TB Samsung EVO 870 SSD
    Internet Speed
    50 Mbps
    Browser
    Edge, Firefox
    Antivirus
    Defender
    Other Info
    fully 'Windows 11 ready' laptop. Windows 10 C: partition migrated from my old unsupported 'main machine' then upgraded to 11. A test migration ran Insider builds for 2 months. When 11 was released on 5th October it was re-imaged back to 10 and was offered the upgrade in Windows Update on 20th October. Windows Update offered the 22H2 Feature Update on 20th September 2022. It got the 23H2 Feature Update on 4th November 2023 through Windows Update.

    My SYSTEM THREE is a Dell Latitude 5410, i7-10610U, 32GB RAM, 512GB NVMe ssd, supported device running Windows 11 Pro (and all my Hyper-V VMs).

    My SYSTEM FOUR is a 2-in-1 convertible Lenovo Yoga 11e 20DA, Celeron N2930, 8GB RAM, 256GB ssd. Unsupported device: currently running Win10 Pro, plus Win11 Pro RTM and Insider Beta as native boot vhdx.

    My SYSTEM FIVE is a Dell Latitude 3190 2-in-1, Pentium Silver N5030, 4GB RAM, 512GB NVMe ssd, supported device running Windows 11 Pro, plus the Insider Beta, Dev, and Canary builds as a native boot .vhdx.
  • Operating System
    Windows 11 Pro
    Computer type
    Laptop
    Manufacturer/Model
    Dell Lattitude E4310
    CPU
    Intel® Core™ i5-520M
    Motherboard
    0T6M8G
    Memory
    8GB
    Graphics card(s)
    (integrated graphics) Intel HD Graphics
    Screen Resolution
    1366x768
    Hard Drives
    500GB Crucial MX500 SSD
    Browser
    Firefox, Edge
    Antivirus
    Defender
    Other Info
    unsupported machine: Legacy bios, MBR, TPM 1.2, upgraded from W10 to W11 using W10/W11 hybrid install media workaround. In-place upgrade to 22H2 using ISO and a workaround. Feature Update to 23H2 by manually installing the Enablement Package. Also running Insider Beta, Dev, and Canary builds as a native boot .vhdx.

    My SYSTEM THREE is a Dell Latitude 5410, i7-10610U, 32GB RAM, 512GB NVMe ssd, supported device running Windows 11 Pro (and all my Hyper-V VMs).

    My SYSTEM FOUR is a 2-in-1 convertible Lenovo Yoga 11e 20DA, Celeron N2930, 8GB RAM, 256GB ssd. Unsupported device: currently running Win10 Pro, plus Win11 Pro RTM and Insider Beta as native boot vhdx.

    My SYSTEM FIVE is a Dell Latitude 3190 2-in-1, Pentium Silver N5030, 4GB RAM, 512GB NVMe ssd, supported device running Windows 11 Pro, plus the Insider Beta, Dev, and Canary builds as a native boot .vhdx.
Currently I'm running several 'next versions' on my unsupported System Four (see 'Other Info' in my specs) - the Beta, Dev and Canary Insider builds. Dev and Beta get weekly feature updates, Beta just gets CU's now. Replacing appraiserres.dll with a zero byte dummy file is all I need to do to bypass the system checks during the Dev or Canary upgrades.
OK thanks Bree. Is this also relevant for a fresh install do you know, would rufus accommodate this? I edited the iso with that dummy file regardless, for the current public version due to earlier threads I had read pre-rufus.
 

My Computers

System One System Two

  • OS
    Windows 11 Pro 23H2 Build: 22631.3374
    Computer type
    PC/Desktop
    Manufacturer/Model
    Sin-built
    CPU
    Intel(R) Core(TM) i7-4770K CPU @ 3.50GHz (4th Gen?)
    Motherboard
    ASUS ROG Maximus VI Formula
    Memory
    32.0 GB of I forget and the box is in storage.
    Graphics Card(s)
    Gigabyte nVidia GeForce GTX 1660 Super OC 6GB
    Sound Card
    Onboard
    Monitor(s) Displays
    4 x LG 23MP75 1 x 24" LG M38H 1 x 32" LF6300 TV Monitor 1 x Wacom Pro 22" Tablet
    Screen Resolution
    All over the place
    Hard Drives
    2 x WD something Something 8TB HDD's / 2 x WD something Something 4TB HDD's / 1 x EVO 1TB SSD / 2 x QVO 1TB SSD's / 1 x EVO 250 GB SSD / 2 x QVO 1TB (External Hub) / 1 x EVO 1TB (Portable Backup Case)
    PSU
    Silverstone 1500
    Case
    NZXT Phantom 820 Full-Tower Case
    Cooling
    Noctua NH-D15 Elite Class Dual Tower CPU Cooler / 6 x EziDIY 120mm / 2 x Corsair 140mm somethings / 1 x 140mm Thermaltake something / 2 x 200mm Corsair.
    Keyboard
    Corsair K95 / Logitech diNovo Edge Wireless
    Mouse
    Logitech G402 / G502 / Mx Masters / MX Air Cordless
    Internet Speed
    100/40Mbps
    Browser
    All sorts
    Antivirus
    Kaspersky Premium
    Other Info
    I’m on a horse.
  • Operating System
    Windows 11 Pro 22621.2215
    Computer type
    Laptop
    Manufacturer/Model
    LENOVO Yoga 7i EVO OLED 14" Touchscreen i5 12 Core 16GB/512GB
    CPU
    Intel Core 12th Gen i5-1240P Processor (1.7 - 4.4GHz)
    Memory
    16GB LPDDR5 RAM
    Graphics card(s)
    Graphics processor is an Intel Iris Xe
    Sound Card
    optimized with Dolby Atmos®
    Screen Resolution
    QHD 2880 x 1800 OLED
    Hard Drives
    M.2 512GB
    Other Info
    …still on a horse.
OK thanks Bree. Is this also relevant for a fresh install do you know, would rufus accommodate this? I edited the iso with that dummy file regardless, for the current public version due to earlier threads I had read pre-rufus.
I'm not sure what changes Rufus makes, I've not used it myself. An in-place repair install using a usb made by Rufus may well not need any workarounds. For a clean install on an unsupported device I boot to a command prompt from an unmodified install usb, apply the known registry changes (originally published by Microsoft) then start Setup.exe from the command prompt.
 

My Computers

System One System Two

  • OS
    Windows 11 Home
    Computer type
    Laptop
    Manufacturer/Model
    Acer Aspire 3 A315-23
    CPU
    AMD Athlon Silver 3050U
    Memory
    8GB
    Graphics Card(s)
    Radeon Graphics
    Monitor(s) Displays
    laptop screen
    Screen Resolution
    1366x768 native resolution, up to 2560x1440 with Radeon Virtual Super Resolution
    Hard Drives
    1TB Samsung EVO 870 SSD
    Internet Speed
    50 Mbps
    Browser
    Edge, Firefox
    Antivirus
    Defender
    Other Info
    fully 'Windows 11 ready' laptop. Windows 10 C: partition migrated from my old unsupported 'main machine' then upgraded to 11. A test migration ran Insider builds for 2 months. When 11 was released on 5th October it was re-imaged back to 10 and was offered the upgrade in Windows Update on 20th October. Windows Update offered the 22H2 Feature Update on 20th September 2022. It got the 23H2 Feature Update on 4th November 2023 through Windows Update.

    My SYSTEM THREE is a Dell Latitude 5410, i7-10610U, 32GB RAM, 512GB NVMe ssd, supported device running Windows 11 Pro (and all my Hyper-V VMs).

    My SYSTEM FOUR is a 2-in-1 convertible Lenovo Yoga 11e 20DA, Celeron N2930, 8GB RAM, 256GB ssd. Unsupported device: currently running Win10 Pro, plus Win11 Pro RTM and Insider Beta as native boot vhdx.

    My SYSTEM FIVE is a Dell Latitude 3190 2-in-1, Pentium Silver N5030, 4GB RAM, 512GB NVMe ssd, supported device running Windows 11 Pro, plus the Insider Beta, Dev, and Canary builds as a native boot .vhdx.
  • Operating System
    Windows 11 Pro
    Computer type
    Laptop
    Manufacturer/Model
    Dell Lattitude E4310
    CPU
    Intel® Core™ i5-520M
    Motherboard
    0T6M8G
    Memory
    8GB
    Graphics card(s)
    (integrated graphics) Intel HD Graphics
    Screen Resolution
    1366x768
    Hard Drives
    500GB Crucial MX500 SSD
    Browser
    Firefox, Edge
    Antivirus
    Defender
    Other Info
    unsupported machine: Legacy bios, MBR, TPM 1.2, upgraded from W10 to W11 using W10/W11 hybrid install media workaround. In-place upgrade to 22H2 using ISO and a workaround. Feature Update to 23H2 by manually installing the Enablement Package. Also running Insider Beta, Dev, and Canary builds as a native boot .vhdx.

    My SYSTEM THREE is a Dell Latitude 5410, i7-10610U, 32GB RAM, 512GB NVMe ssd, supported device running Windows 11 Pro (and all my Hyper-V VMs).

    My SYSTEM FOUR is a 2-in-1 convertible Lenovo Yoga 11e 20DA, Celeron N2930, 8GB RAM, 256GB ssd. Unsupported device: currently running Win10 Pro, plus Win11 Pro RTM and Insider Beta as native boot vhdx.

    My SYSTEM FIVE is a Dell Latitude 3190 2-in-1, Pentium Silver N5030, 4GB RAM, 512GB NVMe ssd, supported device running Windows 11 Pro, plus the Insider Beta, Dev, and Canary builds as a native boot .vhdx.
I'm not sure what changes Rufus makes, I've not used it myself. An in-place repair install using a usb made by Rufus may well not need any workarounds. For a clean install on an unsupported device I boot to a command prompt from an unmodified install usb, apply the known registry changes (originally published by Microsoft) then start Setup.exe from the command prompt.
OK thanks, @Bree
 

My Computers

System One System Two

  • OS
    Windows 11 Pro 23H2 Build: 22631.3374
    Computer type
    PC/Desktop
    Manufacturer/Model
    Sin-built
    CPU
    Intel(R) Core(TM) i7-4770K CPU @ 3.50GHz (4th Gen?)
    Motherboard
    ASUS ROG Maximus VI Formula
    Memory
    32.0 GB of I forget and the box is in storage.
    Graphics Card(s)
    Gigabyte nVidia GeForce GTX 1660 Super OC 6GB
    Sound Card
    Onboard
    Monitor(s) Displays
    4 x LG 23MP75 1 x 24" LG M38H 1 x 32" LF6300 TV Monitor 1 x Wacom Pro 22" Tablet
    Screen Resolution
    All over the place
    Hard Drives
    2 x WD something Something 8TB HDD's / 2 x WD something Something 4TB HDD's / 1 x EVO 1TB SSD / 2 x QVO 1TB SSD's / 1 x EVO 250 GB SSD / 2 x QVO 1TB (External Hub) / 1 x EVO 1TB (Portable Backup Case)
    PSU
    Silverstone 1500
    Case
    NZXT Phantom 820 Full-Tower Case
    Cooling
    Noctua NH-D15 Elite Class Dual Tower CPU Cooler / 6 x EziDIY 120mm / 2 x Corsair 140mm somethings / 1 x 140mm Thermaltake something / 2 x 200mm Corsair.
    Keyboard
    Corsair K95 / Logitech diNovo Edge Wireless
    Mouse
    Logitech G402 / G502 / Mx Masters / MX Air Cordless
    Internet Speed
    100/40Mbps
    Browser
    All sorts
    Antivirus
    Kaspersky Premium
    Other Info
    I’m on a horse.
  • Operating System
    Windows 11 Pro 22621.2215
    Computer type
    Laptop
    Manufacturer/Model
    LENOVO Yoga 7i EVO OLED 14" Touchscreen i5 12 Core 16GB/512GB
    CPU
    Intel Core 12th Gen i5-1240P Processor (1.7 - 4.4GHz)
    Memory
    16GB LPDDR5 RAM
    Graphics card(s)
    Graphics processor is an Intel Iris Xe
    Sound Card
    optimized with Dolby Atmos®
    Screen Resolution
    QHD 2880 x 1800 OLED
    Hard Drives
    M.2 512GB
    Other Info
    …still on a horse.
Yes, that changed a while back. Setup now complains if it's missing, or a substitute one. I tried several alternative older appraiserres.dll files, Setup seemed to detect if a 'wrong' .dll was there and failed saying 'something went wrong'. The only reliable way is to create a zero byte 'new text document' and rename it as appraiserres.dll. Then replace the one in C:\$WINDOWS.~BT\Sources with this dummy file.
that worked fine, even with an official outdated ISO
 

My Computer

System One

  • OS
    windows 11
    Computer type
    PC/Desktop
    Manufacturer/Model
    OEM
    CPU
    Intel i5-3570K
    Motherboard
    Asrock B75M-GL
    Graphics Card(s)
    none
    Sound Card
    none
    Screen Resolution
    1920x1080
    Browser
    Microsoft Edge
    Antivirus
    Microsoft
    Other Info
    22621.2428
Yet again Brink, you rescue us from despair. This will be invalualbe if and when the times comes. Thank you also for the context change.
 

Attachments

  • minion-icon-7.png
    minion-icon-7.png
    17.6 KB · Views: 20

My Computer

System One

  • OS
    Win 11 x 64 Home on PC . Pro Win 11 x 64 on Surface 9.
    Computer type
    PC/Desktop
    Manufacturer/Model
    Upgraded to personal setup from made to measure.
    CPU
    amd ryzen 5 7600 6core 3701mhz
    Motherboard
    Gigabyte B650M K
    Memory
    32GB DDR5
    Graphics Card(s)
    MSI Nvidia Geforce Ventus 2X RTX 4070
    Sound Card
    ONBOARD 6 CHANNEL (5.1) HIGH DEF AUDIO (AS STANDARD)
    Monitor(s) Displays
    Coolermaster GM27-FFS 27 inch
    Screen Resolution
    1920 x 1080
    Hard Drives
    Samsung V-NAND SSD 970 Evo plus 500GB
    3TB SATA-III 3.5" HDD, 6GB/s, 7200RPM, 64MB CACHE
    1 x 4TB External USB. 1 x 5TB External SSD, & BIG sticks
    PSU
    700
    Case
    Coolermaster
    Cooling
    DEEP COOL AS700 CPU COOLER
    Keyboard
    Microsoft 600K & Logitech gamer G213
    Mouse
    logitech X2 Pro
    Internet Speed
    640+MB
    Browser
    Chrome & Firefox
    Antivirus
    Kaspersky Plus
    Other Info
    WIRELESS 802.11 AC1300 867Mbps/5GHz, 400Mbps/2.4GHz PCI-E CARD
    Logitech L202 Speakers
    Asus DRW-14D5MT x48
    Net via Virgin Media hub 3 (using RJ45 cable). Plus MS surface 9 tablet (win 11). Amazon Fire 10.
Yet again Brink, you rescue us from despair. This will be invalualbe if and when the times comes. Thank you also for the context change.
:shawn:
 

My Computers

System One System Two

  • OS
    Windows 11 Pro for Workstations
    Computer type
    PC/Desktop
    Manufacturer/Model
    Custom self build
    CPU
    Intel i7-8700K 5 GHz
    Motherboard
    ASUS ROG Maximus XI Formula Z390
    Memory
    64 GB (4x16GB) G.SKILL TridentZ RGB DDR4 3600 MHz (F4-3600C18D-32GTZR)
    Graphics Card(s)
    ASUS ROG-STRIX-GTX1080TI-O11G-GAMING (11GB GDDR5X)
    Sound Card
    Integrated Digital Audio (S/PDIF)
    Monitor(s) Displays
    2 x Samsung Odyssey G75 27"
    Screen Resolution
    2560x1440
    Hard Drives
    1TB Samsung 990 PRO M.2,
    4TB Samsung 990 PRO M.2,
    8TB WD MyCloudEX2Ultra NAS
    PSU
    Seasonic Prime Titanium 850W
    Case
    Thermaltake Core P3 wall mounted
    Cooling
    Corsair Hydro H115i
    Keyboard
    Logitech wireless K800
    Mouse
    Logitech MX Master 3
    Internet Speed
    1 Gbps Download and 35 Mbps Upload
    Browser
    Google Chrome
    Antivirus
    Microsoft Defender and Malwarebytes Premium
    Other Info
    Logitech Z625 speaker system,
    Logitech BRIO 4K Pro webcam,
    HP Color LaserJet Pro MFP M477fdn,
    APC SMART-UPS RT 1000 XL - SURT1000XLI,
    Galaxy S23 Plus phone
  • Operating System
    Windows 11 Pro
    Computer type
    Laptop
    Manufacturer/Model
    HP Spectre x360 2in1 14-eu0098nr (2024)
    CPU
    Intel Core Ultra 7 155H 4.8 GHz
    Memory
    16 GB LPDDR5x-7467 MHz
    Graphics card(s)
    Integrated Intel Arc
    Sound Card
    Poly Studio
    Monitor(s) Displays
    14" 2.8K OLED multitouch
    Screen Resolution
    2880 x 1800
    Hard Drives
    2 TB PCIe NVMe M.2 SSD
    Internet Speed
    Intel Wi-Fi 7 BE200 (2x2) and Bluetooth 5.4
    Browser
    Chrome and Edge
    Antivirus
    Windows Defender and Malwarebytes Premium
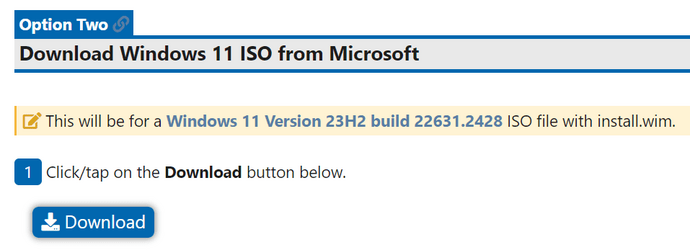
Trying to do a repair install. Using this thread's tutorial. When I get to this step:

Capture 1.PNG
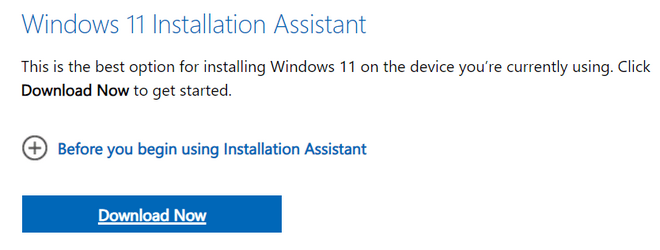
Clicking the Download button takes me to another page with this:

Capture 2.PNG
However when clicking on that Download Now button, nothing happens, no download, no error, nothing. In fact, none of the download button options on that page do anything. Started over a couple of times, but still nothing. Suggestions?
 

My Computer

System One

  • OS
    Windows 11 23H2 22631.3447
    Computer type
    PC/Desktop
    Manufacturer/Model
    HP Envy Desktop TE02-0xxx
    CPU
    2.10GHz Intel 12th Gen Core i7-12700
    Motherboard
    HP 'BlizzardU' 894B 10; Chipset Intel ADL Z690
    Memory
    16GB
    Graphics Card(s)
    NVIDIA GeForce 3050
    Sound Card
    Realtek Audio
    Monitor(s) Displays
    HP27er
    Screen Resolution
    1920x1080
    Hard Drives
    256GB NVMe SSD
    2TB HDD
    PSU
    600W
    Case
    Desktop Tower
    Cooling
    Air
    Keyboard
    Logitech K350
    Mouse
    Logitech M510
    Internet Speed
    25Mps (Max)
    Browser
    Chrome
    Antivirus
    Windows native security
    Other Info
    HP replaced SSD under warranty in November, 2023.

My Computers

System One System Two

  • OS
    11 Pro 23H2 22631.3447
    Computer type
    PC/Desktop
    Manufacturer/Model
    Lenovo ThinkCentre M920S SFF
    CPU
    i7-9700 @ 3.00GHz
    Motherboard
    Lenovo 3132
    Memory
    32GBDDR4 @ 2666MHz
    Graphics Card(s)
    Intel HD 630 Graphics onboard
    Sound Card
    Realtek HD Audio
    Monitor(s) Displays
    LG E2442
    Screen Resolution
    1920x1080
    Hard Drives
    1 x Samsung 970 EVO PLUS 500GB NVMe SSD, 1 x WD_BLACK SN770
    250GB NVMe SSD (OS and programs), 1 x WD_BLACK SN770
    500GB NVMe SSD (Data)
    Case
    Lenovo SFF
    Keyboard
    Cherry Stream TKL JK-8600US-2 Wired
    Mouse
    LogiTech M510 wireless
    Internet Speed
    Fast (for fixed wireless!)
    Browser
    Chrome, sometimes Firefox
    Antivirus
    Malwarebytes Premium & Defender (working together beautifully!)
  • Operating System
    11 Pro 23H2 22631.3527
    Computer type
    PC/Desktop
    Manufacturer/Model
    Lenovo ThinkCentre M920S SFF
    CPU
    i5-8400 @ 2.80GHz
    Motherboard
    Lenovo 3132
    Memory
    32GB DDR4 @ 2600MHz
    Graphics card(s)
    Intel HD 630 Graphics onboard
    Sound Card
    Realtek High Definition Audio onboard
    Monitor(s) Displays
    LG FULL HD (1920x1080@59Hz)
    Screen Resolution
    1920 x 1080
    Hard Drives
    1 x Samsung 970 EVO PLUS NVMe; 1 x Samsung 980 NVMe SSD
    Case
    Lenovo Think Centre SFF
    Mouse
    LogiTech M510 wireless
    Keyboard
    Cherry Stream TKL JK-8600US-2 Wired
    Internet Speed
    Fast (for fixed wireless!)
    Browser
    Chrome
    Antivirus
    Malwarebytes Premium and MS Defender, beautiful together

Latest Support Threads

Back
Top Bottom