- Local time
- 1:50 AM
- Posts
- 280
- OS
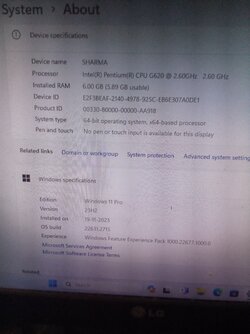
- Window 11 v24H2 Build 26100.2033
Please note that following steps are required to prepare bootable usb, manually.
PART A
Run CMD as administrator
C:\Windows\system32>Diskpart
DISKPART>List Disk
DISKPART>Select Disk #
DISKPART>clean
DISKPART>convert mbr
DISKPART>create partition primary size=2048
DISKPART>create partition primary
DISKPART>select partition 1
DISKPART>format fs=fat32 quick label="BOOT"
DISKPART>assign letter=x
DISKPART>active
DISKPART>select partition 2
DISKPART>format fs=ntfs quick label="INSTALL"
DISKPART>assign letter=y
DISKPART>exit
PART B
1. Extract bypass11 compressed zip folder to NTFS (INSTALL) Partition. All six files are extracted to root partition Y: We can copy and paste these files in Y:
2. These files are namely auto, AutoUnattend, Quick_11_iso_esd_wim_TPM_toggle, readme.md, Skip_TPM_Check_on_Dynamic_Update , windows_update_refresh.
3. Right click file auto to run as administrator.
4. Setup starts , proceed quickly checking updates, pc, free enough space, what to keep, without giving any chance to us to select. It is automatic. So as soon as setup completes 100% , quickly cancel the inplace upgrade process by clicking cancel or close button.
5. Even at 0% progress, we can cancell the upgradation. If you want to continue , keep it going on. But backup important data before clicking auto. I have found that , cancelling the installation progress at 0% did not erase anything. It may keep personal files unerased.
6. Bootable usb is ready to clean install Windows 11 23H2 with all 11 editions.
7. Skip or enter product key. If skipped we can select other edition from 11 available editions.
8. All files should always be in NTFS root partition Y: to install Windows 11 23H2 on unsupported pc .
PART C
1. To safely update from within current Windows, right click on file Quick_11_iso_esd_wim_TPM_toggle to run as administrator. This adds send to option to iso in context menu. It means that if we right click on the original iso downloaded from official website of Microsoft, it gives send to Quick_11_iso_esd_wim_TPM_toggle. This patches the working edition of current Windows 11 os.
2. Alternatively we can drag and drop the iso on file Quick_11_iso_esd_wim_TPM_toggle, this patches TPM. But to make bootable usb to clean install , file auto must be run as administrator, from within current Windows running on pc.
Thanks everyone for reading this thread.
- Windows Build/Version
- Windows 11 Home version 23H2 OS Build 22631.2428
Attachments
My Computer
At a glance
Window 11 v24H2 Build 26100.2033Intel(R) Core(TM) i3-2100 CPU @ 3.10GHz 3.10 GHz4.00 GB (3.89 GB usable)Onboard
- OS
- Window 11 v24H2 Build 26100.2033
- Computer type
- PC/Desktop
- Manufacturer/Model
- ASSEMMBLED
- CPU
- Intel(R) Core(TM) i3-2100 CPU @ 3.10GHz 3.10 GHz
- Motherboard
- ZEBRONICS
- Memory
- 4.00 GB (3.89 GB usable)
- Graphics Card(s)
- Onboard
- Sound Card
- Onboard
- Monitor(s) Displays
- LG
- Screen Resolution
- 1366x768
- Hard Drives
- Toshiba HDD 1 TB
- Keyboard
- Mechanical
- Mouse
- Mechanical
- Internet Speed
- 700 kb/s
- Browser
- Microsoft EDGE, CHROME
- Antivirus
- Microsoft Defender