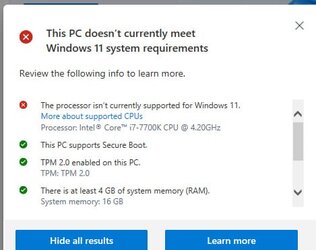
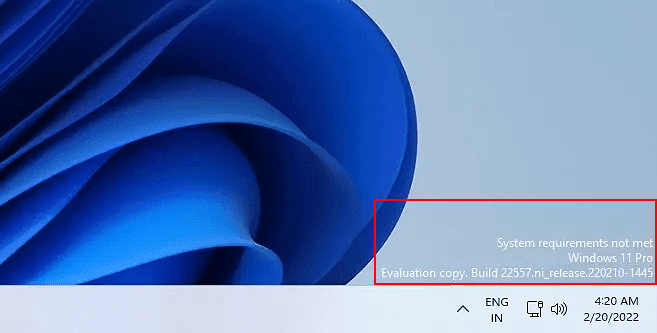
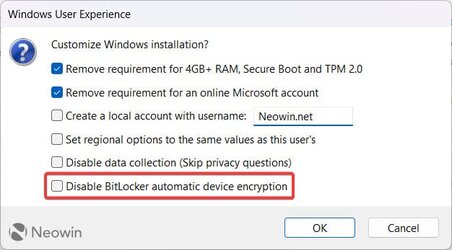
The document below is just what I use as my personal notes for installing Windows on unsupported hardware. Yes, there are other ways to do this, but these are tried and proven methods.
NOTE: Since you are performing an upgrade installation, be sure to follow the steps in the section "UPGRADE INSTALLATION PROCEDURE". I'm including my full document simply for the sake of completeness:
-----------------------------
This document describes how to install Windows 11 on systems that do not technically meet the Windows 11 hardware requirements. Before we even begin, I would like to point out that there are other methods not covered here to accomplish this task. For example, the "Rufus" utility can create installation media to allow for installation on unsupported hardware. However, the goal with this document is to provide methods to install Windows 11 without the need for any third-party utilities.
********************************
* CLEAN INSTALLATION PROCEDURE *
********************************
IMPORTANT: Be sure to read both PART 1 and PART 2 below. Part 1 describes how to bypass the initial Windows hardware requirements. Part 2 describes how to create a local user account and bypass the need to login with a Microsoft account later on in the installation.
***************************************************************************************************
* PART 1 - This section describes how to bypass the initial hardware requirements for Windows 11. *
***************************************************************************************************
Note: All methods below have the same goal, which is to set registry entries in Windows PE to bypass the Windows setup requirements. This will NOT affect the final installation of Windows. It only affects the registry entries of Windows PE which is loaded in memory during setup. As soon as the first reboot during installation occurs, these registry entries are lost, having already served their purpose.
****************************************************
* Method 1 - Using an Autounattend.xml Answer File *
****************************************************
Note: The answer file provided here does nothing except to bypass the Windows 11 system requirements.
If you want to create an answer file on your own, these are the steps to include the entries that bypass Windows 11 system requirements.
Create a new answer file or modify an existing answer file with the following entries:
Add the component Microsoft Windows Setup\RunSynchronos\RunSynchronousCommand to Pass 1 windowsPE.
Set the following values:
Order: 1
Path: reg add HKLM\System\Setup\LabConfig /v BypassTPMCheck /t reg_dword /d 0x00000001 /f
Repeat the above steps 4 more time (for a total of 5 "RunSynchronousCommand" entries) with the following entries:
Order: 2
Path: reg add HKLM\System\Setup\LabConfig /v BypassSecureBootCheck /t reg_dword /d 0x00000001 /f
Order: 3
Path: reg add HKLM\System\Setup\LabConfig /v BypassRAMCheck /t reg_dword /d 0x00000001 /f
Order: 4
Path: reg add HKLM\System\Setup\LabConfig /v BypassStorageCheck /t reg_dword /d 0x00000001 /f
Order: 5
Path: reg add HKLM\System\Setup\LabConfig /v BypassCPUCheck /t reg_dword /d 0x00000001 /f
*************************************************************
* Method 2 - Manually Modify the Registry for Windows Setup *
*************************************************************
Begin installation of Windows from your installation media. At the first static screen where Windows setup requests information from you during setup, press SHIFT + F10 to open a command prompt.
Type regedit and hit ENTER. Add the following entries:
HKLM\System\Setup\LabConfig BypassTPMCheck reg_dword 0x00000001
HKLM\System\Setup\LabConfig BypassSecureBootCheck reg_dword 0x00000001
HKLM\System\Setup\LabConfig BypassRAMCheck reg_dword 0x00000001
HKLM\System\Setup\LabConfig BypassStorageCheck reg_dword 0x00000001
HKLM\System\Setup\LabConfig BypassCPUCheck reg_dword 0x00000001
Close the Registry Editor and the command prompt. Continue installation normally.
********************************
* Method 3 - Using a .reg file *
********************************
Create a file with the extension .reg. Place the following text between the bars (----) into that file. Don't include the "----" lines.
----
Windows Registry Editor Version 5.00
[HKEY_LOCAL_MACHINE\SYSTEM\Setup\LabConfig]
"BypassTPMCheck"=dword:00000001
"BypassSecureBootCheck"=dword:00000001
"BypassRAMCheck"=dword:00000001
"BypassStorageCheck"=dword:00000001
"BypassCPUCheck"=dword:00000001
----
Save the file, making sure to use a ".reg" file extension. Example: Bypass.reg
Drop this registry file onto your install media. After starting setup, when you reach the first static screen where information is requested by setup, press Shift + F10 to open a command prompt. Navigate to the drive letter where the .reg file is located and then run it. You can run it by simply typing the name of the file and pressing <ENTER>. Close the command prompt and continue installation of Windows as usual.
*********************************
* Method 4 - Using a Batch File *
*********************************
Create a text file with the extension .bat. Example: Bypass.bat. Place the following six lines in that file:
@echo off
reg add HKLM\System\Setup\LabConfig /v BypassTPMCheck /t reg_dword /d 0x00000001 /f > NUL
reg add HKLM\System\Setup\LabConfig /v BypassSecureBootCheck /t reg_dword /d 0x00000001 /f > NUL
reg add HKLM\System\Setup\LabConfig /v BypassRAMCheck /t reg_dword /d 0x00000001 /f > NUL
reg add HKLM\System\Setup\LabConfig /v BypassStorageCheck /t reg_dword /d 0x00000001 /f > NUL
reg add HKLM\System\Setup\LabConfig /v BypassCPUCheck /t reg_dword /d 0x00000001 /f > NUL
NOTE: The "> NUL" simply suppresses the output from being displayed for "silent" operation.
Drop this file onto your install media. After starting setup, when you reach the first static screen where information is requested by setup, press Shift + F10 to open a command prompt. Navigate to the drive letter where the .bat file is located and then run it. You can run it by simply typing the name of the file and pressing <ENTER>. Close the command prompt and continue installation of Windows as usual.
*****************************************************************************************
* Part 2 - This section describes how to create a local account duning installation and *
* bypass the requirement to logon with a Microsoft account in Windows 11 Pro. *
*****************************************************************************************
************************************
* If you have a network connection *
************************************
When you reach the screen where you have a choice to "Set up for personal use" or "Set up for work or school", select "Set up for work or school" and click on "Next".
On the next screen, select "Sign-in options", then "Domain join instead". Don't worry, we are not joining a domain!
On the next screen, supply the local user name that you want to create and then continue through setup as normal.
*********************************************
* If you do NOT have an Internet connection *
*********************************************
When you reach the screen where Windows wants to connect you to a network to create a local user account, press SHIFT + F10 to open a command prompt, and then run "OOBE\BypassNRO". The system will reboot. After rebooting, you will start back up at the screen asking you to select the correct keyboard layout. When you get back to the "Let's connect you to a network" screen, you will have an option to select "I don't have internet". Choose that option. On the next screen, select "Continue with limited setup". Enter your local user account name, and then continue with setup as usual.
**********************************
* UPGRADE INSTALLATION PROCEDURE *
**********************************
************
* Method 1 *
************
When installing Windows 11 as an upgrade, Windows will make use of the file \sources\appraiserres.dll to determine the system requirements for installation. To bypass the system requirements, you can replace that file with a fake appraiserres.dll file.
Delete or rename the original \sources\appraiserres.dll file on your installation media. Replace the file that you deleted or renamed with a fake appraiserres.dll. You could simply create a text file and rename it to appraiserres.dll. If you prefer, you could also just grab the appraiserres.dll from a Windows 10 distribution.
You can now run setup from the root of the installation media to begin an upgrade install.
************
* Method 2 *
************
NOTE: If you follow the steps in method 1, you do not need to follow the steps outlined in method 2.
You can bypass just the TPM 2.0 and supported CPU requirements for an upgrade installation by making the following change to the registry:
[HKEY_LOCAL_MACHINE\SYSTEM\Setup\MoSetup]
"AllowUpgradesWithUnsupportedTPMOrCPU"=dword:00000001
You can make this into a .REG file if you wish. Then, simply double-click that file to merge the contents into the registry. If you want to do this, open notepad, paste in the following lines between the "----" lines (not including those lines), and save it to a file with a .REG extention, then double-click that file to make the registry change:
----
Windows Registry Editor Version 5.00
[HKEY_LOCAL_MACHINE\SYSTEM\Setup\MoSetup]
"AllowUpgradesWithUnsupportedTPMOrCPU"=dword:00000001
----
NOTE: This registry setting bypasses the need for a supported CPU and a TPM 2.0 but a TPM 1.2 would still be needed. If you still do not meet this requirement, then please follow the steps in method 1 instead.
References
==========
Learn how to install Windows 11, including the recommended option of using the Windows Update page in Settings.

support.microsoft.com


