Installation and Upgrade Create Windows 11 Bootable USB Installation Media


  • Staff
Win11USB Banner.png

This tutorial will show you how to create a bootable USB flash drive used to install Windows 11 with UEFI support.

You can use a Windows 11 installation USB flash drive to clean install, upgrade, reset, or repair Windows 11.

The installation USB can also be used as a recovery drive to boot to WinRE (aka: advanced startup).


You must be signed in as an administrator to create a bootable Windows 11 installation USB.

The USB flash drive needs to be at least 8 GB or larger in size.


Contents

  • Option One: Create Windows 11 Bootable USB Installation Media with Media Creation Tool
  • Option Two: Create Windows 11 Bootable USB Installation Media with Rufus
  • Option Three: Create Windows 11 Bootable USB Installation Media in Command Prompt


OPTION ONE

Create Windows 11 Bootable USB Installation Media with Media Creation Tool


This will be for a Windows 11 Version 23H2 build 22631.2861 USB.


1 Click/tap on the Download button below, and click/tap on the Download Now button at Microsoft's site below Create Windows 11 Installation Media. (see screenshot below)


Windows_11_MCT-1.png

2 Save the MediaCreationTool_Win11_23H2.exe file to your desktop, and run it.

Windows_11_MCT-2.png

3 If prompted by UAC, click/tap on Yes.

4 Click/tap on Accept for the license terms. (see screenshot below)

Windows_11_MCT-3.png

5 Uncheck the Use the recommended options for this PC box. (see screenshot below)

Leaving the Use the recommended options for this PC box checked will have the Media Creation Tool download an ISO that's the same language, edition, and architecture as the current PC.


Windows_11_MCT-4.png

6 Select (dot) USB flash drive, and click/tap on Next. (see screenshot below)

Windows_11_MCT-5.png

7 Connect your USB flash drive, click/tap on the Refresh drive list link, select the USB flash drive, and click/tap on Next. (see screenshot below)

Windows_11_MCT-6.png

8 It will now start Downloading Windows 11 and Creating Windows 11 media. (see screenshot below)

Windows_11_MCT-7.png

9 Click/tap on Finish when the USB flash drive is ready. (see screenshot below)

Windows_11_MCT-8.png


OPTION TWO

Create Windows 11 Bootable USB Installation Media with Rufus


1 If you have not already, you will need to download a Windows 11 ISO file.

2 Download the latest version of Rufus, and save its .exe file to your desktop.


This is a standalone exe file that doesn't install anything to your PC. For Rufus FAQs, see: rufus FAQ on GitHub


3 Connect the 8 GB or larger USB flash drive.

This USB flash drive will be formatted and lose all data on it.


4 Run the Rufus .exe file, and click/tap on Yes if prompted by UAC.

5 Change the following settings in Rufus, and click/tap on Start when finished. (see screenshot below)
  • Under Device, select the USB flash drive you want to format and use.
  • Under Boot selection, click/tap on the SELECT button, and navigate to and select the Windows 11 ISO file.
  • Under Image option (if available), select Standard Windows installation.
  • Under Partition scheme, select GPT.
  • Under Target system, select UEFI (non CSM).
  • Under Volume label, you can enter any name you like for the USB flash drive, or leave the default name.
  • Under File system, select NTFS.
  • Under Cluster size, select the (Default) (ex: 4096 bytes) it has listed.
Rufus-1.png

6 Check or uncheck the "Customize Windows installation" options you want, and click/tap on OK. (see screenshot below)
  • Remove Requirement for 4GB+ RAM, Secure Boot and TPM 2.0 – Check this option if you want to install Windows 11 on a computer with unsupported hardware.
  • Remove requirement for an online Microsoft account - Check this option to skip the Microsoft Account requirement. Windows 11 will not ask you to sign in with a Microsoft Account during the initial setup.
  • Disable data collection (Skip privacy questions) – Windows 11 will not ask you to send diagnostic data, enable location, advertisement ID, and other things some users consider privacy-invading.
  • Set a local account using the same name as this user's – Rufus will copy the current local account to the new installation.
  • Set regional options using the same values as this user's – Rufus will copy the current regional settings to the new installation.
Rufus1b.png

7 Click/tap on OK to confirm. (see screenshot below)

Rufus-2.png

8 Rufus will now start creating the bootable USB flash drive. (see screenshot below)

Rufus-3.png

9 When finished, click/tap on Close to close Rufus. (see screenshot below)

Rufus-5.png


OPTION THREE

Create Windows 11 Bootable USB Installation Media in Command Prompt


This option will use the dual FAT32 and NTFS partitions on the USB since the install.wim file for Windows 11 is usually over 4GB in size that prevents using only the FAT32 file system.


1 If you have not already, you will need to download a Windows 11 ISO file.

2 Connect the 8 GB or larger USB flash drive.

This USB flash drive will be formatted and lose all data on it.


3 Open an elevated Windows Terminal, and select Windows PowerShell or Command Prompt.

4 Type diskpart into the elevated terminal, and press Enter. (see screenshot below step 18)

5 Type list disk into the elevated terminal, press Enter, and make note of the Disk # (ex: 3) for the USB flash drive from step 2.

6 Type select disk # into the elevated terminal, and press Enter.

Substitute # in the command above with the actual Disk # (ex: 3) from step 5) above for the USB flash drive.

For example: select disk 3


7 Type clean into the elevated terminal, and press Enter.

8 Type convert mbr into the elevated terminal, and press Enter.

9 Type create partition primary size=1024 into the elevated terminal, and press Enter.

10 Type create partition primary into the elevated terminal, and press Enter.

11 Type select partition 1 into the elevated terminal, and press Enter.

12 Type format fs=fat32 quick into the elevated terminal, and press Enter.

13 Type assign letter=X into the elevated terminal, and press Enter.

14 Type active into the elevated terminal and press Enter.

15 Type select partition 2 into the elevated terminal, and press Enter.

16 Type format fs=ntfs quick into the elevated terminal, and press Enter.

17 Type assign letter=Y into the elevated terminal, and press Enter.

18 You can now close the elevated Windows terminal.

diskpart.png

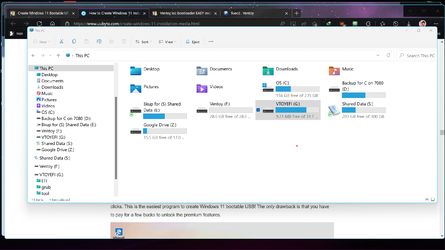
19 Open File Explorer (Win+E) to This PC. You will see the USB has two partitions. Partition "X" with FAT32 file system, and partition "Y" with NTFS file system. (see screenshot below)

File_Explorer_USB.png

20 Mount the ISO file from step 1.

21 Perform the following steps to copy the mounted ISO contents to the USB X: (FAT32) partition:
  1. Click/tap on the mounted ISO in the navigation pane of File Explorer to open it.
  2. Select everything except the sources folder in the mounted ISO.
  3. Right click or press and hold on the selected files.
  4. Click/tap on Show more options (Shift+F10).
Copy-1.png

22 Click/tap on Send to, and click/tap on the USB Drive (X: ). (see screenshot below)

Copy-2.png

23 Perform the following steps to copy the "sources" folder from the mounted ISO to the USB Y: (NTFS) partition:
  1. Click/tap on the mounted ISO in the navigation pane of File Explorer to open it.
  2. Select only the sources folder in the mounted ISO.
  3. Right click or press and hold on the selected sources folder.
  4. Click/tap on Show more options (Shift+F10).
Copy-3.png

24 Click/tap on Send to, and click/tap on the USB Drive (Y: ). (see screenshot below)

It may take a while to finish copying the sources folder to the USB Y: (NTFS) partition.


Copy-4.png

25 Open the USB X: (FAT32) partition, and create a new folder (Ctrl+Shift+N) named sources. (see screenshots below)

sources-1.png
sources-2.png

26 Open the Y:\sources folder from the USB Y: (NTFS) partition, and Cut (Win+X) the boot.wim file. (see screenshots below)

move_boot.wim-1.png
move_boot.wim-2.png

27 Paste (Ctrl+V) the boot.wim file from the USB Y: (NTFS) partition in step 24 into the new sources folder in the USB X: (FAT32) partition from step 23. (see screenshot below)

move_boot.wim-3.png

28 The Windows 11 bootable USB installation media is now ready.

29 You can unmount the ISO file.

30 You can now close all File Explorer windows.


That's it,
Shawn Brink


Attachments

  • win11usb.png
    win11usb.png
    10.1 KB · Views: 330
Last edited:

My Computers

System One System Two

  • OS
    Windows 11 Pro for Workstations
    Computer type
    PC/Desktop
    Manufacturer/Model
    Custom self build
    CPU
    Intel i7-8700K 5 GHz
    Motherboard
    ASUS ROG Maximus XI Formula Z390
    Memory
    64 GB (4x16GB) G.SKILL TridentZ RGB DDR4 3600 MHz (F4-3600C18D-32GTZR)
    Graphics Card(s)
    ASUS ROG-STRIX-GTX1080TI-O11G-GAMING (11GB GDDR5X)
    Sound Card
    Integrated Digital Audio (S/PDIF)
    Monitor(s) Displays
    2 x Samsung Odyssey G75 27"
    Screen Resolution
    2560x1440
    Hard Drives
    1TB Samsung 990 PRO M.2,
    4TB Samsung 990 PRO M.2,
    8TB WD MyCloudEX2Ultra NAS
    PSU
    Seasonic Prime Titanium 850W
    Case
    Thermaltake Core P3 wall mounted
    Cooling
    Corsair Hydro H115i
    Keyboard
    Logitech wireless K800
    Mouse
    Logitech MX Master 3
    Internet Speed
    1 Gbps Download and 35 Mbps Upload
    Browser
    Google Chrome
    Antivirus
    Microsoft Defender and Malwarebytes Premium
    Other Info
    Logitech Z625 speaker system,
    Logitech BRIO 4K Pro webcam,
    HP Color LaserJet Pro MFP M477fdn,
    APC SMART-UPS RT 1000 XL - SURT1000XLI,
    Galaxy S23 Plus phone
  • Operating System
    Windows 11 Pro
    Computer type
    Laptop
    Manufacturer/Model
    HP Spectre x360 2in1 14-eu0098nr (2024)
    CPU
    Intel Core Ultra 7 155H 4.8 GHz
    Memory
    16 GB LPDDR5x-7467 MHz
    Graphics card(s)
    Integrated Intel Arc
    Sound Card
    Poly Studio
    Monitor(s) Displays
    14" 2.8K OLED multitouch
    Screen Resolution
    2880 x 1800
    Hard Drives
    2 TB PCIe NVMe M.2 SSD
    Internet Speed
    Intel Wi-Fi 7 BE200 (2x2) and Bluetooth 5.4
    Browser
    Chrome and Edge
    Antivirus
    Windows Defender and Malwarebytes Premium
In that case, you could try downloading a Surface Pro X recovery image from Microsoft below to do a factory reset with.

I've tried that before and many other things before, this forum is my last chance. It seems like my USB wont be read as containing installing information unless I do the 3rd method but with the modification I previous stated.
 

My Computer

System One

  • OS
    Windows 11
    Computer type
    Tablet
    Manufacturer/Model
    Microsoft Surface Pro X
    Memory
    16gb
I finally was able to do a clean install. I used Microsoft Surface Data Eraser. Thanks everyone for their help.
 

My Computer

System One

  • OS
    Windows 11
    Computer type
    Tablet
    Manufacturer/Model
    Microsoft Surface Pro X
    Memory
    16gb

My Computers

System One System Two

  • OS
    Windows 11 Pro for Workstations
    Computer type
    PC/Desktop
    Manufacturer/Model
    Custom self build
    CPU
    Intel i7-8700K 5 GHz
    Motherboard
    ASUS ROG Maximus XI Formula Z390
    Memory
    64 GB (4x16GB) G.SKILL TridentZ RGB DDR4 3600 MHz (F4-3600C18D-32GTZR)
    Graphics Card(s)
    ASUS ROG-STRIX-GTX1080TI-O11G-GAMING (11GB GDDR5X)
    Sound Card
    Integrated Digital Audio (S/PDIF)
    Monitor(s) Displays
    2 x Samsung Odyssey G75 27"
    Screen Resolution
    2560x1440
    Hard Drives
    1TB Samsung 990 PRO M.2,
    4TB Samsung 990 PRO M.2,
    8TB WD MyCloudEX2Ultra NAS
    PSU
    Seasonic Prime Titanium 850W
    Case
    Thermaltake Core P3 wall mounted
    Cooling
    Corsair Hydro H115i
    Keyboard
    Logitech wireless K800
    Mouse
    Logitech MX Master 3
    Internet Speed
    1 Gbps Download and 35 Mbps Upload
    Browser
    Google Chrome
    Antivirus
    Microsoft Defender and Malwarebytes Premium
    Other Info
    Logitech Z625 speaker system,
    Logitech BRIO 4K Pro webcam,
    HP Color LaserJet Pro MFP M477fdn,
    APC SMART-UPS RT 1000 XL - SURT1000XLI,
    Galaxy S23 Plus phone
  • Operating System
    Windows 11 Pro
    Computer type
    Laptop
    Manufacturer/Model
    HP Spectre x360 2in1 14-eu0098nr (2024)
    CPU
    Intel Core Ultra 7 155H 4.8 GHz
    Memory
    16 GB LPDDR5x-7467 MHz
    Graphics card(s)
    Integrated Intel Arc
    Sound Card
    Poly Studio
    Monitor(s) Displays
    14" 2.8K OLED multitouch
    Screen Resolution
    2880 x 1800
    Hard Drives
    2 TB PCIe NVMe M.2 SSD
    Internet Speed
    Intel Wi-Fi 7 BE200 (2x2) and Bluetooth 5.4
    Browser
    Chrome and Edge
    Antivirus
    Windows Defender and Malwarebytes Premium
I'm hoping someone can help me.

I've followed the instructions to make a Windows 11 USB installer manually, after Rufus and the official tool failed, but it only ends the same way. I get to the vendor logo and two spinning dots appear and start to spin for a second before it crashes and my only option is to force reboot.

I've discovered so far that most think it seems to be UEFI related. I have tried every permutation possible available in my bios. I have an ASUS Maximus V Extreme (with an i7 3770k). The options I have are:
Launch CSM>Auto/Enabled/Disabled
and
Secure Boot>Windows UEFI mode/OtherOS
That's it. When I say I've tried every single variable here and elsewhere removing every drive and device besides the USB drive, nothing works. One thing of note is that in all my days of installing Windows (untold dozens of times), I have never had the vendor logo (ASUS ROG) show up instead of the Windows logo.

I really want to avoid MBR at all costs. I cannot stand another broken boot so I like to have control of it myself.

Does anyone have any ideas for a solution? Or is MBR the only option with this motherboard?

EDIT:
Despite resetting several times to default I had to reset CMOS fully to actually get anywhere. I have now reached the actual install. I feel like facepalming. Between BitDefender's "disable" not actually disabling and now resetting to defaults not actually doing that deeply enough, it's obvious you can't trust things to do what they say.

I do however have no clue if I am now in full UEFI mode or not. I don't understand why it's so hard to go GPT/UEFI. Is it just older hardware?

EDIT 2:
I have even now rebooted and completely disabled CSM and ensured Windows UEFI mode and I'm now still getting to the install. So it was CMOS reset that was needed. Utterly bizarre and totally unfair to expect a normal user to solve this.

EDIT 3:
One last one.
Now I've somehow managed to get the Windows logo back instead of my vendor one when loading the USB installer. All I did was simply put back all my bios tweaks and overclock (to see if the install would go ahead, and yes it does, it was literally just in need of the CMOS reset) and now I get the shiny new W11 logo.

It's just so variable and unpredictable. This is exactly why I insisted on GPT/UEFI with refind and other tools to control my EFI. I had two windows installs on separate disks testing some things and somehow a game borked one boot sector and then Windows stole the other disks one. So to boot my main Windows, I had to have my other Windows install disk in at the same time, they wouldn't work alone. The more I tinker the more I just want to smash Windows. But I know I want to smash Linux more ':D

Apologies and thanks for being my sounding board, hopefully it can help someone else though.
 
Last edited:

My Computer

System One

  • OS
    10
I got this error (Failed to download file) multiple times when trying to create a Windows 11 bootable usb with rufus on my Win 7 laptop. Rufus version is 3.16.

9E598CF75E7506A5E76B1B718C894BD2.png


Fortunately, I managed to use a new software called Ventory shared in this post to finish the job. It is quite simple. Make a Ventory USB and put Windows 11 ISO into it. You can add different ISO files into it without re-burning.
 

My Computer

System One

  • OS
    Windows 10
    Computer type
    PC/Desktop
    Manufacturer/Model
    DIY
    CPU
    Intel i5 7500
    Motherboard
    ASRock B250M
    Memory
    Kingston 8 GB DDR4
    Graphics Card(s)
    Intel Graphics HD 630
    Monitor(s) Displays
    HKC M242
    Hard Drives
    SanDisk SSD PLus 240
    Browser
    Chrome

My Computer

System One

  • OS
    Windows 10
It is probably the best thing that has ever happened to Bootable Media!"
Someone help me out here because I'm really confused. I used a blank 32gb flash drive formatted fat32. I then ran Ventoy2Disk which created a second partition on the flash drive, leaving the first large partition empty. The Ventoy boot files are on the second smaller partition. Do I just copy any iso I want to the flash drive and do I copy to the large empty partition?? Why are there 2 partitions? The instructions do not show 2 partitions.

I am assuming I can add additional or delete unwanted isos on this empty partition at any time.
 

Attachments

  • Screenshot 2022-01-14 032711.png
    Screenshot 2022-01-14 032711.png
    207.5 KB · Views: 117
Last edited:

My Computers

System One System Two

  • OS
    Windows 11 Pro 23H2 22631.3296
    Computer type
    PC/Desktop
    Manufacturer/Model
    Dell Optiplex 7080
    CPU
    i9-10900 10 core 20 threads
    Motherboard
    DELL 0J37VM
    Memory
    32 gb
    Graphics Card(s)
    none-Intel UHD Graphics 630
    Sound Card
    Integrated Realtek
    Monitor(s) Displays
    Benq 27
    Screen Resolution
    2560x1440
    Hard Drives
    1tb Solidigm m.2 +256gb ssd+512 gb usb m.2 sata
    PSU
    500w
    Case
    MT
    Cooling
    Dell Premium
    Keyboard
    Logitech wired
    Mouse
    Logitech wireless
    Internet Speed
    so slow I'm too embarrassed to tell
    Browser
    Firefox
    Antivirus
    Defender+MWB Premium
  • Operating System
    Windows 10 Pro 22H2 19045.3930
    Computer type
    PC/Desktop
    Manufacturer/Model
    Dell Optiplex 9020
    CPU
    i7-4770
    Memory
    24 gb
    Monitor(s) Displays
    Benq 27
    Screen Resolution
    2560x1440
    Hard Drives
    256 gb Toshiba BG4 M.2 NVE SSB and 1 tb hdd
    PSU
    500w
    Case
    MT
    Cooling
    Dell factory
    Mouse
    Logitech wireless
    Keyboard
    Logitech wired
    Internet Speed
    still not telling
    Browser
    Firefox
    Antivirus
    Defender+MWB Premium
Do I just copy any iso I want to the flash drive and do I copy to the large empty partition??
Copy any ISO files only onto the exFAT "Ventoy" partition. Do not touch the FAT "VTOYEFI" partition.

Why are there 2 partitions? The instructions do not show 2 partitions.
See "About Part1" and "About Part2" on this page: Ventoy

I am assuming I can add additional or delete unwanted isos on this empty partition at any time.
You can add/delete any ISO files at will. If you want to put personal files onto the exFAT partition, see the following post:

Ventoy is not an option in this tutorial (although I wish it were). So, if you have further questions about Ventoy, start a new thread in the following section:


My Computer

System One

  • OS
    Windows 10
:thumbsup: Thank you so much for this Shawn, you really make it less of a chore! I am actually looking forward to installing Windows 11 :loveit:
 

My Computer

System One

  • OS
    Windows 11 23H2
    Computer type
    PC/Desktop
    Manufacturer/Model
    ME Hemi
    CPU
    Intel i7 11700K
    Motherboard
    Asus Prime Z590-A
    Memory
    Crucial 32GB DDR4 3200mhz
    Graphics Card(s)
    EVGA RTX 3070 FTW3 Ultra
    Sound Card
    Realtek S1220A 7.1 DTS:X Ultra
    Monitor(s) Displays
    Dell 32in 4K Asus 27in 1K
    Screen Resolution
    3840x2160 144Hz 1920x1080 60Hz
    Hard Drives
    10TB Nvme's & SSD's
    PSU
    EVGA 220G3750
    Case
    Antec 1200 w/8 fans
    Cooling
    Noctua NH-U12A
    Keyboard
    EVGA Z12
    Mouse
    Razer Deathadder v2
    Internet Speed
    GFiber 2GIG
    Browser
    MS Edge
    Antivirus
    Windows Security
    Other Info
    Linksys WRT1900ACS, SONY WH-XB910N,
    7 Altec Lansing speakers
Windows 11 version 22H2 build 22621.382 from MCT now available from Microsoft. See first post for more details. :-)
 

My Computers

System One System Two

  • OS
    Windows 11 Pro for Workstations
    Computer type
    PC/Desktop
    Manufacturer/Model
    Custom self build
    CPU
    Intel i7-8700K 5 GHz
    Motherboard
    ASUS ROG Maximus XI Formula Z390
    Memory
    64 GB (4x16GB) G.SKILL TridentZ RGB DDR4 3600 MHz (F4-3600C18D-32GTZR)
    Graphics Card(s)
    ASUS ROG-STRIX-GTX1080TI-O11G-GAMING (11GB GDDR5X)
    Sound Card
    Integrated Digital Audio (S/PDIF)
    Monitor(s) Displays
    2 x Samsung Odyssey G75 27"
    Screen Resolution
    2560x1440
    Hard Drives
    1TB Samsung 990 PRO M.2,
    4TB Samsung 990 PRO M.2,
    8TB WD MyCloudEX2Ultra NAS
    PSU
    Seasonic Prime Titanium 850W
    Case
    Thermaltake Core P3 wall mounted
    Cooling
    Corsair Hydro H115i
    Keyboard
    Logitech wireless K800
    Mouse
    Logitech MX Master 3
    Internet Speed
    1 Gbps Download and 35 Mbps Upload
    Browser
    Google Chrome
    Antivirus
    Microsoft Defender and Malwarebytes Premium
    Other Info
    Logitech Z625 speaker system,
    Logitech BRIO 4K Pro webcam,
    HP Color LaserJet Pro MFP M477fdn,
    APC SMART-UPS RT 1000 XL - SURT1000XLI,
    Galaxy S23 Plus phone
  • Operating System
    Windows 11 Pro
    Computer type
    Laptop
    Manufacturer/Model
    HP Spectre x360 2in1 14-eu0098nr (2024)
    CPU
    Intel Core Ultra 7 155H 4.8 GHz
    Memory
    16 GB LPDDR5x-7467 MHz
    Graphics card(s)
    Integrated Intel Arc
    Sound Card
    Poly Studio
    Monitor(s) Displays
    14" 2.8K OLED multitouch
    Screen Resolution
    2880 x 1800
    Hard Drives
    2 TB PCIe NVMe M.2 SSD
    Internet Speed
    Intel Wi-Fi 7 BE200 (2x2) and Bluetooth 5.4
    Browser
    Chrome and Edge
    Antivirus
    Windows Defender and Malwarebytes Premium
Windows 11 version 22H2 build 22621.382 from MCT now available from Microsoft. See first post for more details. :-)
Built my ISO with the MCT, now to test and do an upgrade....
 

My Computers

System One System Two

  • OS
    Windows 11 Home
    Computer type
    Laptop
    Manufacturer/Model
    Acer Aspire 3 A315-23
    CPU
    AMD Athlon Silver 3050U
    Memory
    8GB
    Graphics Card(s)
    Radeon Graphics
    Monitor(s) Displays
    laptop screen
    Screen Resolution
    1366x768 native resolution, up to 2560x1440 with Radeon Virtual Super Resolution
    Hard Drives
    1TB Samsung EVO 870 SSD
    Internet Speed
    50 Mbps
    Browser
    Edge, Firefox
    Antivirus
    Defender
    Other Info
    fully 'Windows 11 ready' laptop. Windows 10 C: partition migrated from my old unsupported 'main machine' then upgraded to 11. A test migration ran Insider builds for 2 months. When 11 was released on 5th October it was re-imaged back to 10 and was offered the upgrade in Windows Update on 20th October. Windows Update offered the 22H2 Feature Update on 20th September 2022. It got the 23H2 Feature Update on 4th November 2023 through Windows Update.

    My SYSTEM THREE is a Dell Latitude 5410, i7-10610U, 32GB RAM, 512GB ssd, supported device running Windows 11 Pro (and all my Hyper-V VMs).

    My SYSTEM FOUR is a 2-in-1 convertible Lenovo Yoga 11e 20DA, Celeron N2930, 4GB RAM, 256GB ssd. Unsupported device: currently running Win10 Pro, plus Win11 Pro RTM and Insider Beta as native boot vhdx.

    My SYSTEM FIVE is a Dell Latitude 3190 2-in-1, Pentium Silver N5030, 4GB RAM, 512GB NVMe ssd, supported device running Windows 11 Pro, plus the Insider Beta, Dev, and Canary builds as a native boot .vhdx.
  • Operating System
    Windows 11 Pro
    Computer type
    Laptop
    Manufacturer/Model
    Dell Lattitude E4310
    CPU
    Intel® Core™ i5-520M
    Motherboard
    0T6M8G
    Memory
    8GB
    Graphics card(s)
    (integrated graphics) Intel HD Graphics
    Screen Resolution
    1366x768
    Hard Drives
    500GB Crucial MX500 SSD
    Browser
    Firefox, Edge
    Antivirus
    Defender
    Other Info
    unsupported machine: Legacy bios, MBR, TPM 1.2, upgraded from W10 to W11 using W10/W11 hybrid install media workaround. In-place upgrade to 22H2 using ISO and a workaround. Feature Update to 23H2 by manually installing the Enablement Package.

    My SYSTEM THREE is a Dell Latitude 5410, i7-10610U, 32GB RAM, 512GB ssd, supported device running Windows 11 Pro (and all my Hyper-V VMs).

    My SYSTEM FOUR is a 2-in-1 convertible Lenovo Yoga 11e 20DA, Celeron N2930, 4GB RAM, 256GB ssd. Unsupported device: currently running Win10 Pro, plus Win11 Pro RTM and Insider Beta as native boot vhdx.

    My SYSTEM FIVE is a Dell Latitude 3190 2-in-1, Pentium Silver N5030, 4GB RAM, 512GB NVMe ssd, supported device running Windows 11 Pro, plus the Insider Beta, Dev, and Canary builds as a native boot .vhdx.
Media Creation Tool (MCT) will now install and create an ISO or USB for Windows 11 version 22H2 build 22621.525.


22621.525.jpg
 

My Computers

System One System Two

  • OS
    Windows 11 Pro for Workstations
    Computer type
    PC/Desktop
    Manufacturer/Model
    Custom self build
    CPU
    Intel i7-8700K 5 GHz
    Motherboard
    ASUS ROG Maximus XI Formula Z390
    Memory
    64 GB (4x16GB) G.SKILL TridentZ RGB DDR4 3600 MHz (F4-3600C18D-32GTZR)
    Graphics Card(s)
    ASUS ROG-STRIX-GTX1080TI-O11G-GAMING (11GB GDDR5X)
    Sound Card
    Integrated Digital Audio (S/PDIF)
    Monitor(s) Displays
    2 x Samsung Odyssey G75 27"
    Screen Resolution
    2560x1440
    Hard Drives
    1TB Samsung 990 PRO M.2,
    4TB Samsung 990 PRO M.2,
    8TB WD MyCloudEX2Ultra NAS
    PSU
    Seasonic Prime Titanium 850W
    Case
    Thermaltake Core P3 wall mounted
    Cooling
    Corsair Hydro H115i
    Keyboard
    Logitech wireless K800
    Mouse
    Logitech MX Master 3
    Internet Speed
    1 Gbps Download and 35 Mbps Upload
    Browser
    Google Chrome
    Antivirus
    Microsoft Defender and Malwarebytes Premium
    Other Info
    Logitech Z625 speaker system,
    Logitech BRIO 4K Pro webcam,
    HP Color LaserJet Pro MFP M477fdn,
    APC SMART-UPS RT 1000 XL - SURT1000XLI,
    Galaxy S23 Plus phone
  • Operating System
    Windows 11 Pro
    Computer type
    Laptop
    Manufacturer/Model
    HP Spectre x360 2in1 14-eu0098nr (2024)
    CPU
    Intel Core Ultra 7 155H 4.8 GHz
    Memory
    16 GB LPDDR5x-7467 MHz
    Graphics card(s)
    Integrated Intel Arc
    Sound Card
    Poly Studio
    Monitor(s) Displays
    14" 2.8K OLED multitouch
    Screen Resolution
    2880 x 1800
    Hard Drives
    2 TB PCIe NVMe M.2 SSD
    Internet Speed
    Intel Wi-Fi 7 BE200 (2x2) and Bluetooth 5.4
    Browser
    Chrome and Edge
    Antivirus
    Windows Defender and Malwarebytes Premium
Thank you! On my to do list :-)
 

My Computer

System One

  • OS
    Windows 11 23H2
    Computer type
    PC/Desktop
    Manufacturer/Model
    ME Hemi
    CPU
    Intel i7 11700K
    Motherboard
    Asus Prime Z590-A
    Memory
    Crucial 32GB DDR4 3200mhz
    Graphics Card(s)
    EVGA RTX 3070 FTW3 Ultra
    Sound Card
    Realtek S1220A 7.1 DTS:X Ultra
    Monitor(s) Displays
    Dell 32in 4K Asus 27in 1K
    Screen Resolution
    3840x2160 144Hz 1920x1080 60Hz
    Hard Drives
    10TB Nvme's & SSD's
    PSU
    EVGA 220G3750
    Case
    Antec 1200 w/8 fans
    Cooling
    Noctua NH-U12A
    Keyboard
    EVGA Z12
    Mouse
    Razer Deathadder v2
    Internet Speed
    GFiber 2GIG
    Browser
    MS Edge
    Antivirus
    Windows Security
    Other Info
    Linksys WRT1900ACS, SONY WH-XB910N,
    7 Altec Lansing speakers
Media Creation Tool (MCT) will now install and create an ISO or USB for Windows 11 version 22H2 build 22621.525.


View attachment 40668
When creating a boot USB using method #3, can it be updated to a new build without starting from scratch by replacing only specific files?
 

My Computer

System One

  • OS
    Windows 11
When creating a boot USB using method #3, can it be updated to a new build without starting from scratch by replacing only specific files?

Hello, :-)

Yes, you sure can. You could perform an upgrade installation with the ISO like below to update the build.


My Computers

System One System Two

  • OS
    Windows 11 Pro for Workstations
    Computer type
    PC/Desktop
    Manufacturer/Model
    Custom self build
    CPU
    Intel i7-8700K 5 GHz
    Motherboard
    ASUS ROG Maximus XI Formula Z390
    Memory
    64 GB (4x16GB) G.SKILL TridentZ RGB DDR4 3600 MHz (F4-3600C18D-32GTZR)
    Graphics Card(s)
    ASUS ROG-STRIX-GTX1080TI-O11G-GAMING (11GB GDDR5X)
    Sound Card
    Integrated Digital Audio (S/PDIF)
    Monitor(s) Displays
    2 x Samsung Odyssey G75 27"
    Screen Resolution
    2560x1440
    Hard Drives
    1TB Samsung 990 PRO M.2,
    4TB Samsung 990 PRO M.2,
    8TB WD MyCloudEX2Ultra NAS
    PSU
    Seasonic Prime Titanium 850W
    Case
    Thermaltake Core P3 wall mounted
    Cooling
    Corsair Hydro H115i
    Keyboard
    Logitech wireless K800
    Mouse
    Logitech MX Master 3
    Internet Speed
    1 Gbps Download and 35 Mbps Upload
    Browser
    Google Chrome
    Antivirus
    Microsoft Defender and Malwarebytes Premium
    Other Info
    Logitech Z625 speaker system,
    Logitech BRIO 4K Pro webcam,
    HP Color LaserJet Pro MFP M477fdn,
    APC SMART-UPS RT 1000 XL - SURT1000XLI,
    Galaxy S23 Plus phone
  • Operating System
    Windows 11 Pro
    Computer type
    Laptop
    Manufacturer/Model
    HP Spectre x360 2in1 14-eu0098nr (2024)
    CPU
    Intel Core Ultra 7 155H 4.8 GHz
    Memory
    16 GB LPDDR5x-7467 MHz
    Graphics card(s)
    Integrated Intel Arc
    Sound Card
    Poly Studio
    Monitor(s) Displays
    14" 2.8K OLED multitouch
    Screen Resolution
    2880 x 1800
    Hard Drives
    2 TB PCIe NVMe M.2 SSD
    Internet Speed
    Intel Wi-Fi 7 BE200 (2x2) and Bluetooth 5.4
    Browser
    Chrome and Edge
    Antivirus
    Windows Defender and Malwarebytes Premium
Hi Brink/ Guys

Can someone please post info or a link on how to edit the Windows Install USB (created by the Media creation tool) so that it does not prompt for a Microsoft account.

I know it can be done via Rufus....but wanted to see if we could edit a file somewhere etc

Many thanks
 

My Computer

System One

  • OS
    Windows 11 Pro
Hi Brink/ Guys

Can someone please post info or a link on how to edit the Windows Install USB (created by the Media creation tool) so that it does not prompt for a Microsoft account.

I know it can be done via Rufus....but wanted to see if we could edit a file somewhere etc

Many thanks

Hello Ancient, and welcome. :-)

If you're using the USB to clean install Windows 11, then you can use the method in the tutorial below to install Windows 11 with a local account.


My Computers

System One System Two

  • OS
    Windows 11 Pro for Workstations
    Computer type
    PC/Desktop
    Manufacturer/Model
    Custom self build
    CPU
    Intel i7-8700K 5 GHz
    Motherboard
    ASUS ROG Maximus XI Formula Z390
    Memory
    64 GB (4x16GB) G.SKILL TridentZ RGB DDR4 3600 MHz (F4-3600C18D-32GTZR)
    Graphics Card(s)
    ASUS ROG-STRIX-GTX1080TI-O11G-GAMING (11GB GDDR5X)
    Sound Card
    Integrated Digital Audio (S/PDIF)
    Monitor(s) Displays
    2 x Samsung Odyssey G75 27"
    Screen Resolution
    2560x1440
    Hard Drives
    1TB Samsung 990 PRO M.2,
    4TB Samsung 990 PRO M.2,
    8TB WD MyCloudEX2Ultra NAS
    PSU
    Seasonic Prime Titanium 850W
    Case
    Thermaltake Core P3 wall mounted
    Cooling
    Corsair Hydro H115i
    Keyboard
    Logitech wireless K800
    Mouse
    Logitech MX Master 3
    Internet Speed
    1 Gbps Download and 35 Mbps Upload
    Browser
    Google Chrome
    Antivirus
    Microsoft Defender and Malwarebytes Premium
    Other Info
    Logitech Z625 speaker system,
    Logitech BRIO 4K Pro webcam,
    HP Color LaserJet Pro MFP M477fdn,
    APC SMART-UPS RT 1000 XL - SURT1000XLI,
    Galaxy S23 Plus phone
  • Operating System
    Windows 11 Pro
    Computer type
    Laptop
    Manufacturer/Model
    HP Spectre x360 2in1 14-eu0098nr (2024)
    CPU
    Intel Core Ultra 7 155H 4.8 GHz
    Memory
    16 GB LPDDR5x-7467 MHz
    Graphics card(s)
    Integrated Intel Arc
    Sound Card
    Poly Studio
    Monitor(s) Displays
    14" 2.8K OLED multitouch
    Screen Resolution
    2880 x 1800
    Hard Drives
    2 TB PCIe NVMe M.2 SSD
    Internet Speed
    Intel Wi-Fi 7 BE200 (2x2) and Bluetooth 5.4
    Browser
    Chrome and Edge
    Antivirus
    Windows Defender and Malwarebytes Premium
Thank you for the link my friend....and a huge continued thank you for your great support over the many years!

I didn't see a way to edit any config on the usb media though?
I assume the only way is to Shift F10 the oobe/bypassnro ?

Also when I reply on here, I can't see the option to be notified for replies?...like there was on the old Win10 forums
 

My Computer

System One

  • OS
    Windows 11 Pro
I can't see the option to be notified for replies?...like there was on the old Win10 forums
You are automatically watching any thread you have posted on. Above the top of the thread to the right is a 'Watch' or 'Unwatch' button (depending on your current 'watch' status). Click on it to change your 'watching' preferences for this thread
 

My Computers

System One System Two

  • OS
    Windows 11 Home
    Computer type
    Laptop
    Manufacturer/Model
    Acer Aspire 3 A315-23
    CPU
    AMD Athlon Silver 3050U
    Memory
    8GB
    Graphics Card(s)
    Radeon Graphics
    Monitor(s) Displays
    laptop screen
    Screen Resolution
    1366x768 native resolution, up to 2560x1440 with Radeon Virtual Super Resolution
    Hard Drives
    1TB Samsung EVO 870 SSD
    Internet Speed
    50 Mbps
    Browser
    Edge, Firefox
    Antivirus
    Defender
    Other Info
    fully 'Windows 11 ready' laptop. Windows 10 C: partition migrated from my old unsupported 'main machine' then upgraded to 11. A test migration ran Insider builds for 2 months. When 11 was released on 5th October it was re-imaged back to 10 and was offered the upgrade in Windows Update on 20th October. Windows Update offered the 22H2 Feature Update on 20th September 2022. It got the 23H2 Feature Update on 4th November 2023 through Windows Update.

    My SYSTEM THREE is a Dell Latitude 5410, i7-10610U, 32GB RAM, 512GB ssd, supported device running Windows 11 Pro (and all my Hyper-V VMs).

    My SYSTEM FOUR is a 2-in-1 convertible Lenovo Yoga 11e 20DA, Celeron N2930, 4GB RAM, 256GB ssd. Unsupported device: currently running Win10 Pro, plus Win11 Pro RTM and Insider Beta as native boot vhdx.

    My SYSTEM FIVE is a Dell Latitude 3190 2-in-1, Pentium Silver N5030, 4GB RAM, 512GB NVMe ssd, supported device running Windows 11 Pro, plus the Insider Beta, Dev, and Canary builds as a native boot .vhdx.
  • Operating System
    Windows 11 Pro
    Computer type
    Laptop
    Manufacturer/Model
    Dell Lattitude E4310
    CPU
    Intel® Core™ i5-520M
    Motherboard
    0T6M8G
    Memory
    8GB
    Graphics card(s)
    (integrated graphics) Intel HD Graphics
    Screen Resolution
    1366x768
    Hard Drives
    500GB Crucial MX500 SSD
    Browser
    Firefox, Edge
    Antivirus
    Defender
    Other Info
    unsupported machine: Legacy bios, MBR, TPM 1.2, upgraded from W10 to W11 using W10/W11 hybrid install media workaround. In-place upgrade to 22H2 using ISO and a workaround. Feature Update to 23H2 by manually installing the Enablement Package.

    My SYSTEM THREE is a Dell Latitude 5410, i7-10610U, 32GB RAM, 512GB ssd, supported device running Windows 11 Pro (and all my Hyper-V VMs).

    My SYSTEM FOUR is a 2-in-1 convertible Lenovo Yoga 11e 20DA, Celeron N2930, 4GB RAM, 256GB ssd. Unsupported device: currently running Win10 Pro, plus Win11 Pro RTM and Insider Beta as native boot vhdx.

    My SYSTEM FIVE is a Dell Latitude 3190 2-in-1, Pentium Silver N5030, 4GB RAM, 512GB NVMe ssd, supported device running Windows 11 Pro, plus the Insider Beta, Dev, and Canary builds as a native boot .vhdx.

Latest Support Threads

Back
Top Bottom