Win Update KB5030219 Windows 11 Cumulative Update Build 22621.2283 (22H2)


  • Staff
UPDATE 9/26:


 Microsoft Support:

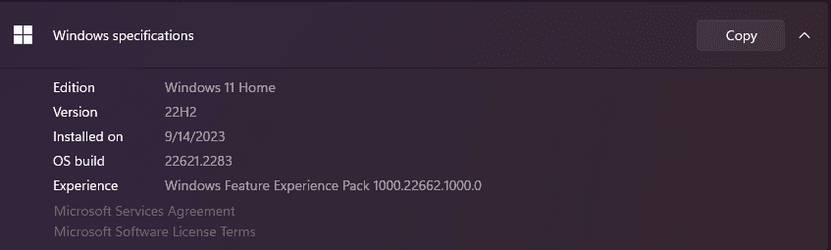
September 12, 2023 - KB5030219 (OS Build 22621.2283)​


For information about Windows update terminology, see the article about the types of Windows updates and the monthly quality update types. For an overview of Windows 11, version 22H2, see its update history page.

Note Follow @WindowsUpdate to find out when new content is published to the Windows release health dashboard.


Highlights​

  • This update removes a blank menu item from the Sticky Keys menu. This issue occurs after you install KB5029351.
  • This update addresses security issues for your Windows operating system.

Improvements​

This security update includes improvements that were a part of update KB5029351 (released August 22, 2023). When you install this KB:
  • This update addresses an issue that affects authentication. Using a smart card to join or rejoin a computer to an Active Directory domain might fail. This occurs after you install Windows updates dated October 2022 or later. For more details, see KB5020276.
If you installed earlier updates, only the new updates contained in this package will be downloaded and installed on your device.

For more information about security vulnerabilities, please refer to the Security Update Guide website and the September 2023 Security Updates.

Windows 11 servicing stack update - 22621.2061​

This update makes quality improvements to the servicing stack, which is the component that installs Windows updates. Servicing stack updates (SSU) ensure that you have a robust and reliable servicing stack so that your devices can receive and install Microsoft updates.

Known issues in this update​

Microsoft is not currently aware of any issues with this update.

How to get this update​

Before installing this update

Microsoft combines the latest servicing stack update (SSU) for your operating system with the latest cumulative update (LCU). For general information about SSUs, see Servicing stack updates and Servicing Stack Updates (SSU): Frequently Asked Questions.

Install this update

Release ChannelAvailableNext Step
Windows Update and Microsoft UpdateYesNone. This update will be downloaded and installed automatically from Windows Update.
Windows Update for BusinessYesNone. This update will be downloaded and installed automatically from Windows Update in accordance with configured policies.
Microsoft Update CatalogYesTo get the standalone package for this update, go to the Microsoft Update Catalog website.
Windows Server Update Services (WSUS)YesThis update will automatically sync with WSUS if you configure Products and Classifications as follows:
Product: Windows 11
Classification: Security Updates

If you want to remove the LCU

To remove the LCU after installing the combined SSU and LCU package, use the DISM/Remove-Package command line option with the LCU package name as the argument. You can find the package name by using this command: DISM /online /get-packages.

Running Windows Update Standalone Installer (wusa.exe) with the /uninstall switch on the combined package will not work because the combined package contains the SSU. You cannot remove the SSU from the system after installation.

File information

For a list of the files that are provided in this update, download the file information for cumulative update 5030219.

For a list of the files that are provided in the servicing stack update, download the file information for the SSU - version 22621.2061.


 Source:


Check Windows Updates


Direct download links for KB5030219 MSU file from Microsoft Update Catalog:

Download KB5030219 MSU for Windows 11 v22H2 64-bit (x64) - 400.6 MB

Download KB5030219 MSU for Windows 11 v22H2 ARM64 - 523.4 MB


UUP Dump:

64-bit ISO download:

ARM64 ISO download:

 
Last edited:
JFgjZyvYPa.png
:thumbsup: :thumbsup:
 

My Computer

System One

  • OS
    Windows 11 pro
    Computer type
    PC/Desktop
    Manufacturer/Model
    Asus
    CPU
    Intel(R) Core(TM) i7-10700K CPU @ 3.80GHz
    Motherboard
    PRIME Z490-A
    Memory
    32.0 GB DDR4
    Graphics Card(s)
    Radeon RX 580 Series
    Sound Card
    AMD High-Definition Audio Device
    Monitor(s) Displays
    AOC Q32G1WG4
    Screen Resolution
    2560 x 1440
    PSU
    750
    Cooling
    Air
    Keyboard
    Corsair K70 RGB
    Mouse
    G502 Hero
    Browser
    Microsoft Edge
New Release Preview 22621.2359, 9/14/2023.


My Computer

System One

  • OS
    Windows 11 Pro
    Computer type
    Laptop
    Manufacturer/Model
    Lenovo Yoga 920
    CPU
    Intel I7-8550U
    Motherboard
    n/a
    Memory
    16GB
    Graphics Card(s)
    Intel Graphics UHD 620
    Sound Card
    Realtek High Definition Audio (SST)
    Monitor(s) Displays
    4k Touch screen
    Screen Resolution
    3480 x 2160
    Hard Drives
    512GB NVMe
For over a week every time I try to install this update I get Install error - 0x80070002

Is any remedy for this available?
After a bunch of searching I found this video that helped me get past the "Something Didn't Go As Planned" message & I got the update to work. Vid is here -
 

Attachments

  • win11stats.png
    win11stats.png
    18.5 KB · Views: 1

My Computer

System One

  • OS
    Windows 11 Home 64bit
    Computer type
    PC/Desktop
    Manufacturer/Model
    Custom
    CPU
    AMD Ryzen 5 2600
    Motherboard
    B450M DS3H (rev. 1.x)
    Graphics Card(s)
    Nvidia GTX 1660 Super
After a bunch of searching I found this video that helped me get past the "Something Didn't Go As Planned" message & I got the update to work. Vid is here -
I will consider reinstalling OS as a last resort, to be honest. In the meantime, I will keep looking for some less invasive ways of solving this issue.
 

My Computer

System One

  • OS
    Windows 11
Yes, you understand correctly. In fact, unless your WinSxS component store was already corrupted before the update then Dism's RestoreHealth step is redundant. The few times SFC finds errors after a CU they are invariably of the 'permissions/ownership set twice' type, ones that it can fix without needing to refer to the component store.

I also like to see just how much was cleaned up so I use one other command before and after '.../StartComponentCleanup'.
Dism.exe /online /Cleanup-Image /AnalyzeComponentStore
(compare the before and after values of 'Actual Size of Component Store')

I tried that all went ok except the last command gave me

Dism.exe /online /Cleanup-Image /StartComponentCleanup

Error 6824 : Impossible to do this operation. Another transaction depends on the fact that this property does not change.

Am I right, this should only call Disk Cleanup and remove old Installation files ?
 
Last edited:

My Computer

System One

  • OS
    Windows 11 22631.2271
    Computer type
    PC/Desktop
    CPU
    Ryzen 5600X
    Motherboard
    B550M
    Memory
    16GB
    Graphics Card(s)
    RTX 2070
    Monitor(s) Displays
    LCD
    Screen Resolution
    Full HD
    Hard Drives
    SSD
    Internet Speed
    Fiber
    Browser
    Edge
Did this update few days ago and today saw a restart system, seems it installed a "Windows configuration update" with a link to an old May one on MS site.
I saw insider preview got this with another update but I am in the release, normal channel.
 

My Computer

System One

  • OS
    Win11
    Computer type
    PC/Desktop
    CPU
    12600k
    Motherboard
    ASUS TUF Z690 wifi D4
    Memory
    Crucial 16gig @3600
    Graphics Card(s)
    RTX TUF 3060ti
    Monitor(s) Displays
    LG 27GP850
    Screen Resolution
    1440p
    Hard Drives
    980 PRO
    PSU
    750w
Did this update few days ago and today saw a restart system, seems it installed a "Windows configuration update" with a link to an old May one on MS site.
I saw insider preview got this with another update but I am in the release, normal channel.
Glad I'm not the only one - see my post here: Wndows Re-Configuration ?
Same thing, May Update...
 

My Computer

System One

  • OS
    Windows 11 Intel i5 10400 HD630 graphics chip
    Computer type
    PC/Desktop
    Manufacturer/Model
    HP
    CPU
    i5-10400
    Memory
    12 gb
    Graphics Card(s)
    HD630 chipset
    Monitor(s) Displays
    LG 24inch
    Hard Drives
    SSD, external usb drive 1tb for files/backups
    Keyboard
    wireless Logi
    Mouse
    ms 4000 wireless mouse
    Internet Speed
    10meg
    Browser
    Firefox
    Antivirus
    Defender
    Other Info
    Win11 Home 23H2 22631.3737 6/11/24
I tried that all went ok except the last command gave me

Dism.exe /online /Cleanup-Image /StartComponentCleanup

Error 6824 : Impossible to do this operation. Another transaction depends on the fact that this property does not change.
You are running the Insider Beta build, and this was a known issue that started with build 22631.1972. There is a simple fix, you need to do an offline cleanup. See:

KB5028247 Windows 11 Insider Beta 22621.2048 and 22631.2048 - July 13 - post #22
 

My Computers

System One System Two

  • OS
    Windows 11 Home
    Computer type
    Laptop
    Manufacturer/Model
    Acer Aspire 3 A315-23
    CPU
    AMD Athlon Silver 3050U
    Memory
    8GB
    Graphics Card(s)
    Radeon Graphics
    Monitor(s) Displays
    laptop screen
    Screen Resolution
    1366x768 native resolution, up to 2560x1440 with Radeon Virtual Super Resolution
    Hard Drives
    1TB Samsung EVO 870 SSD
    Internet Speed
    50 Mbps
    Browser
    Edge, Firefox
    Antivirus
    Defender
    Other Info
    fully 'Windows 11 ready' laptop. Windows 10 C: partition migrated from my old unsupported 'main machine' then upgraded to 11. A test migration ran Insider builds for 2 months. When 11 was released on 5th October it was re-imaged back to 10 and was offered the upgrade in Windows Update on 20th October. Windows Update offered the 22H2 Feature Update on 20th September 2022. It got the 23H2 Feature Update on 4th November 2023 through Windows Update.

    My SYSTEM THREE is a Dell Latitude 5410, i7-10610U, 32GB RAM, 512GB NVMe ssd, supported device running Windows 11 Pro (and all my Hyper-V VMs).

    My SYSTEM FOUR is a 2-in-1 convertible Lenovo Yoga 11e 20DA, Celeron N2930, 8GB RAM, 256GB ssd. Unsupported device: currently running Win10 Pro, plus Win11 Pro RTM and Insider Beta as native boot vhdx.

    My SYSTEM FIVE is a Dell Latitude 3190 2-in-1, Pentium Silver N5030, 4GB RAM, 512GB NVMe ssd, supported device running Windows 11 Pro, plus the Insider Beta, Dev, Canary, and Release Preview builds as a native boot .vhdx.
  • Operating System
    Windows 11 Pro
    Computer type
    Laptop
    Manufacturer/Model
    Dell Lattitude E4310
    CPU
    Intel® Core™ i5-520M
    Motherboard
    0T6M8G
    Memory
    8GB
    Graphics card(s)
    (integrated graphics) Intel HD Graphics
    Screen Resolution
    1366x768
    Hard Drives
    500GB Crucial MX500 SSD
    Browser
    Firefox, Edge
    Antivirus
    Defender
    Other Info
    unsupported machine: Legacy bios, MBR, TPM 1.2, upgraded from W10 to W11 using W10/W11 hybrid install media workaround. In-place upgrade to 22H2 using ISO and a workaround. Feature Update to 23H2 by manually installing the Enablement Package. Also running Insider Beta, Dev, and Canary builds as a native boot .vhdx.

    My SYSTEM THREE is a Dell Latitude 5410, i7-10610U, 32GB RAM, 512GB NVMe ssd, supported device running Windows 11 Pro (and all my Hyper-V VMs).

    My SYSTEM FOUR is a 2-in-1 convertible Lenovo Yoga 11e 20DA, Celeron N2930, 8GB RAM, 256GB ssd. Unsupported device: currently running Win10 Pro, plus Win11 Pro RTM and Insider Beta as native boot vhdx.

    My SYSTEM FIVE is a Dell Latitude 3190 2-in-1, Pentium Silver N5030, 4GB RAM, 512GB NVMe ssd, supported device running Windows 11 Pro, plus the Insider Beta, Dev, Canary, and Release Preview builds as a native boot .vhdx.
I looked at your link, seems a bit beyond what I undserstand
 

My Computer

System One

  • OS
    Windows 11 22631.2271
    Computer type
    PC/Desktop
    CPU
    Ryzen 5600X
    Motherboard
    B550M
    Memory
    16GB
    Graphics Card(s)
    RTX 2070
    Monitor(s) Displays
    LCD
    Screen Resolution
    Full HD
    Hard Drives
    SSD
    Internet Speed
    Fiber
    Browser
    Edge
looked at your link, seems a bit beyond what I undserstand
It's quite simple really, you already know how to run Dism /online from a command prompt, so it's not beyond you. You just need to boot from something else so that your Windows isn't running while you run Dism offline. First create a folder on your C: drive that DISM can use for a scratch directory, eg. C:\Temp. Then boot to the Advanced Startup recovery environment and open a command prompt.


Then use the command DISM /Image:C:\ /cleanup-image /startcomponentcleanup /ScratchDir:C:\Temp
 

My Computers

System One System Two

  • OS
    Windows 11 Home
    Computer type
    Laptop
    Manufacturer/Model
    Acer Aspire 3 A315-23
    CPU
    AMD Athlon Silver 3050U
    Memory
    8GB
    Graphics Card(s)
    Radeon Graphics
    Monitor(s) Displays
    laptop screen
    Screen Resolution
    1366x768 native resolution, up to 2560x1440 with Radeon Virtual Super Resolution
    Hard Drives
    1TB Samsung EVO 870 SSD
    Internet Speed
    50 Mbps
    Browser
    Edge, Firefox
    Antivirus
    Defender
    Other Info
    fully 'Windows 11 ready' laptop. Windows 10 C: partition migrated from my old unsupported 'main machine' then upgraded to 11. A test migration ran Insider builds for 2 months. When 11 was released on 5th October it was re-imaged back to 10 and was offered the upgrade in Windows Update on 20th October. Windows Update offered the 22H2 Feature Update on 20th September 2022. It got the 23H2 Feature Update on 4th November 2023 through Windows Update.

    My SYSTEM THREE is a Dell Latitude 5410, i7-10610U, 32GB RAM, 512GB NVMe ssd, supported device running Windows 11 Pro (and all my Hyper-V VMs).

    My SYSTEM FOUR is a 2-in-1 convertible Lenovo Yoga 11e 20DA, Celeron N2930, 8GB RAM, 256GB ssd. Unsupported device: currently running Win10 Pro, plus Win11 Pro RTM and Insider Beta as native boot vhdx.

    My SYSTEM FIVE is a Dell Latitude 3190 2-in-1, Pentium Silver N5030, 4GB RAM, 512GB NVMe ssd, supported device running Windows 11 Pro, plus the Insider Beta, Dev, Canary, and Release Preview builds as a native boot .vhdx.
  • Operating System
    Windows 11 Pro
    Computer type
    Laptop
    Manufacturer/Model
    Dell Lattitude E4310
    CPU
    Intel® Core™ i5-520M
    Motherboard
    0T6M8G
    Memory
    8GB
    Graphics card(s)
    (integrated graphics) Intel HD Graphics
    Screen Resolution
    1366x768
    Hard Drives
    500GB Crucial MX500 SSD
    Browser
    Firefox, Edge
    Antivirus
    Defender
    Other Info
    unsupported machine: Legacy bios, MBR, TPM 1.2, upgraded from W10 to W11 using W10/W11 hybrid install media workaround. In-place upgrade to 22H2 using ISO and a workaround. Feature Update to 23H2 by manually installing the Enablement Package. Also running Insider Beta, Dev, and Canary builds as a native boot .vhdx.

    My SYSTEM THREE is a Dell Latitude 5410, i7-10610U, 32GB RAM, 512GB NVMe ssd, supported device running Windows 11 Pro (and all my Hyper-V VMs).

    My SYSTEM FOUR is a 2-in-1 convertible Lenovo Yoga 11e 20DA, Celeron N2930, 8GB RAM, 256GB ssd. Unsupported device: currently running Win10 Pro, plus Win11 Pro RTM and Insider Beta as native boot vhdx.

    My SYSTEM FIVE is a Dell Latitude 3190 2-in-1, Pentium Silver N5030, 4GB RAM, 512GB NVMe ssd, supported device running Windows 11 Pro, plus the Insider Beta, Dev, Canary, and Release Preview builds as a native boot .vhdx.
Than you for the help. I did this.

Make C:\Temp , Settings/Recovery/Reboot, then Select Command Prompt from the Blue Menu

I tried the command and it did not work, I knew it since now my C is named X (and my F drive became C ...)

Should I just replace C by X in your command line ?
 

My Computer

System One

  • OS
    Windows 11 22631.2271
    Computer type
    PC/Desktop
    CPU
    Ryzen 5600X
    Motherboard
    B550M
    Memory
    16GB
    Graphics Card(s)
    RTX 2070
    Monitor(s) Displays
    LCD
    Screen Resolution
    Full HD
    Hard Drives
    SSD
    Internet Speed
    Fiber
    Browser
    Edge
Should I just replace C by X in your command line ?
No, not X:, that will usually be the temporary RAM drive that your recovery environment is running from. You need to identify which drive letter your installed Windows now has, then use that letter in place of C: in my command. You can run DISKPART and use its LIST VOLUME command to see what letters your drives now have. Exit Diskpart then use DIR to see what's on each drive letter. It usually is C: though, as it is here in my Beta VM.

1694872603970.png
 

My Computers

System One System Two

  • OS
    Windows 11 Home
    Computer type
    Laptop
    Manufacturer/Model
    Acer Aspire 3 A315-23
    CPU
    AMD Athlon Silver 3050U
    Memory
    8GB
    Graphics Card(s)
    Radeon Graphics
    Monitor(s) Displays
    laptop screen
    Screen Resolution
    1366x768 native resolution, up to 2560x1440 with Radeon Virtual Super Resolution
    Hard Drives
    1TB Samsung EVO 870 SSD
    Internet Speed
    50 Mbps
    Browser
    Edge, Firefox
    Antivirus
    Defender
    Other Info
    fully 'Windows 11 ready' laptop. Windows 10 C: partition migrated from my old unsupported 'main machine' then upgraded to 11. A test migration ran Insider builds for 2 months. When 11 was released on 5th October it was re-imaged back to 10 and was offered the upgrade in Windows Update on 20th October. Windows Update offered the 22H2 Feature Update on 20th September 2022. It got the 23H2 Feature Update on 4th November 2023 through Windows Update.

    My SYSTEM THREE is a Dell Latitude 5410, i7-10610U, 32GB RAM, 512GB NVMe ssd, supported device running Windows 11 Pro (and all my Hyper-V VMs).

    My SYSTEM FOUR is a 2-in-1 convertible Lenovo Yoga 11e 20DA, Celeron N2930, 8GB RAM, 256GB ssd. Unsupported device: currently running Win10 Pro, plus Win11 Pro RTM and Insider Beta as native boot vhdx.

    My SYSTEM FIVE is a Dell Latitude 3190 2-in-1, Pentium Silver N5030, 4GB RAM, 512GB NVMe ssd, supported device running Windows 11 Pro, plus the Insider Beta, Dev, Canary, and Release Preview builds as a native boot .vhdx.
  • Operating System
    Windows 11 Pro
    Computer type
    Laptop
    Manufacturer/Model
    Dell Lattitude E4310
    CPU
    Intel® Core™ i5-520M
    Motherboard
    0T6M8G
    Memory
    8GB
    Graphics card(s)
    (integrated graphics) Intel HD Graphics
    Screen Resolution
    1366x768
    Hard Drives
    500GB Crucial MX500 SSD
    Browser
    Firefox, Edge
    Antivirus
    Defender
    Other Info
    unsupported machine: Legacy bios, MBR, TPM 1.2, upgraded from W10 to W11 using W10/W11 hybrid install media workaround. In-place upgrade to 22H2 using ISO and a workaround. Feature Update to 23H2 by manually installing the Enablement Package. Also running Insider Beta, Dev, and Canary builds as a native boot .vhdx.

    My SYSTEM THREE is a Dell Latitude 5410, i7-10610U, 32GB RAM, 512GB NVMe ssd, supported device running Windows 11 Pro (and all my Hyper-V VMs).

    My SYSTEM FOUR is a 2-in-1 convertible Lenovo Yoga 11e 20DA, Celeron N2930, 8GB RAM, 256GB ssd. Unsupported device: currently running Win10 Pro, plus Win11 Pro RTM and Insider Beta as native boot vhdx.

    My SYSTEM FIVE is a Dell Latitude 3190 2-in-1, Pentium Silver N5030, 4GB RAM, 512GB NVMe ssd, supported device running Windows 11 Pro, plus the Insider Beta, Dev, Canary, and Release Preview builds as a native boot .vhdx.
Ok, thanks, that went well
 

My Computer

System One

  • OS
    Windows 11 22631.2271
    Computer type
    PC/Desktop
    CPU
    Ryzen 5600X
    Motherboard
    B550M
    Memory
    16GB
    Graphics Card(s)
    RTX 2070
    Monitor(s) Displays
    LCD
    Screen Resolution
    Full HD
    Hard Drives
    SSD
    Internet Speed
    Fiber
    Browser
    Edge
Ok, thanks, that went well
Good. Once you have successfully completed the offline clean up with Dism, then Dism's online clean up will work normally from now on.
 

My Computers

System One System Two

  • OS
    Windows 11 Home
    Computer type
    Laptop
    Manufacturer/Model
    Acer Aspire 3 A315-23
    CPU
    AMD Athlon Silver 3050U
    Memory
    8GB
    Graphics Card(s)
    Radeon Graphics
    Monitor(s) Displays
    laptop screen
    Screen Resolution
    1366x768 native resolution, up to 2560x1440 with Radeon Virtual Super Resolution
    Hard Drives
    1TB Samsung EVO 870 SSD
    Internet Speed
    50 Mbps
    Browser
    Edge, Firefox
    Antivirus
    Defender
    Other Info
    fully 'Windows 11 ready' laptop. Windows 10 C: partition migrated from my old unsupported 'main machine' then upgraded to 11. A test migration ran Insider builds for 2 months. When 11 was released on 5th October it was re-imaged back to 10 and was offered the upgrade in Windows Update on 20th October. Windows Update offered the 22H2 Feature Update on 20th September 2022. It got the 23H2 Feature Update on 4th November 2023 through Windows Update.

    My SYSTEM THREE is a Dell Latitude 5410, i7-10610U, 32GB RAM, 512GB NVMe ssd, supported device running Windows 11 Pro (and all my Hyper-V VMs).

    My SYSTEM FOUR is a 2-in-1 convertible Lenovo Yoga 11e 20DA, Celeron N2930, 8GB RAM, 256GB ssd. Unsupported device: currently running Win10 Pro, plus Win11 Pro RTM and Insider Beta as native boot vhdx.

    My SYSTEM FIVE is a Dell Latitude 3190 2-in-1, Pentium Silver N5030, 4GB RAM, 512GB NVMe ssd, supported device running Windows 11 Pro, plus the Insider Beta, Dev, Canary, and Release Preview builds as a native boot .vhdx.
  • Operating System
    Windows 11 Pro
    Computer type
    Laptop
    Manufacturer/Model
    Dell Lattitude E4310
    CPU
    Intel® Core™ i5-520M
    Motherboard
    0T6M8G
    Memory
    8GB
    Graphics card(s)
    (integrated graphics) Intel HD Graphics
    Screen Resolution
    1366x768
    Hard Drives
    500GB Crucial MX500 SSD
    Browser
    Firefox, Edge
    Antivirus
    Defender
    Other Info
    unsupported machine: Legacy bios, MBR, TPM 1.2, upgraded from W10 to W11 using W10/W11 hybrid install media workaround. In-place upgrade to 22H2 using ISO and a workaround. Feature Update to 23H2 by manually installing the Enablement Package. Also running Insider Beta, Dev, and Canary builds as a native boot .vhdx.

    My SYSTEM THREE is a Dell Latitude 5410, i7-10610U, 32GB RAM, 512GB NVMe ssd, supported device running Windows 11 Pro (and all my Hyper-V VMs).

    My SYSTEM FOUR is a 2-in-1 convertible Lenovo Yoga 11e 20DA, Celeron N2930, 8GB RAM, 256GB ssd. Unsupported device: currently running Win10 Pro, plus Win11 Pro RTM and Insider Beta as native boot vhdx.

    My SYSTEM FIVE is a Dell Latitude 3190 2-in-1, Pentium Silver N5030, 4GB RAM, 512GB NVMe ssd, supported device running Windows 11 Pro, plus the Insider Beta, Dev, Canary, and Release Preview builds as a native boot .vhdx.
How to use Print Screen in this version? I click it, I get the popup and afterwards it disappears and that is it.
Usually I simply pasted the image into mspaint and that was it, not anymore, it is nowhere to be found. :(

capture_09172023_193540.jpg
 

My Computer

System One

  • OS
    Windows 11 Home
    Computer type
    PC/Desktop
    CPU
    AMD Ryzen 5 3600 & No fTPM (07/19)
    Motherboard
    MSI B450 TOMAHAWK 7C02v1E & IFX TPM (07/19)
    Memory
    4x 8GB ADATA XPG GAMMIX D10 DDR4 3200MHz CL16
    Graphics Card(s)
    MSI Radeon RX 580 ARMOR 8G OC @48FPS (08/19)
    Sound Card
    Creative Sound Blaster Z (11/16)
    Monitor(s) Displays
    24" Philips 24M1N3200ZS/00 (05/24)
    Screen Resolution
    1920×1080@165Hz via DP1.4
    Hard Drives
    ADATA XPG GAMMIX S11 Pro SSD 512GB (07/19)
    PSU
    Seasonic M12II-520 80 Plus Bronze (11/16)
    Case
    Lian Li PC-7NB & 3x Noctua NF-S12A FLX@700rpm (11/16)
    Cooling
    CPU Cooler Noctua NH-U12S@700rpm (07/19)
    Keyboard
    HP Wired Desktop 320K + Rabalux 76017 Parker (01/24)
    Mouse
    Logitech M330 Silent Plus (04/23)
    Internet Speed
    400/40 Mbps via RouterOS (05/21) & TCP Optimizer
    Browser
    Edge & Brave for YouTube & LibreWolf for FB
    Antivirus
    NoAV & Binisoft WFC & NextDNS
    Other Info
    Backup: Hasleo Backup Suite (PreOS)
    Notifier: Xiaomi Mi Band 7 NFC (05/24)
    Headphones: Sennheiser RS170 (09/10)
    Phone: Samsung Galaxy Xcover 7 (02/24)
    2nd Monitor: AOC G2460VQ6 @75Hz (02/19)
How to use Print Screen in this version? I click it, I get the popup and afterwards it disappears and that is it.
Usually I simply pasted the image into mspaint and that was it, not anymore, it is nowhere to be found. :(

View attachment 71377

When do Print Screen. that on your picture appears at top, choose type of cut you want, do the cut and when I release mouse button, Snipping Tool notification opens in right bottom corner, as soon as I click on it, it opens window normally
It's it's already in memory and you can paste it anywhere, including in Paint
 

My Computer

System One

  • OS
    W11 Pro and Insider Dev
    Computer type
    PC/Desktop
    Manufacturer/Model
    Home brewed
    CPU
    AMD Ryzen 9 7900x
    Motherboard
    ASROCK b650 PRO RS
    Memory
    2x8GB Kingston 6000MHz, Cl 32 @ 6200MHz Cl30
    Graphics Card(s)
    Gigabyte Rx 6600XT Gaming OC 8G Pro
    Sound Card
    MB, Realtek Ac1220p
    Monitor(s) Displays
    3 x 27"
    Screen Resolution
    1080p
    Hard Drives
    Kingston KC3000. 1TBSamsung 970 evo Plus 500GB, Crucial P1 NVMe 1TB, Lexar NVMe 2 TB, Silicon Power M.2 SATA 500GB
    PSU
    Seasonic 750W
    Case
    Custom Raidmax
    Cooling
    Arctic Liquid Freezer III 360mm
    Internet Speed
    20/19 mbps
Snipping Tool notification opens in right bottom corner, as soon as I click on it, it opens window normally
I guess that is the issue, I have uninstalled Snipping Tool. So I can give up on using this key ever again. :cautious:
 

My Computer

System One

  • OS
    Windows 11 Home
    Computer type
    PC/Desktop
    CPU
    AMD Ryzen 5 3600 & No fTPM (07/19)
    Motherboard
    MSI B450 TOMAHAWK 7C02v1E & IFX TPM (07/19)
    Memory
    4x 8GB ADATA XPG GAMMIX D10 DDR4 3200MHz CL16
    Graphics Card(s)
    MSI Radeon RX 580 ARMOR 8G OC @48FPS (08/19)
    Sound Card
    Creative Sound Blaster Z (11/16)
    Monitor(s) Displays
    24" Philips 24M1N3200ZS/00 (05/24)
    Screen Resolution
    1920×1080@165Hz via DP1.4
    Hard Drives
    ADATA XPG GAMMIX S11 Pro SSD 512GB (07/19)
    PSU
    Seasonic M12II-520 80 Plus Bronze (11/16)
    Case
    Lian Li PC-7NB & 3x Noctua NF-S12A FLX@700rpm (11/16)
    Cooling
    CPU Cooler Noctua NH-U12S@700rpm (07/19)
    Keyboard
    HP Wired Desktop 320K + Rabalux 76017 Parker (01/24)
    Mouse
    Logitech M330 Silent Plus (04/23)
    Internet Speed
    400/40 Mbps via RouterOS (05/21) & TCP Optimizer
    Browser
    Edge & Brave for YouTube & LibreWolf for FB
    Antivirus
    NoAV & Binisoft WFC & NextDNS
    Other Info
    Backup: Hasleo Backup Suite (PreOS)
    Notifier: Xiaomi Mi Band 7 NFC (05/24)
    Headphones: Sennheiser RS170 (09/10)
    Phone: Samsung Galaxy Xcover 7 (02/24)
    2nd Monitor: AOC G2460VQ6 @75Hz (02/19)
I guess that is the issue, I have uninstalled Snipping Tool. So I can give up on using this key ever again. :cautious:
Shift > Print Screen still records full screen into mamory like it always did.
 

My Computer

System One

  • OS
    W11 Pro and Insider Dev
    Computer type
    PC/Desktop
    Manufacturer/Model
    Home brewed
    CPU
    AMD Ryzen 9 7900x
    Motherboard
    ASROCK b650 PRO RS
    Memory
    2x8GB Kingston 6000MHz, Cl 32 @ 6200MHz Cl30
    Graphics Card(s)
    Gigabyte Rx 6600XT Gaming OC 8G Pro
    Sound Card
    MB, Realtek Ac1220p
    Monitor(s) Displays
    3 x 27"
    Screen Resolution
    1080p
    Hard Drives
    Kingston KC3000. 1TBSamsung 970 evo Plus 500GB, Crucial P1 NVMe 1TB, Lexar NVMe 2 TB, Silicon Power M.2 SATA 500GB
    PSU
    Seasonic 750W
    Case
    Custom Raidmax
    Cooling
    Arctic Liquid Freezer III 360mm
    Internet Speed
    20/19 mbps

My Computer

System One

  • OS
    Windows 11 Home
    Computer type
    PC/Desktop
    CPU
    AMD Ryzen 5 3600 & No fTPM (07/19)
    Motherboard
    MSI B450 TOMAHAWK 7C02v1E & IFX TPM (07/19)
    Memory
    4x 8GB ADATA XPG GAMMIX D10 DDR4 3200MHz CL16
    Graphics Card(s)
    MSI Radeon RX 580 ARMOR 8G OC @48FPS (08/19)
    Sound Card
    Creative Sound Blaster Z (11/16)
    Monitor(s) Displays
    24" Philips 24M1N3200ZS/00 (05/24)
    Screen Resolution
    1920×1080@165Hz via DP1.4
    Hard Drives
    ADATA XPG GAMMIX S11 Pro SSD 512GB (07/19)
    PSU
    Seasonic M12II-520 80 Plus Bronze (11/16)
    Case
    Lian Li PC-7NB & 3x Noctua NF-S12A FLX@700rpm (11/16)
    Cooling
    CPU Cooler Noctua NH-U12S@700rpm (07/19)
    Keyboard
    HP Wired Desktop 320K + Rabalux 76017 Parker (01/24)
    Mouse
    Logitech M330 Silent Plus (04/23)
    Internet Speed
    400/40 Mbps via RouterOS (05/21) & TCP Optimizer
    Browser
    Edge & Brave for YouTube & LibreWolf for FB
    Antivirus
    NoAV & Binisoft WFC & NextDNS
    Other Info
    Backup: Hasleo Backup Suite (PreOS)
    Notifier: Xiaomi Mi Band 7 NFC (05/24)
    Headphones: Sennheiser RS170 (09/10)
    Phone: Samsung Galaxy Xcover 7 (02/24)
    2nd Monitor: AOC G2460VQ6 @75Hz (02/19)
That actually works, thank you so much. ;-)
Win + PrtScn takes a full screen shot that goes into Pictures\Screenshots folder.
The Full screen mode gets the full screen in the Snipping tool directly.
Win + Shift + S can also take a full screen shot.
3 ways to get to the same result. 😎

1694975339828.png
 

My Computer

System One

  • OS
    Windows 11 Pro
    Computer type
    Laptop
    Manufacturer/Model
    Lenovo Yoga 920
    CPU
    Intel I7-8550U
    Motherboard
    n/a
    Memory
    16GB
    Graphics Card(s)
    Intel Graphics UHD 620
    Sound Card
    Realtek High Definition Audio (SST)
    Monitor(s) Displays
    4k Touch screen
    Screen Resolution
    3480 x 2160
    Hard Drives
    512GB NVMe
Back
Top Bottom