Small and Medium Business Blog:
Video is essential, as you build a marketing strategy for your business. Overall video viewership on the web has increased 25% since 20191, and there are more than three billion internet users accessing video content every day, so video is a medium you don't want to overlook when delivering an impactful message to your current and growing audience. That's why we released Microsoft Clipchamp last November, so that we can help you create professional-grade videos more quickly and easily.
Clipchamp has an innovative interface that is purpose-built to make video creation easier, while still delivering polished and professional results. Clipchamp is available for Microsoft 365 Business Standard or Microsoft 365 Business Premium customers. To purchase Microsoft 365 for your business, take a look at the Microsoft 365 Plans.

Microsoft Clipchamp autocaptions and text to speech
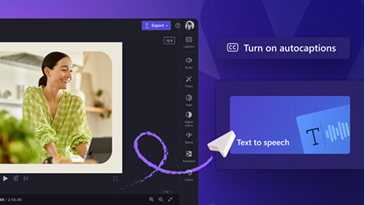
Autocaptions
Autocaptions are a great way to ensure your audience can understand your message clearly with or without sound. Many viewers consume content in public spaces using a mobile device, which means that their audio can be disrupted, or they might be hindered from turning on sound. Captions are the perfect way to provide viewers with the full context of the video.To add autocaptions, simply import your media, then select ‘Captions’ in the right property panel. Clipchamp immediately generates captions for your video, which you can review and edit as needed. You can ensure brand consistency by customizing the font, color, and size of your captions. If you’re targeting an international audience, you can even select a different language for your audio track. Now you’ve got the ability to generate a professional-looking series of captions in minutes.

Microsoft Clipchamp text to speech
Text to speech
Your team can use the new text to speech feature to add voice over tracks to videos without requiring recording equipment or expensive voice layovers in post-production. Text-to-speech leverages AI technology, which automatically converts written text into natural-sounding speech. Just enter what you want to say, and Clipchamp generates your voice-over track.If you plan to reach customers in multiple countries with different languages, use text to speech so that you don’t have to record separate talk tracks for each language. Choose a voice, emotion and pitch for the voiceover and then Clipchamp will turn your script into an audio track. Now every video can reach the maximum number of customers quickly.
In addition to choosing from a variety of languages, you're also able to browse through a library of voices that can add a unique stamp to your content. Using text to speech is simple: navigate to the ‘Audio’ tab and select ‘Text to speech’ in the option list. Then type in or upload a script. After that, simply choose a language and the voice you like most, and Clipchamp immediately brings your track to life. You can preview the track and continue editing the script as needed. Once you’re happy with the finished track, just add it to the timeline editor.
Getting started
Autocaptions and text to speech are both perfect examples of the features Clipchamp provides to help businesses make videos simply. They deliver sophisticated results, while still fitting in with the same intuitive interface that’s already made Clipchamp reliable for many small businesses.Clipchamp is available for Microsoft 365 Business Standard or Microsoft 365 Business Premium customers. To purchase Microsoft 365 for your business, take a look at the Microsoft 365 Plans.
Review a quick overview of how to get started using Clipchamp.
Source:
New features to make your Clipchamp videos more accessible
Find out about two new features that will help make your videos even more accessible.
techcommunity.microsoft.com