Installation and Upgrade Clean Install Windows 11


  • Staff
Windows.png

This tutorial will show you step by step on how to clean install Windows 11 at boot on your PC with or without an Internet connection and setup with a local account or Microsoft account.

Windows 11 has all the power and security of Windows 10 with a redesigned and refreshed look. It also comes with new tools, sounds, and apps. Every detail has been considered. All of it comes together to bring you a refreshing experience on your PC.

A clean install of Windows 11 will wipe out everything on the drive you select to install Windows 11 on giving you a completely new default installation of Windows 11.

References:

If you’d like to see if your current PC meets the minimum requirements, download and run the PC Health Check app.


It is required to be connected to the Internet if you want to set up a Microsoft account during Windows Setup.

It is not required to be connected to the Internet if you want to set up a local account during Windows Setup.


If you set up a Microsoft account during Windows Setup, it will get linked to OneDrive to backup and sync your files by default. You can either set up a local account instead to avoid this, or stop the backup and sync your files to OneDrive when the installation is complete.

If you set up a Microsoft account during Windows Setup, your user profile folder in the "C:\Users" folder will be named with the first 5 characters of the email address used for your Microsoft account. If you want to specify the name of your user profile folder in the "C:\Users" folder, then you will need to set up a local account during Windows Setup instead of a Microsoft account so your user profile folder will have the same name you enter as the local account name. When Windows 11 has finished installing, you can switch to a Microsoft account from the local account (if wanted) without the user profile folder name getting changed.


Here's How:

1 If you have not already, you will need to create a bootable Windows 11 installation USB that supports UEFI mode.

2 It is recommended to temporarily disconnect all non OS hard drives until Windows installation has finished for the following reasons:
  • To avoid you mistakenly deleting or formatting the wrong disk or drive.
  • To prevent Windows Setup from installing the boot configuration files (bootloader) to a different connected hard drive instead of on the disk Windows will be installed on.
3 Boot to the UEFI firmware settings for your motherboard, and enable UEFI or disable Legacy BIOS (CSM) mode.

Usually it will be set to UEFI mode by default if supported. You may need to read your PC's or motherboard's manual for its specific instructions on how to change this setting.


4 Boot from the Windows 11 installation USB flash drive on your computer.

5 Select your language, time and currency format, and keyboard or input method preferences, and click/tap on Next. (see screenshot below)

Clean_install_Windows_11-1.jpg

6 Perform an available action below: (see screenshots below)
  • Click/tap on the Install Now button to start Windows Setup for the installation.
  • Select (dot) Install Windows 11, check I agree everything will be deleted including files, apps, an settings, and click/tap on Next.

Starting with Windows 11 build 26040 (Canary), Microsoft is refreshing Windows OS Media Setup with a much cleaner and more modern design. All of the same features will continue to be supported in the bare-metal (clean) OS installation experience, including unattended support, but will now be consistent with the current upgrade and installation experience available for the devices already running the Windows OS.

winsetup-before-after-1024x493.png


Clean_install_Windows_11-2.jpg

7 Enter your Windows 11 product key, and click/tap on Next. (see screenshot below)

The product key you enter will determine which edition of Windows 11 gets installed, and is required to activate Windows 11 unless you activate with a digital license instead. If you don't enter a product key and click/tap on I don't have a product key, you will be able to select the Windows 11 edition you want to install at step 8 below, but Windows 11 will not be activated.

You can enter an official Windows 7, Windows 8.1, or Windows 10 retail product key (OEM keys will not work) not currently used to activate Windows on another PC, and click/tap on Next to activate Windows 11.

⚠️ Free Activation from Windows 7/8 key or upgrade to Windows 10/11 Ends

If you do not have a product key available right now, click/tap on the I don't have a product key link, select the Windows 11 edition you want to install at step 8. You will be able to manually activate Windows 11 with your product key when you want later after the Windows 11 installation has finished.

If you want to activate with a digital license linked to your Microsoft account, click/tap on the I don't have a product key link, select the Windows 11 edition you want to install at step 8, and add your linked Microsoft account at step 20 .

You will not be asked to enter a product key if installing Windows 11 Enterprise. You will need to manually activate later after installation has finished.

If this is an OEM PC that has a valid product key embedded in its UEFI firmware chip, then you will not be prompted to enter a product key. Windows 11 will automatically use the embedded product key if its valid for the edition being installed. If needed, you can change the product key after installation has finished.


Clean_install_Windows_11-3.jpg

8 If you clicked on I don't have a product key in step 7 above, then select the Windows 11 edition you want to install, and click/tap on Next. (see screenshots below)

Clean_install_Windows_11-4.jpg
Clean_install_Windows_11-5.jpg

9 Check the I accept the Microsoft Software License Terms box, and click/tap on Next. (see screenshot below)

If you only have the keyboard available, you can press the Space + + keys to check the box.


Clean_install_Windows_11-6.jpg

10 Click/tap on the Custom: Install Windows only (advanced) option. (see screenshot below)

Clean_install_Windows_11-7.jpg

11 Perform one of the following actions to select a drive or disk to install Windows 11 on: (see screenshots below)

If RAID is enabled in UEFI/BIOS, Windows Setup may not see any drive(s) available to select to install on.

In this situation, you could either disable RAID in BIOS/UEFI or select to "Add driver" to install the RAID driver from your OEM/motherboard manufacturer's chipset.

AMD Quick Start Guide- Chapter 5: Install AMD-RAID Drivers (PDF)

Intel Support - Installing the Operating System onto a RAID Volume—F6 Install Method

If no drives can be found during Windows 11 or Windows 10 installation (Intel 11th Generation processors)


  • Delete all partitions on the Drive # (ex: Drive 0) you want to install Windows 11 until that Drive # shows only as one Unallocated Space, select the unallocated space, and click/tap on Next.
  • Select a Primary or unallocated partition on a drive you want to install Windows 11, Delete the partition/volume if not already unallocated, click/tap on OK to confirm, and click/tap on Next.
Clean_install_Windows_11-8.jpg
Clean_install_Windows_11-8B.jpg

12 The installation of Windows 11 will now begin. (see screenshots below)

During the installation process, your screen may flash and the computer will restart a few times.


Clean_install_Windows_11-9.jpg
Clean_install_Windows_11-10.jpg

13 Select your country or region (ex: "United States"), and click/tap on Yes. (see screenshot below)

If you would like to set up this PC to have an OOBE (Out-of-box Experience) so another user/owner can pick up at this step to finish setting up Windows on the PC with their own account and preferences the next time the PC it turned on, then:

1. Press the Shift + F10 keys when you see the screenshot below to open a command prompt.
2. Type C:\Windows\System32\shutdown -s -t 0 -f into the command prompt, and press Enter to shut down Windows.


Clean_install_Windows_11-11.jpg

14 Select the keyboard layout (ex: "US") you want, and click/tap on Yes. (see screenshot below)

Clean_install_Windows_11-12.jpg

15 Select Add layout or Skip depending on if you want to add a second keyboard layout or not. (see screenshot below)

Clean_install_Windows_11-13.jpg

16 Windows Setup will now check for an Internet connection. If an Internet connection is not detected, it will prompt you to connect and select an Ethernet network and/or setup and connect to a Wi-Fi network (if available), and click/tap on Next. (see screenshots below)

Starting with a Windows 11 build 25987 (Canary) ISO, when you need to connect to a network and there is no Wi-Fi drivers, you will be given an option to press an Install Drivers button to install drivers you have previously downloaded.


It is required to have an Internet connection if you want to set up a Microsoft account, or work or school account.

Whether you have an Internet connection or not, you will still be able to set up a local account (if wanted) when you get to step 21.

If installing a Windows 11 Pro or Education edition and you currently do not have an Internet connection available, click/tap on I don't have Internet, and go to step 21D to set up a local account. I don't have Internet is not available by default for the Home edition unless you use either command below first. (see bottom screenshot)

If you don't have an Internet connection and none of the above worked for you, then press the Shift + F10 keys to open a command prompt. Copy and paste the OOBE\BYPASSNRO command into the command prompt, and press Enter. This will restart the computer, and take you back to step 13. You should then be able to click/tap on I don't have internet when you get back to this step, and go to step 21D to set up a local account. (see bottom screenshot)

If the OOBE\BYPASSNRO command doesn't work for you, then copy and paste the MSOOBE\BYPASSNRO command into the command prompt, and press Enter. This will restart the computer, and take you back to step 13. You should then be able to click/tap on I don't have internet when you get back to this step, and go to step 21D to set up a local account. (see bottom screenshot)


Clean_install_Windows_11-13b.jpg
Internet_required.png
W11_PRO_no_Internet-1.jpg

17 Type a name you want for the PC, and click/tap on Next. (see screenshot below)

You can always rename the PC at anytime if needed.

Your PC name cannot have more then 15 characters.

Your PC name cannot have spaces or any of the following special characters: " /\ [] : | <> + + ; , ?


ComputerName.jpg

18 Perform an action below for which type of account you want to set up: (see screenshot below)

You will not see this step if installing a Windows 11 Home edition. You will see step 19 instead.


  • Click/tap on Set up for personal use, click/tap on Next, and go to step 19 to set up a Microsoft account or local account on your personal PC.
  • Click/tap on Set up for work or school, click/tap on Next, and go to step 22 to set up a work or school account on your PC to join a domain.
Clean_install_Windows_11-14.jpg

19 Click/tap on Sign in, and go to the step below depending on if your want to set up a local account or Microsoft account to sign in to Windows 11 with. (see screenshot below)

This account will be an administrator account on the PC.


MSA_required.jpg

20 Set Up Windows 11 with a Microsoft Account

For more details about a Microsoft account, see: Microsoft account | Microsoft Docs


A) Type in the email address for your Microsoft account, and click/tap on Next. (see screenshot below)​

If you do not have a Microsoft account and would like to use one, click/tap on the Create one link to create a new Microsoft account.


Clean_install_Windows_11_Microsoft_account-1.jpg

B) Type in the password for your Microsoft account, and click/tap on Sign in. (see screenshot below)​

Clean_install_Windows_11_Microsoft_account-3.jpg

C) If you have two-step verification turned on for your Microsoft account, select how (ex: email or text) you would like to get a code sent to you. (see screenshots below)​

Clean_install_Windows_11_Microsoft_account-4.jpg
Clean_install_Windows_11_Microsoft_account-5.jpg

D) Provide any other required information based on how you selected to get a code, and click/tap on Send code. (see screenshot below)​

Clean_install_Windows_11_Microsoft_account-6.jpg

E) Enter the code you received from Microsoft, and click/tap on Verify. (see screenshot below)​

Clean_install_Windows_11_Microsoft_account-7.jpg

F) Select Set up as new device, and click/tap on Next. (see screenshots below)​

You may need to click/tap on a View more options link first to see the Set up as new device option.

You can select to restore your settings, preferences, Microsoft Store apps, and synced OneDrive files from another device instead of setting up as a new device.


Clean_install_Windows_11_Microsoft_account-10A.png
Clean_install_Windows_11_Microsoft_account-10.jpg


G) Click/tap on Create PIN. (see screenshot below)​

Clean_install_Windows_11_Microsoft_account-8.jpg

H) Enter a PIN you want to use to sign in with, and click/tap on OK. (see screenshot below)​

Clean_install_Windows_11_Microsoft_account-9.jpg

I) Turn On (default) or Off the privacy settings you want, and click/tap on Accept when finished. (see screenshots below)​

You will be able to change these privacy settings at anytime in Windows 11.


Clean_install_Windows_11-_privacy_settings-1.jpg
Clean_install_Windows_11-_privacy_settings-4.jpg
Clean_install_Windows_11-_privacy_settings-2.jpg
Clean_install_Windows_11-_privacy_settings-5.jpg
Clean_install_Windows_11-_privacy_settings-3.jpg
Clean_install_Windows_11-_privacy_settings-6.jpg

J) Check all the ways you plan to use this device, and click/tap on Accept. (see screenshot below)​

Click/tap on Skip instead if you do not want to select (check) any device usages.

You can change your device usage options at any time in Windows 11.


Clean_install_Windows_11_Microsoft_account-11.jpg
Clean_install_Windows_11_Microsoft_account-12.jpg

K) Scan the QR code with your Android phone to link it if wanted, and click/tap on Continue. (see screenshot below)​


Click/tap on Skip instead if you do not want to link an Android phone.

This option is only available starting with Windows 11 build 22567.


Clean_install_Windows_11_Microsoft_account-14.jpg

L) If prompted (no longer asked), click/tap on the Only save files to this PC (recommended) link or Next depending on if you want to use OneDrive or not. (see screenshot below)​

This is for backing up and syncing your account's personal Desktop, Documents, Pictures, Music, and/or Videos folders to your online (cloud) OneDrive.

When you back up a folder its contents get moved to your account's OneDrive folder on the PC to then be synced with your online OneDrive.

⚠️ If you set up a Microsoft account during Windows Setup, it will get linked to OneDrive to backup and sync your files by default. You can either set up a local account instead to avoid this, or stop the backup and sync your files to OneDrive when the installation is complete.


Clean_install_Windows_11_Microsoft_account-13.jpg

M) If prompted to "Try premium Office apps for free with Microsoft 365", click/tap on Decline or Continue for what you want. (see screenshot below)​

Microsoft_365.png

N) If prompted to "Get 100 GB more cloud storage" for OneDrive, click/tap on Decline or Continue for what you want. (see screenshot below)​

Cloud_storage.png

O) Go to step 23.​


21 Set Up Windows 11 with a Local Account

For more details about a local account, see: Local account | Microsoft Docs:


A) Enter this specific fake email address ("fake@fake.com"), and click/tap on Next. (see screenshot below)​

Fake_email_for_local_account-1.jpg

B) Enter a fake password, and click/tap on Sign in. (see screenshot below)​

Fake_email_for_local_account-2.jpg

C) Click/tap on Next when you see Oops, something went wrong. (see screenshot below)​

Local_account-Internet-1.jpg


D) Enter a user name you want for this local account, and click/tap on Next. (see screenshot below)​

Clean_install_Windows_11-_local_account-4.jpg

E) Enter a password you want for this local account, and click/tap on Next. (see screenshot below)​

If you do not want this local account to have a password, leave the password field empty, click/tap on Next, and go to step J below.


Clean_install_Windows_11-_local_account-5.jpg

F) Enter the password again to confirm, and click/tap on Next. (see screenshot below)​

Clean_install_Windows_11-_local_account-6.jpg

G) Select a security question (1 of 3) you want from the drop menu, type your answer, and click/tap on Next. (see screenshot below)​

Clean_install_Windows_11-_local_account-7.jpg

H) Select a security question (2 of 3) you want from the drop menu, type your answer, and click/tap on Next. (see screenshot below)​

Clean_install_Windows_11-_local_account-8.jpg

I) Select a security question (3 of 3) you want from the drop menu, type your answer, and click/tap on Next. (see screenshot below)​

Clean_install_Windows_11-_local_account-9.jpg

J) Turn On (default) or Off the privacy settings you want, and click/tap on Accept when finished. (see screenshots below)​

You will be able to change these privacy settings at anytime in Windows 11.


Clean_install_Windows_11-_privacy_settings-1.jpg
Clean_install_Windows_11-_privacy_settings-4.jpg
Clean_install_Windows_11-_privacy_settings-2.jpg
Clean_install_Windows_11-_privacy_settings-5.jpg
Clean_install_Windows_11-_privacy_settings-3.jpg
Clean_install_Windows_11-_privacy_settings-6.jpg

O) Go to step 23.​


22 Set Up Windows 11 with a Work or School Account

A) Type in the email address for your work or school account, and click/tap on Next. (see screenshot below)​

W11_clean_install_work_or_school_account-1.png

B) Type in the password for your work or school account, and click/tap on Sign in. (see screenshot below)​

W11_clean_install_work_or_school_account-2.png

C) Turn On (default) or Off the privacy settings you want, and click/tap on Accept when finished. (see screenshots below)​

You will be able to change these privacy settings at anytime in Windows 11.


Clean_install_Windows_11-_privacy_settings-1.jpg
Clean_install_Windows_11-_privacy_settings-4.jpg
Clean_install_Windows_11-_privacy_settings-2.jpg
Clean_install_Windows_11-_privacy_settings-5.jpg
Clean_install_Windows_11-_privacy_settings-3.jpg
Clean_install_Windows_11-_privacy_settings-6.jpg

D) Windows Setup will check for updates. (see screenshot below)​

W11_clean_install_work_or_school_account-4.png

E) If prompted to use Windows Hello with your account, click/tap on OK. (see screenshot below)​

W11_clean_install_work_or_school_account-5.png

F) If your organization requires additional security information, click/tap on Next, and follow any other given instructions to verify. (see screenshot below)​

W11_clean_install_work_or_school_account-6.png

G) When finished, go to step 23.​


23 When the clean install has finished, you will be on your desktop in Windows 11 with the Start menu open. (see screenshot below)

Desktop.png

24 Make sure the correct time zone, date, and time is set.
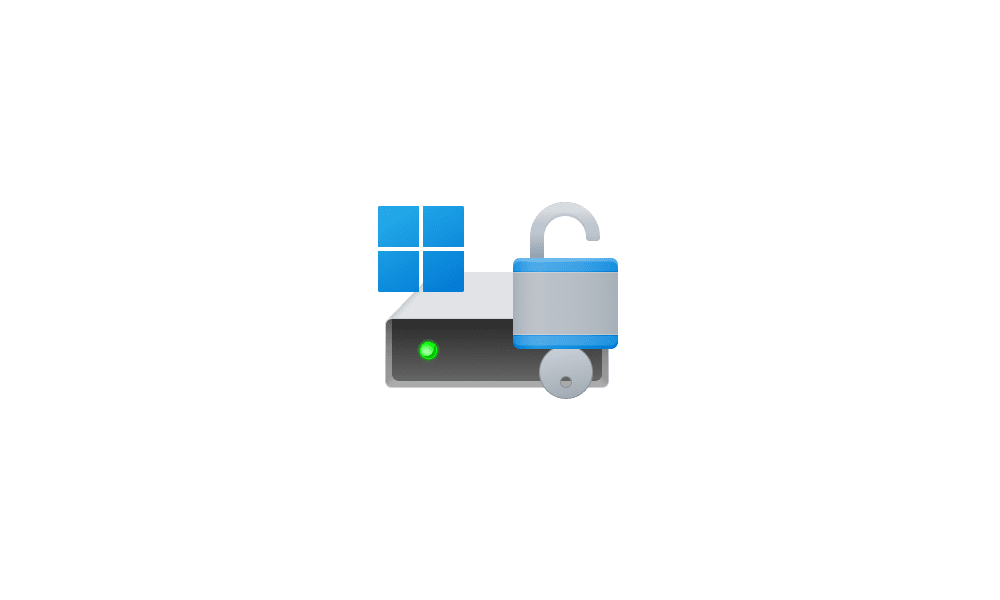
25 Check for and install any available Windows Updates.

26 Install any needed drivers for your devices.


That's it,
Shawn Brink


Attachments

  • Windows_11_banner.png
    Windows_11_banner.png
    5.6 KB · Views: 10,167
  • Windows_11_flag.png
    Windows_11_flag.png
    2.6 KB · Views: 399
Last edited:
I would be very interested in the bloatware removing fresh start option, for both W10 and W11 (y)(y)


Can't you just uninstall OneDrive via Control Panel or with RevoUninstaller?
It looks like they removed the actual Fresh Start app or program that could be run to basically uninstall all third party apps and programs and leave only what vanilla Windows came with. Now there is just a link for more information which doesn't really tell you anything:

capture2.jpg
 

My Computers

System One System Two

  • OS
    Windows 11
    Computer type
    PC/Desktop
    Manufacturer/Model
    Homebuilt
    CPU
    AMD Ryzen 7 3800XT
    Motherboard
    ASUS ROG Crosshair VII Hero (WiFi)
    Memory
    32GB
    Graphics Card(s)
    EVGA GeForce GTX 1080 Ti
  • Operating System
    Windows 11 Education
    Computer type
    Laptop
    Manufacturer/Model
    Dell Inspiron 7773
    CPU
    Intel i7-8550U
    Memory
    32GB
    Graphics card(s)
    Nvidia Geforce MX150
    Sound Card
    Realtek
    Monitor(s) Displays
    17"
    Screen Resolution
    1920 x 1080
    Hard Drives
    Toshiba 512GB NVMe SSD
    SK Hynix 512GB SATA SSD
    Internet Speed
    Fast!
It looks like they removed the actual Fresh Start app or program that could be run to basically uninstall all third party apps and programs and leave only what vanilla Windows came with. Now there is just a link for more information which doesn't really tell you anything:

View attachment 45749
It's under system -recovery -reset your PC.


JBsq0kBcdA.png
 

My Computers

System One System Two

  • OS
    Win 11 Pro & 🐥.
    Computer type
    Laptop
    Manufacturer/Model
    ASUS VivoBook
    CPU
    AMD Ryzen 7 3700U with Radeon Vega Mobile Gfx
    Motherboard
    ASUSTeK COMPUTER INC. X509DA (FP5)
    Memory
    12GB
    Graphics Card(s)
    RX Vega 10 Graphics
    Monitor(s) Displays
    Generic PnP Monitor (1920x1080@60Hz)
    Screen Resolution
    1920x1080@60Hz
    Hard Drives
    Samsung SSD 970 EVO Plus 2TB NVMe 1.3
    Internet Speed
    25 Mbps
    Browser
    Edge
    Antivirus
    Defender
  • Operating System
    Windows 11
    Computer type
    Laptop
    Manufacturer/Model
    ACER NITRO
    CPU
    AMD Ryzen 7 5800H / 3.2 GHz
    Motherboard
    CZ Scala_CAS (FP6)
    Memory
    32 GB DDR4 SDRAM 3200 MHz
    Graphics card(s)
    NVIDIA GeForce RTX 3060 6 GB GDDR6 SDRAM
    Sound Card
    Realtek Audio. NVIDIA High Definition Audio
    Monitor(s) Displays
    15.6" LED backlight 1920 x 1080 (Full HD) 144 Hz
    Screen Resolution
    1920 x 1080 (Full HD)
    Hard Drives
    Samsung 970 Evo Plus 2TB NVMe M.2
    PSU
    180 Watt, 19.5 V
    Mouse
    Lenovo Bluetooth
    Internet Speed
    25 Mbps
    Browser
    Edge
    Antivirus
    Defender
It's there at step 20L.
I didn't see an 'Only save files to this PC' option when I did a 'Reset this PC' but I was able to uninstall OneDrive via the Control Panel.

Right after uninstalling OneDrive, the navigation pane was still all about OneDrive in the cloud, though. I had to unpin the subfolders that pointed to OneDrive in the cloud and pin the subfolders (Documents, Pictures, etc.) that pointed to C:\

That works well with 1 or 2 exceptions. The Home folder at the top cannot be unpinned, and instead of its subfolders (Documents, Pictures, etc.) pointing at OneDrive in the cloud as they originally did, the subfolders now reorient themselves to point at C:\ so this is an issue that resolved itself in the best possible way. Note that the reorientation is not immediate, it takes a few minutes.

Further, I made the mistake of pinning the OneDrive subfolder back on the navigation pane (I was experimenting) and now I can't unpin it. If I click on it, an error message window pops up as OneDrive has been uninstalled. It is only a very minor nuisance, and it is perhaps a good reminder that OneDrive has been uninstalled.

I believe the above is a very good workaround (if I say so myself) for people who want to 'Only save files to this PC'.

You can still access your OneDrive in the cloud with a browser, i.e. you can upload, download, edit, delete, etc. like you can do with a USB stick. It is a very good resource (I won't delete my 'USB stick in the cloud') and best of all, it does not interfere at all with my 'Only save files to this PC' way of computing (y)
 

My Computer

System One

  • OS
    Windows 10 Pro
I didn't see an 'Only save files to this PC' option when I did a 'Reset this PC' but I was able to uninstall OneDrive via the Control Panel.

Right after uninstalling OneDrive, the navigation pane was still all about OneDrive in the cloud, though. I had to unpin the subfolders that pointed to OneDrive in the cloud and pin the subfolders (Documents, Pictures, etc.) that pointed to C:\

That works well with 1 or 2 exceptions. The Home folder at the top cannot be unpinned, and instead of its subfolders (Documents, Pictures, etc.) pointing at OneDrive in the cloud as they originally did, the subfolders now reorient themselves to point at C:\ so this is an issue that resolved itself in the best possible way. Note that the reorientation is not immediate, it takes a few minutes.

Further, I made the mistake of pinning the OneDrive subfolder back on the navigation pane (I was experimenting) and now I can't unpin it. If I click on it, an error message window pops up as OneDrive has been uninstalled. It is only a very minor nuisance, and it is perhaps a good reminder that OneDrive has been uninstalled.

I believe the above is a very good workaround (if I say so myself) for people who want to 'Only save files to this PC'.

You can still access your OneDrive in the cloud with a browser, i.e. you can upload, download, edit, delete, etc. like you can do with a USB stick. It is a very good resource (I won't delete my 'USB stick in the cloud') and best of all, it does not interfere at all with my 'Only save files to this PC' way of computing (y)

Normally, you only see this if setting up a Microsoft account during installation.

I agree that while setting up OneDrive, backing up the folders should be turned off by default to prevent this.
 

My Computers

System One System Two

  • OS
    Windows 11 Pro for Workstations
    Computer type
    PC/Desktop
    Manufacturer/Model
    Custom self build
    CPU
    Intel i7-8700K 5 GHz
    Motherboard
    ASUS ROG Maximus XI Formula Z390
    Memory
    64 GB (4x16GB) G.SKILL TridentZ RGB DDR4 3600 MHz (F4-3600C18D-32GTZR)
    Graphics Card(s)
    ASUS ROG-STRIX-GTX1080TI-O11G-GAMING (11GB GDDR5X)
    Sound Card
    Integrated Digital Audio (S/PDIF)
    Monitor(s) Displays
    2 x Samsung Odyssey G75 27"
    Screen Resolution
    2560x1440
    Hard Drives
    1TB Samsung 990 PRO M.2,
    4TB Samsung 990 PRO M.2,
    8TB WD MyCloudEX2Ultra NAS
    PSU
    Seasonic Prime Titanium 850W
    Case
    Thermaltake Core P3 wall mounted
    Cooling
    Corsair Hydro H115i
    Keyboard
    Logitech wireless K800
    Mouse
    Logitech MX Master 3
    Internet Speed
    1 Gbps Download and 35 Mbps Upload
    Browser
    Google Chrome
    Antivirus
    Microsoft Defender and Malwarebytes Premium
    Other Info
    Logitech Z625 speaker system,
    Logitech BRIO 4K Pro webcam,
    HP Color LaserJet Pro MFP M477fdn,
    APC SMART-UPS RT 1000 XL - SURT1000XLI,
    Galaxy S23 Plus phone
  • Operating System
    Windows 11 Pro
    Computer type
    Laptop
    Manufacturer/Model
    HP Spectre x360 2in1 14-eu0098nr (2024)
    CPU
    Intel Core Ultra 7 155H 4.8 GHz
    Memory
    16 GB LPDDR5x-7467 MHz
    Graphics card(s)
    Integrated Intel Arc
    Sound Card
    Poly Studio
    Monitor(s) Displays
    14" 2.8K OLED multitouch
    Screen Resolution
    2880 x 1800
    Hard Drives
    2 TB PCIe NVMe M.2 SSD
    Internet Speed
    Intel Wi-Fi 7 BE200 (2x2) and Bluetooth 5.4
    Browser
    Chrome and Edge
    Antivirus
    Windows Defender and Malwarebytes Premium
It's under system -recovery -reset your PC.
I did a 'Reset this PC' and selected the options

'Remove everything'
'Clean drive'
'Download fresh copy of OS' (instead of selecting the 'Use local copy of OS' option)

...and the result was a factory reset which includes OEM bloatware (that I subsequently removed in part, I still keep some OEM support stuff and some stuff that I am not sure about)
 

My Computer

System One

  • OS
    Windows 10 Pro
I did a 'Reset this PC' and selected the options

'Remove everything'
'Clean drive'
'Download fresh copy of OS' (instead of selecting the 'Use local copy of OS' option)

...and the result was a factory reset which includes OEM bloatware (that I subsequently removed in part, I still keep some OEM support stuff and some stuff that I am not sure about)

Often doing a "reset" on an OEM device will actually do a factory reset since most OEM devices have their own image on the "Recovery" partition used for the reset.

If you want everything truly removed, it would be best to do a clean install at boot instead like in the tutorial in the first post here.
 

My Computers

System One System Two

  • OS
    Windows 11 Pro for Workstations
    Computer type
    PC/Desktop
    Manufacturer/Model
    Custom self build
    CPU
    Intel i7-8700K 5 GHz
    Motherboard
    ASUS ROG Maximus XI Formula Z390
    Memory
    64 GB (4x16GB) G.SKILL TridentZ RGB DDR4 3600 MHz (F4-3600C18D-32GTZR)
    Graphics Card(s)
    ASUS ROG-STRIX-GTX1080TI-O11G-GAMING (11GB GDDR5X)
    Sound Card
    Integrated Digital Audio (S/PDIF)
    Monitor(s) Displays
    2 x Samsung Odyssey G75 27"
    Screen Resolution
    2560x1440
    Hard Drives
    1TB Samsung 990 PRO M.2,
    4TB Samsung 990 PRO M.2,
    8TB WD MyCloudEX2Ultra NAS
    PSU
    Seasonic Prime Titanium 850W
    Case
    Thermaltake Core P3 wall mounted
    Cooling
    Corsair Hydro H115i
    Keyboard
    Logitech wireless K800
    Mouse
    Logitech MX Master 3
    Internet Speed
    1 Gbps Download and 35 Mbps Upload
    Browser
    Google Chrome
    Antivirus
    Microsoft Defender and Malwarebytes Premium
    Other Info
    Logitech Z625 speaker system,
    Logitech BRIO 4K Pro webcam,
    HP Color LaserJet Pro MFP M477fdn,
    APC SMART-UPS RT 1000 XL - SURT1000XLI,
    Galaxy S23 Plus phone
  • Operating System
    Windows 11 Pro
    Computer type
    Laptop
    Manufacturer/Model
    HP Spectre x360 2in1 14-eu0098nr (2024)
    CPU
    Intel Core Ultra 7 155H 4.8 GHz
    Memory
    16 GB LPDDR5x-7467 MHz
    Graphics card(s)
    Integrated Intel Arc
    Sound Card
    Poly Studio
    Monitor(s) Displays
    14" 2.8K OLED multitouch
    Screen Resolution
    2880 x 1800
    Hard Drives
    2 TB PCIe NVMe M.2 SSD
    Internet Speed
    Intel Wi-Fi 7 BE200 (2x2) and Bluetooth 5.4
    Browser
    Chrome and Edge
    Antivirus
    Windows Defender and Malwarebytes Premium
Often doing a "reset" on an OEM device will actually do a factory reset since most OEM devices have their own image on the "Recovery" partition used for the reset.

If you want everything truly removed, it would be best to do a clean install at boot instead like in the tutorial in the first post here.
Post #108 says in part:

"Your laptop might not work with a non-OEM install anyway as each laptop has specifics on how display, laptop lid, sound ports etc behave"

If the quote in the above is accurate and I am not saying that it is (I don't know) then doing a 'Reset this PC' from inside Windows is safer than doing a clean install at boot.

Comments, please!
 

My Computer

System One

  • OS
    Windows 10 Pro
Post #108 says in part:

"Your laptop might not work with a non-OEM install anyway as each laptop has specifics on how display, laptop lid, sound ports etc behave"

If the quote in the above is accurate and I am not saying that it is (I don't know) then doing a 'Reset this PC' from inside Windows is safer than doing a clean install at boot.

Comments, please!

Those are driver dependent.

At most, you may need to install any needed drivers from the manufacturer after a clean install if they don't get installed via Windows Update.
 

My Computers

System One System Two

  • OS
    Windows 11 Pro for Workstations
    Computer type
    PC/Desktop
    Manufacturer/Model
    Custom self build
    CPU
    Intel i7-8700K 5 GHz
    Motherboard
    ASUS ROG Maximus XI Formula Z390
    Memory
    64 GB (4x16GB) G.SKILL TridentZ RGB DDR4 3600 MHz (F4-3600C18D-32GTZR)
    Graphics Card(s)
    ASUS ROG-STRIX-GTX1080TI-O11G-GAMING (11GB GDDR5X)
    Sound Card
    Integrated Digital Audio (S/PDIF)
    Monitor(s) Displays
    2 x Samsung Odyssey G75 27"
    Screen Resolution
    2560x1440
    Hard Drives
    1TB Samsung 990 PRO M.2,
    4TB Samsung 990 PRO M.2,
    8TB WD MyCloudEX2Ultra NAS
    PSU
    Seasonic Prime Titanium 850W
    Case
    Thermaltake Core P3 wall mounted
    Cooling
    Corsair Hydro H115i
    Keyboard
    Logitech wireless K800
    Mouse
    Logitech MX Master 3
    Internet Speed
    1 Gbps Download and 35 Mbps Upload
    Browser
    Google Chrome
    Antivirus
    Microsoft Defender and Malwarebytes Premium
    Other Info
    Logitech Z625 speaker system,
    Logitech BRIO 4K Pro webcam,
    HP Color LaserJet Pro MFP M477fdn,
    APC SMART-UPS RT 1000 XL - SURT1000XLI,
    Galaxy S23 Plus phone
  • Operating System
    Windows 11 Pro
    Computer type
    Laptop
    Manufacturer/Model
    HP Spectre x360 2in1 14-eu0098nr (2024)
    CPU
    Intel Core Ultra 7 155H 4.8 GHz
    Memory
    16 GB LPDDR5x-7467 MHz
    Graphics card(s)
    Integrated Intel Arc
    Sound Card
    Poly Studio
    Monitor(s) Displays
    14" 2.8K OLED multitouch
    Screen Resolution
    2880 x 1800
    Hard Drives
    2 TB PCIe NVMe M.2 SSD
    Internet Speed
    Intel Wi-Fi 7 BE200 (2x2) and Bluetooth 5.4
    Browser
    Chrome and Edge
    Antivirus
    Windows Defender and Malwarebytes Premium
Those are driver dependent.

At most, you may need to install any needed drivers from the manufacturer after a clean install if they don't get installed via Windows Update.
Yep. I did a clean install on my laptop and had to get my drivers from Lenovo. Once I installed their "Vantage" app, and ran it, it downloaded and installed all the drivers needed.
 

My Computers

System One System Two

  • OS
    Windows 11 Pro 23H2 (Build 22631.3296)
    Computer type
    PC/Desktop
    Manufacturer/Model
    Custom built
    CPU
    Intel i9-9900K
    Motherboard
    Gigabyte Aorus Z390 Xtreme
    Memory
    32G (4x8) DDR4 Corsair RGB Dominator Platinum (3600Mhz)
    Graphics Card(s)
    Radeon VII
    Sound Card
    Onboard (ESS Sabre HiFi using Realtek drivers)
    Monitor(s) Displays
    NEC PA242w (24 inch)
    Screen Resolution
    1920 x 1200
    Hard Drives
    5 Samsung SSD drives: 2X 970 NVME (512 & 1TB), 3X EVO SATA (2X 2TB, 1X 1TB)
    PSU
    EVGA Super Nova I000 G2 (1000 watt)
    Case
    Cooler Master H500M
    Cooling
    Corsair H115i RGB Platinum
    Keyboard
    Logitech Craft
    Mouse
    Logitech MX Master 3
    Internet Speed
    500mb Download. 11mb Upload
    Browser
    Microsoft Edge Chromium
    Antivirus
    Windows Security
    Other Info
    System used for gaming, photography, music, school.
  • Operating System
    Win 10 Pro 22H2 (build 19045.2130)
    Computer type
    PC/Desktop
    Manufacturer/Model
    Custom Built
    CPU
    Intel i7-7700K
    Motherboard
    Gigabyte GA-Z270X-GAMING 8
    Memory
    32G (4x8) DDR4 Corsair Dominator Platinum (3333Mhz)
    Graphics card(s)
    AMD Radeon R9 Fury
    Sound Card
    Onboard (Creative Sound Blaster certified ZxRi)
    Monitor(s) Displays
    Dell U2415 (24 inch)
    Screen Resolution
    1920 x 1200
    Hard Drives
    3 Samsung SSD drives: 1x 512gig 950 NVMe drive (OS drive), 1 x 512gig 850 Pro, 1x 256gig 840 Pro.
    PSU
    EVGA Super Nova 1000 P2 (1000 watt)
    Case
    Phantek Enthoo Luxe
    Cooling
    Corsair H100i
    Mouse
    Logitech MX Master
    Keyboard
    Logitech MK 710
    Internet Speed
    100MB
    Browser
    Edge Chromium
    Antivirus
    Windows Security
    Other Info
    This is my backup system.
Hello mate, :-)

It's there at step 20L.
Hi Brink,

I'm referring to AFTER you fall into the trap and realize, oh s***t, my Desktop, My Documents, Pictures, etc. are now saved in the OneDrive directory. Basically undo what the trap did. I know there's a separate thread for this, but if you can link it to 20L that would very helpful for all.
 

My Computer

System One

  • OS
    Windows 11
    Computer type
    Laptop
    Manufacturer/Model
    Lenovo
    Graphics Card(s)
    NVIDA 1650 Ti
    Monitor(s) Displays
    Lenovo C32q-20
Hi Brink,

I'm referring to AFTER you fall into the trap and realize, oh s***t, my Desktop, My Documents, Pictures, etc. are now saved in the OneDrive directory. Basically undo what the trap did. I know there's a separate thread for this, but if you can link it to 20L that would very helpful for all.

Done. :shawn:
 

My Computers

System One System Two

  • OS
    Windows 11 Pro for Workstations
    Computer type
    PC/Desktop
    Manufacturer/Model
    Custom self build
    CPU
    Intel i7-8700K 5 GHz
    Motherboard
    ASUS ROG Maximus XI Formula Z390
    Memory
    64 GB (4x16GB) G.SKILL TridentZ RGB DDR4 3600 MHz (F4-3600C18D-32GTZR)
    Graphics Card(s)
    ASUS ROG-STRIX-GTX1080TI-O11G-GAMING (11GB GDDR5X)
    Sound Card
    Integrated Digital Audio (S/PDIF)
    Monitor(s) Displays
    2 x Samsung Odyssey G75 27"
    Screen Resolution
    2560x1440
    Hard Drives
    1TB Samsung 990 PRO M.2,
    4TB Samsung 990 PRO M.2,
    8TB WD MyCloudEX2Ultra NAS
    PSU
    Seasonic Prime Titanium 850W
    Case
    Thermaltake Core P3 wall mounted
    Cooling
    Corsair Hydro H115i
    Keyboard
    Logitech wireless K800
    Mouse
    Logitech MX Master 3
    Internet Speed
    1 Gbps Download and 35 Mbps Upload
    Browser
    Google Chrome
    Antivirus
    Microsoft Defender and Malwarebytes Premium
    Other Info
    Logitech Z625 speaker system,
    Logitech BRIO 4K Pro webcam,
    HP Color LaserJet Pro MFP M477fdn,
    APC SMART-UPS RT 1000 XL - SURT1000XLI,
    Galaxy S23 Plus phone
  • Operating System
    Windows 11 Pro
    Computer type
    Laptop
    Manufacturer/Model
    HP Spectre x360 2in1 14-eu0098nr (2024)
    CPU
    Intel Core Ultra 7 155H 4.8 GHz
    Memory
    16 GB LPDDR5x-7467 MHz
    Graphics card(s)
    Integrated Intel Arc
    Sound Card
    Poly Studio
    Monitor(s) Displays
    14" 2.8K OLED multitouch
    Screen Resolution
    2880 x 1800
    Hard Drives
    2 TB PCIe NVMe M.2 SSD
    Internet Speed
    Intel Wi-Fi 7 BE200 (2x2) and Bluetooth 5.4
    Browser
    Chrome and Edge
    Antivirus
    Windows Defender and Malwarebytes Premium
Yep. I did a clean install on my laptop and had to get my drivers from Lenovo. Once I installed their "Vantage" app, and ran it, it downloaded and installed all the drivers needed.
I have a Lenovo laptop. I suggest you keep an eye when shutting down. Lenovo Vantage causes random brief shutdown hanging of Program Manager. It's very quick so you have to be present and watch your screen until your laptop shutsdown.
 

My Computer

System One

  • OS
    Windows 11
    Computer type
    Laptop
    Manufacturer/Model
    Lenovo
    Graphics Card(s)
    NVIDA 1650 Ti
    Monitor(s) Displays
    Lenovo C32q-20
I have a Lenovo laptop. I suggest you keep an eye when shutting down. Lenovo Vantage causes random brief shutdown hanging of Program Manager. It's very quick so you have to be present and watch your screen until your laptop shutsdown.
Thanks, but I've been using/running Lenovo Vantage since I got the laptop in 2017. No issues here. Zip. Nil. Nada. None :-)

Thanks for looking out though (y)
 

My Computers

System One System Two

  • OS
    Windows 11 Pro 23H2 (Build 22631.3296)
    Computer type
    PC/Desktop
    Manufacturer/Model
    Custom built
    CPU
    Intel i9-9900K
    Motherboard
    Gigabyte Aorus Z390 Xtreme
    Memory
    32G (4x8) DDR4 Corsair RGB Dominator Platinum (3600Mhz)
    Graphics Card(s)
    Radeon VII
    Sound Card
    Onboard (ESS Sabre HiFi using Realtek drivers)
    Monitor(s) Displays
    NEC PA242w (24 inch)
    Screen Resolution
    1920 x 1200
    Hard Drives
    5 Samsung SSD drives: 2X 970 NVME (512 & 1TB), 3X EVO SATA (2X 2TB, 1X 1TB)
    PSU
    EVGA Super Nova I000 G2 (1000 watt)
    Case
    Cooler Master H500M
    Cooling
    Corsair H115i RGB Platinum
    Keyboard
    Logitech Craft
    Mouse
    Logitech MX Master 3
    Internet Speed
    500mb Download. 11mb Upload
    Browser
    Microsoft Edge Chromium
    Antivirus
    Windows Security
    Other Info
    System used for gaming, photography, music, school.
  • Operating System
    Win 10 Pro 22H2 (build 19045.2130)
    Computer type
    PC/Desktop
    Manufacturer/Model
    Custom Built
    CPU
    Intel i7-7700K
    Motherboard
    Gigabyte GA-Z270X-GAMING 8
    Memory
    32G (4x8) DDR4 Corsair Dominator Platinum (3333Mhz)
    Graphics card(s)
    AMD Radeon R9 Fury
    Sound Card
    Onboard (Creative Sound Blaster certified ZxRi)
    Monitor(s) Displays
    Dell U2415 (24 inch)
    Screen Resolution
    1920 x 1200
    Hard Drives
    3 Samsung SSD drives: 1x 512gig 950 NVMe drive (OS drive), 1 x 512gig 850 Pro, 1x 256gig 840 Pro.
    PSU
    EVGA Super Nova 1000 P2 (1000 watt)
    Case
    Phantek Enthoo Luxe
    Cooling
    Corsair H100i
    Mouse
    Logitech MX Master
    Keyboard
    Logitech MK 710
    Internet Speed
    100MB
    Browser
    Edge Chromium
    Antivirus
    Windows Security
    Other Info
    This is my backup system.
I agree that while setting up OneDrive, backing up the folders should be turned off by default to prevent this.
The comment made me look at pertinent OneDrive tutorials. I notice that W10 OneDrive is significantly different from W11 OneDrive.

I remember now, when upgrading to and setting up W10 several years ago, I DID have the option of NOT setting up OneDrive. This allowed me to use OneDrive as a 'USB stick in the cloud' (y)

When I very recently did a W11 'Reset this PC' I did NOT have the option of NOT setting up OneDrive, which made me uninstall OneDrive necessitating subsequent tweaking, but the end result is also (y)

If I had turned off folder backup as per quoted comment, what would I have done better?
 

My Computer

System One

  • OS
    Windows 10 Pro
The comment made me look at pertinent OneDrive tutorials. I notice that W10 OneDrive is significantly different from W11 OneDrive.

I remember now, when upgrading to and setting up W10 several years ago, I DID have the option of NOT setting up OneDrive. This allowed me to use OneDrive as a 'USB stick in the cloud' (y)

When I very recently did a W11 'Reset this PC' I did NOT have the option of NOT setting up OneDrive, which made me uninstall OneDrive necessitating subsequent tweaking, but the end result is also (y)

If I had turned off folder backup as per quoted comment, what would I have done better?

If setting up a Microsoft account during the reset or clean install, you should normally have a tiny Only save files to this PC link like below to not turn on back up to OneDrive.

If you click on Next, it will go to OneDrive Setup.

The only problem with uninstalling OneDrive later is that if you turned on back up to OneDrive, then you will need to turn that off first and copy all your files back from OneDrive. If you didn't turn off backup first, then the folders will still be linked to OneDrive.

1669042121440.png
 

My Computers

System One System Two

  • OS
    Windows 11 Pro for Workstations
    Computer type
    PC/Desktop
    Manufacturer/Model
    Custom self build
    CPU
    Intel i7-8700K 5 GHz
    Motherboard
    ASUS ROG Maximus XI Formula Z390
    Memory
    64 GB (4x16GB) G.SKILL TridentZ RGB DDR4 3600 MHz (F4-3600C18D-32GTZR)
    Graphics Card(s)
    ASUS ROG-STRIX-GTX1080TI-O11G-GAMING (11GB GDDR5X)
    Sound Card
    Integrated Digital Audio (S/PDIF)
    Monitor(s) Displays
    2 x Samsung Odyssey G75 27"
    Screen Resolution
    2560x1440
    Hard Drives
    1TB Samsung 990 PRO M.2,
    4TB Samsung 990 PRO M.2,
    8TB WD MyCloudEX2Ultra NAS
    PSU
    Seasonic Prime Titanium 850W
    Case
    Thermaltake Core P3 wall mounted
    Cooling
    Corsair Hydro H115i
    Keyboard
    Logitech wireless K800
    Mouse
    Logitech MX Master 3
    Internet Speed
    1 Gbps Download and 35 Mbps Upload
    Browser
    Google Chrome
    Antivirus
    Microsoft Defender and Malwarebytes Premium
    Other Info
    Logitech Z625 speaker system,
    Logitech BRIO 4K Pro webcam,
    HP Color LaserJet Pro MFP M477fdn,
    APC SMART-UPS RT 1000 XL - SURT1000XLI,
    Galaxy S23 Plus phone
  • Operating System
    Windows 11 Pro
    Computer type
    Laptop
    Manufacturer/Model
    HP Spectre x360 2in1 14-eu0098nr (2024)
    CPU
    Intel Core Ultra 7 155H 4.8 GHz
    Memory
    16 GB LPDDR5x-7467 MHz
    Graphics card(s)
    Integrated Intel Arc
    Sound Card
    Poly Studio
    Monitor(s) Displays
    14" 2.8K OLED multitouch
    Screen Resolution
    2880 x 1800
    Hard Drives
    2 TB PCIe NVMe M.2 SSD
    Internet Speed
    Intel Wi-Fi 7 BE200 (2x2) and Bluetooth 5.4
    Browser
    Chrome and Edge
    Antivirus
    Windows Defender and Malwarebytes Premium

My Computer

System One

  • OS
    Windows 11 Home x64 Version 23H2 Build 22631.3447
Brink,

Ref: step 16 yellow notes about making local accounts

In a post earlier today, CPUPROHKY reported that some HP computers use a different folder for the bypassnro command. And Bree agrees.
So
OOBE/bypassnro
needs to become
MSOOBE/bypassnro
for those cases.

I think it would help all users to include a note to check the folder name & contents in your yellow notes.


All the best,
Denis

Thank you Denis. I've included both in the note under step 16 to cover all bases.
 

My Computers

System One System Two

  • OS
    Windows 11 Pro for Workstations
    Computer type
    PC/Desktop
    Manufacturer/Model
    Custom self build
    CPU
    Intel i7-8700K 5 GHz
    Motherboard
    ASUS ROG Maximus XI Formula Z390
    Memory
    64 GB (4x16GB) G.SKILL TridentZ RGB DDR4 3600 MHz (F4-3600C18D-32GTZR)
    Graphics Card(s)
    ASUS ROG-STRIX-GTX1080TI-O11G-GAMING (11GB GDDR5X)
    Sound Card
    Integrated Digital Audio (S/PDIF)
    Monitor(s) Displays
    2 x Samsung Odyssey G75 27"
    Screen Resolution
    2560x1440
    Hard Drives
    1TB Samsung 990 PRO M.2,
    4TB Samsung 990 PRO M.2,
    8TB WD MyCloudEX2Ultra NAS
    PSU
    Seasonic Prime Titanium 850W
    Case
    Thermaltake Core P3 wall mounted
    Cooling
    Corsair Hydro H115i
    Keyboard
    Logitech wireless K800
    Mouse
    Logitech MX Master 3
    Internet Speed
    1 Gbps Download and 35 Mbps Upload
    Browser
    Google Chrome
    Antivirus
    Microsoft Defender and Malwarebytes Premium
    Other Info
    Logitech Z625 speaker system,
    Logitech BRIO 4K Pro webcam,
    HP Color LaserJet Pro MFP M477fdn,
    APC SMART-UPS RT 1000 XL - SURT1000XLI,
    Galaxy S23 Plus phone
  • Operating System
    Windows 11 Pro
    Computer type
    Laptop
    Manufacturer/Model
    HP Spectre x360 2in1 14-eu0098nr (2024)
    CPU
    Intel Core Ultra 7 155H 4.8 GHz
    Memory
    16 GB LPDDR5x-7467 MHz
    Graphics card(s)
    Integrated Intel Arc
    Sound Card
    Poly Studio
    Monitor(s) Displays
    14" 2.8K OLED multitouch
    Screen Resolution
    2880 x 1800
    Hard Drives
    2 TB PCIe NVMe M.2 SSD
    Internet Speed
    Intel Wi-Fi 7 BE200 (2x2) and Bluetooth 5.4
    Browser
    Chrome and Edge
    Antivirus
    Windows Defender and Malwarebytes Premium
I found another way to bypasss logging in with a Microsoft account when installing Windows 11.
The advantage is that I can leave the network connected the whole time.

When it asks to log into a Microsoft account I enter
Username: username
Password: password

After I hit Next I get an error message. It then says that account account is blocked. It then allows me to enter a local account.

Through experimentation I found I can't just use any random username. It has to be one that probably already exists.

Here are screenshots where I used that workaround:

login1.jpg


login2.jpg


login3.jpg


login4.jpg
 

My Computers

System One System Two

  • OS
    Windows 11 Pro 23H2
    Computer type
    Laptop
    Manufacturer/Model
    ASUS TUF Gaming A15 (2022)
    CPU
    AMD Ryzen 7 6800H with Radeon 680M GPU (486MB RAM)
    Memory
    Micron DDR5-4800 (2400MHz) 16GB (2 x 8GB)
    Graphics Card(s)
    NVIDIA RTX 3060 Laptop (6GB RAM)
    Sound Card
    n/a
    Monitor(s) Displays
    15.6-inch
    Screen Resolution
    1920x1080 300Hz
    Hard Drives
    2 x Samsung 980 (1TB M.2 NVME SSD)
    PSU
    n/a
    Mouse
    Wireless Mouse M510
    Internet Speed
    1200Mbps/250Mbps
    Browser
    Firefox
    Antivirus
    Malwarebytes
  • Operating System
    Windows 11 Pro 23H2
    Computer type
    PC/Desktop
    Manufacturer/Model
    Custom build
    CPU
    AMD Ryzen 7 3700X
    Motherboard
    ASUS PRIME X370-PRO
    Memory
    G.SKILL Flare X 32GB (2x16GB) DDR4
    Graphics card(s)
    ASUS ROG-STRIX-RTX3060TI-08G-V2-GAMING (RTX 3060-Ti, 8GB RAM)
    Monitor(s) Displays
    Samsung S23A300B (23-in LED)
    Screen Resolution
    1080p 60Hz
    Hard Drives
    2TB XPG SX8200 Pro (M2. PCIe SSD) || 2TB Intel 660P (M2. PCIe SSD) ||
    PSU
    Corsair RM750x (750 watts)
    Case
    Cooler Master MasterCase 5
    Cooling
    Corsair H60 AIO water cooler
    Mouse
    Logitech K350 (wireless)
    Keyboard
    Logitech M510 (wireless)
    Internet Speed
    1200 Mbps down / 200 Mbps up
    Browser
    Firefox, Edge, Chrome
    Antivirus
    Malwarebytes (Premium)
    Other Info
    ASUS Blu-ray Burner BW-16D1HT (SATA) || Western Digital Elements 12TB USB 3.0 external hard drive used with Acronis True Image backup software || HP OfficeJet Pro 6975 Printer/Scanner
Hi there
This old standard works :

Username ----> nobody@nobody.com
Password ----->Boll%%ks or anything you want.

Then you get message "OOPS --something went wrong" and you get the next button that takes you to the next screen where you can use a local account.

The real problem is there's (at least I haven't found any) way to install Windows 11 if you aren't connected to the internet for at least part of the setup program.

cheers
jimbo
 

My Computer

System One

  • OS
    Windows XP,7,10,11 Linux Arch Linux
    Computer type
    PC/Desktop
    CPU
    2 X Intel i7

Latest Support Threads

Back
Top Bottom